Have you ever seen a garden that takes your breath away, making you think, “I want this”? Well, you’re in luck. There are tons of unique garden bed designs that can transform your space into a personal oasis. From cozy curved beds to bold geometric patterns, the options are endless. But how do you choose? Stick around, and I’ll guide you through 10 stunning designs that’ll make your garden the envy of the neighborhood, even if your thumbs aren’t green yet.
Innovative Bed Arrangement Styles
When it comes to bed arrangements, think outside the box—or should I say, outside the rectangle?
Curved raised beds, tiered vertical planters, or even circular mosaic patterns can really spice up your garden game. You’ll be surprised at how these innovative styles not only look good but also make your planting routine feel like an art project instead of just yard work.
1. Curved Raised Garden Beds
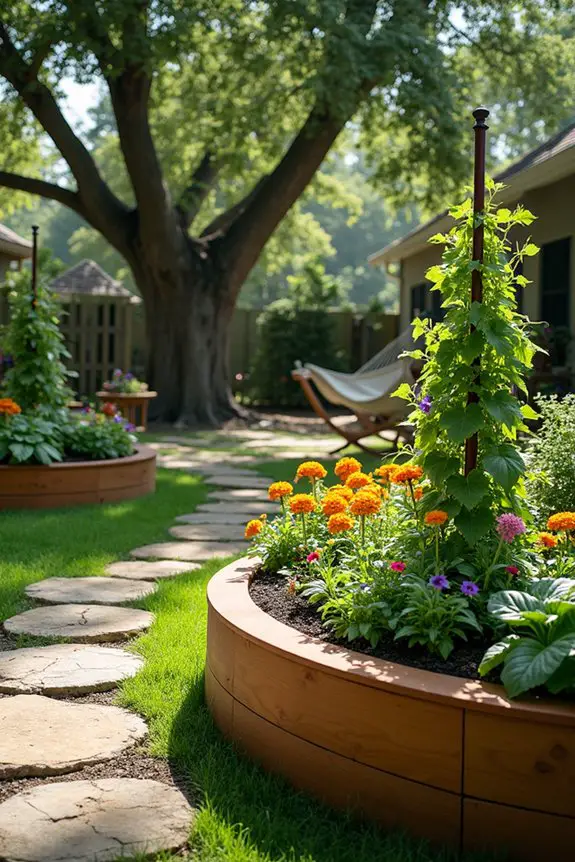
If you’re looking to add a unique flair to your garden, curved raised garden beds could be just the ticket. They not only create an inviting, flowing look, but they also offer some incredible functionality. Imagine towering vegetables, blooming flowers, and vibrant herbs gracefully intermingling along a gentle arch. It’s like a garden waltz. Additionally, incorporating a garden tower obelisk can further enhance your garden’s vertical appeal.
Now, you might be wondering, how do I create one of these swooping beauties? Don’t worry, I got you covered. First off, decide on a shape that matches your style—maybe a gentle wave, a whimsical circle, or an elegant oval. Sketch it out on a piece of paper. (Trust me, even if you think your drawing skills rival those of a five-year-old, it really helps!)
Next, gather your materials. You’ll need some wood (cedar is great because it’s naturally resistant to rot), a handful of nails or screws, and some sturdy landscaping fabric to keep the soil in. And, of course, don’t forget the soil itself—mix in some good compost, and your plants will be living their best lives. Using a compost tumbler bin can accelerate the composting process, giving your garden the nutrients it needs even faster.
Once your supplies are ready, start by marking out your curved shape in the garden. You can use a garden hose or even string to help form that lovely curve. This part is essential because it sets the tone for the entire bed; think of it like framing a picture.
When you’re happy with your outline, it’s time to dig. You’ll want to create a bed that’s at least 12 inches deep. Yes, it might feel like you’re digging your own grave (trust me, I’ve been there, too), but it’s all part of the gardening journey.
With your space prepared, it’s time to build the frame. Cut your wood pieces to match the curves of your design. Assembling them might feel like a jigsaw puzzle from hell, especially if you’ve managed to lose a piece (or three) along the way. But with a little patience and some elbow grease, you’ll have a stunning frame that stands the test of time.
Finally, lay down the landscaping fabric, fill your bed with that glorious soil mix, and plant your favorite flowers, veggies, or whatever tickles your green thumb.
And remember, curved raised garden beds not only look fantastic, but they also give you easy access for watering and harvesting. So go ahead, embrace the curvy side of gardening. Your future garden self will thank you.
2. Symmetrical Geometric Patterns
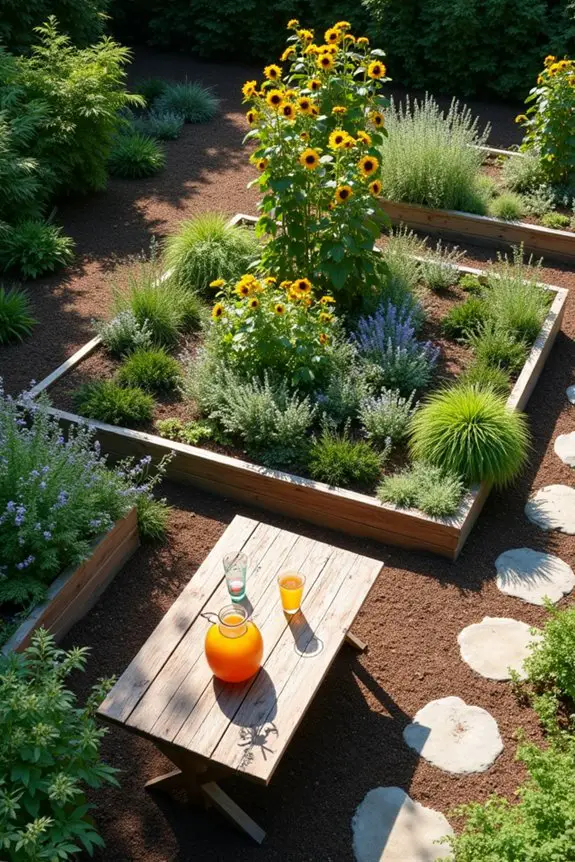
When it comes to designing a garden that truly stands out, symmetrical geometric patterns can work wonders. Not only do they create a visually pleasing aesthetic, but they also maximize your planting space, making it easier to keep things organized and harmonious. Imagine your garden as a canvas, where each plant forms a vibrant brushstroke within the perfectly arranged patterns of soil and foliage. A light duty pressure washer is an excellent tool to help maintain the cleanliness of your garden paths and beds.
It’s elegant, sophisticated, and, most importantly, gives you that little thrill of satisfaction whenever you wander through it.
To get started, sketch out some basic geometric shapes like squares, rectangles, or even circles. Think about the space you have available and the types of plants you want to feature. A square or rectangular bed can create a strong focal point, while circular arrangements lead the eye on a gentle journey around your garden.
You don’t need to be Picasso (though a crooked circle is pretty much unavoidable for many of us), but having a visual blueprint helps align your vision with reality.
Next, it’s time to bring out the measuring tape—this is the adulting part; don’t worry, you’ve got this. Map out your chosen shapes in your garden using stakes and string, or even just some good old-fashioned chalk. Make sure to allow enough space between each section for easy access. You wouldn’t want to be shimmying between your plants like a crab trying to escape a pot, right?
Aim for at least 2 feet of pathways so you can glide gracefully while you tend to your greens.
Once your geometric pattern is laid out, it’s digging time. Create the beds according to your measurements, making sure they’re at least 12 inches deep for those impressive root systems. I once dug a bed that ended up resembling the Bermuda Triangle—never found my way back to the surface till the plants grew in, but I digress.
You can line the edges of your beds with bricks, stones, or even wooden boards to give them a refined look. A well-crafted wooden garden table set complements the outdoor ambiance and provides a perfect space to relax and enjoy your new garden.
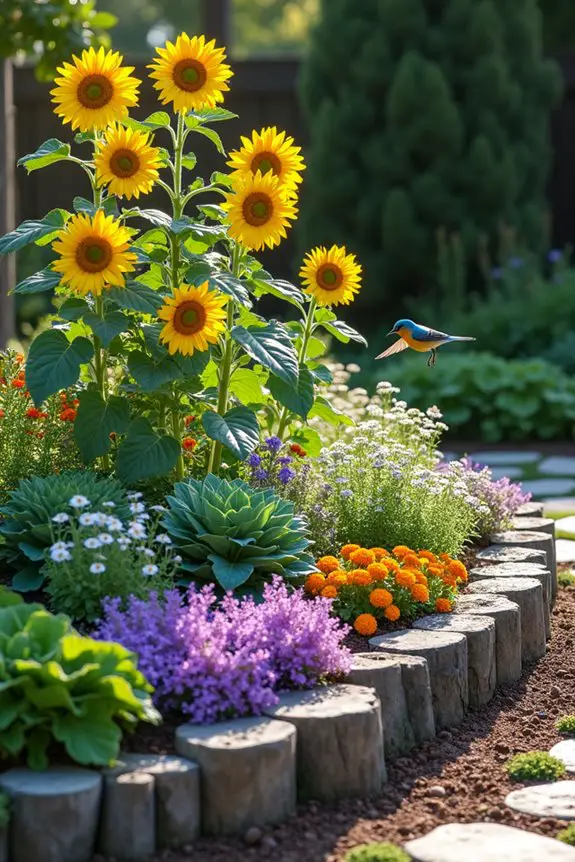
Now comes the fun part—planting. Choose plants that vary in height and texture to keep your geometric scheme lively. Taller plants like sunflowers or ornamental grasses can serve as the focal points, while trailing plants like sweet alyssum add a beautiful cascade effect.
Place them according to your design: is that center square crying out for a dramatic splash of color? Go for it, let the plants know who’s the boss here.
And don’t forget the mulch. A nice layer not only looks fabulous but helps retain moisture and keep those pesky weeds at bay. As you sip on your iced tea, revel in your meticulously arranged garden; it’s like a garden dance party where each plant has its designated spot on the dance floor.
Symmetrical geometric patterns not only elevate your garden’s vibe but also reflect your creativity and care. So roll up those sleeves and get planting—your masterpiece is just waiting to blossom.
3. Tiered Vertical Planters
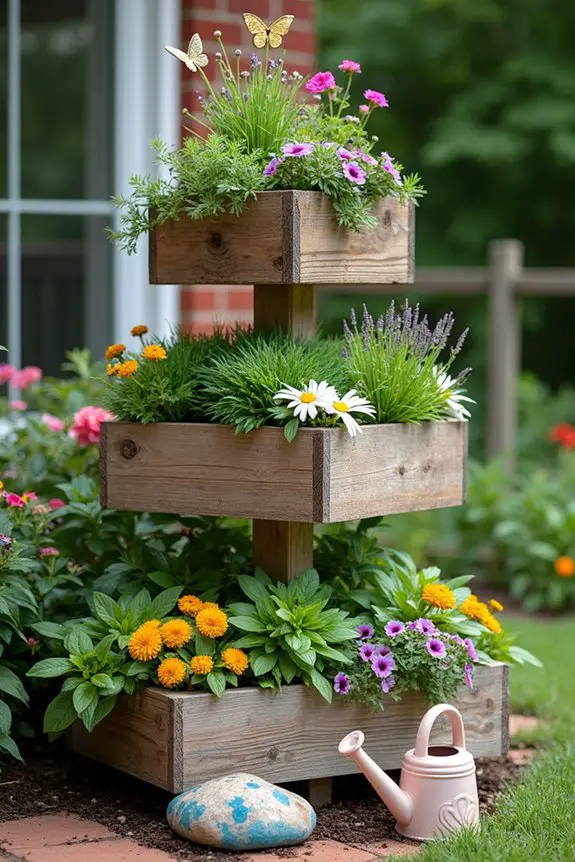
When you think of garden beds, tiered vertical planters may not be the first thing that pops into your mind, but trust me, they’re worth considering. These clever arrangements make the most out of limited space, allowing you to pack in a variety of plants while creating a whimsical, somewhat magical vibe. Picture a lively staircase of greenery leading your eye upward; it’s like a garden that’s reaching for the sky—quite literally!
To kick things off, find an area in your yard or patio where vertical planting can thrive. Once you’ve picked your spot, start gathering materials. This could be reclaimed wood for a rustic charm, or maybe sturdy plastic for a modern twist. If you’re feeling particularly adventurous, you might even consider stacking wooden crates or old pallets. Just remember, if it seems unstable, it probably is—don’t blame me when your herbs go tumbling into the neighbor’s yard.
Now, once you have your base arranged, it’s all about layering. Think of it like building a delicious three-layer cake, but instead of frosting, you’re adding soil and plants. Start with the largest planters at the bottom, allowing your smaller ones to follow suit as you climb. It’s like a plant family reunion, and everyone deserves their space. Make sure to secure your planters well to prevent them from toppling over with a gust of wind or during a surprise rainstorm. I once had my succulent tower nearly blow away during a thunderstorm; let’s just say it didn’t end well.
Next, fill your planters with a mix of potting soil and compost to create a nutrient-rich environment. Now, coming to the fun part—planting! Choose a delightful combo of herbs, flowers, and even some vibrant vegetables that can thrive in those upward spaces. It’s also a good time to experiment with trailing plants that can hang down beautifully, adding a cascade of color. I like to think of my planters as layered salads; rosemary and lavender for an aromatic touch, or bright petunias to turn heads.
As a helpful tip, keep plants with similar light and water needs together. You wouldn’t want your thirsty ferns making your succulent friends swim in despair, now would you? Regular watering is essential, especially for those on the upper tiers—it’s like an indoor fountain of youth for your greenery. A little drip irrigation can work wonders here, so you won’t be climbing a ladder every day like a gardener version of Spiderman.
And finally, don’t forget to add some decorative elements to your tiered vertical planters. Whether it’s glittery garden stakes or whimsical plant markers, these little touches can bring your unique style into the mix. After all, you want your vertical creations to reflect your personality—a little flair never hurt!
4. Organic Free-Form Shapes
Building organic free-form shapes in your garden beds is like creating a culinary masterpiece—unpredictable, artistic, and completely satisfying. This design strategy not only enhances the visual appeal of your space but also allows you to play with different plant heights and textures, making every corner feel like a cozy little nook in a lush paradise.
Imagine cozy curves and flowing lines that invite you in, rather than strict squares and straight edges that feel a bit too rigid. It’s all about letting nature’s creativity shine through!
To start, pick an area in your yard where you can safely let your imagination run wild. No need to stick to conventional shapes here. Grab some garden hose or outdoor string to map out a free-form design that flows. You can make gentle curves and loops—think of it like tracing a smooth ribbon in the soil. If you’re like me, you might find doodling shapes in the dirt strangely satisfying.
And remember, it doesn’t have to be a perfect design; the beauty of organic shapes is their whimsical nature.
Once you’ve outlined your curvy pathway, the next step is to build up the borders. You could use rocks, bricks, or even wooden logs to create a soft edge that will hold your soil in place. I once tried using old wine bottles for borders, which was a fun—but slightly messy—experiment.
(Note to self: don’t be too ambitious when finding creative solutions.) Secure your borders firmly, and don’t be shy about layering soil to add dimension. Like stacking pancakes, you want some fluffiness to it.
Now, let’s talk soil—because plants need that cozy home to thrive. Fill your organic shapes with a rich mix of potting soil, compost, and maybe some homemade compost if you feel extra adventurous. It’s like making a nourishing smoothie for your plants, packed with all the good stuff they need.
Once you’ve got your soil ready, it’s time to select plants that match your vision. Choose varieties of different heights, leaf shapes, and colors to complement the flow of your bed. Maybe a tall sunflower here, a cascading ground cover there—it’s all about balance and playfulness.
As you plant, let your instincts guide you! Group plants with similar watering needs together; trust me, your plants will thank you later. You wouldn’t want your thirsty lilac competing for water with a dry-loving lavender—comedy of errors alert.
Create little pockets of color and texture, mixing flowering plants with leafy greens for visual intrigue. It’s like plating a dish where every ingredient has a role to play.
Don’t skimp on maintenance either. Regular checks and watering will keep your free-form garden thriving.
And as you nurture this creative space, you might find yourself developing a greater appreciation for the little things—a bee buzzing by, a butterfly hovering over a bloom. These organic beds become a celebration of life, reminding you that art (and gardening) is all about exploration, growth, and finding joy in the unexpected.
5. Circular Mosaic Patterns
If you’re looking for a way to spice up your garden beds, reflect on creating stunning circular mosaic patterns. This design idea isn’t just visually enchanting; it’s functional too. By mixing various materials and plants, you create a unique space that invites curiosity and exploration. Plus, who doesn’t love a garden that feels like a whimsical puzzle just waiting to be solved?
To kick things off, find a sunny spot in your yard—think of it as your blank canvas. Now, grab some string or a garden hose to outline a big circle. The size is really up to you, but I’d recommend starting with something manageable, say about 6 to 8 feet in diameter. Once you have your circle, take a moment to admire your handiwork. Isn’t it amazing how such a simple shape can already bring a cozy vibe to your space?
Next, it’s time to get crafty! Instead of just planting in straight lines, contemplate incorporating texture and color in a mosaic-like fashion. Grab some colorful stones, bricks, or even tiles to create sections for different plants—this is where your creative juices can flow. You might go for bright reds and yellows for some sun-loving flowers, while cooler shades of blues and greens can be perfect for leafy plants. It’s like creating a dish with a variety of flavors; the more diversity, the better the experience.
Now onto soil—your plants’ best friend. Just like you wouldn’t skimp on the ingredients for a great meal, don’t cut corners here. Use a mix of quality potting soil and compost. If you’ve got some homemade compost, throw that in too. It’s like adding secret seasoning to your garden! Fill each section of your circular pattern with this nutrient-rich blend. As you plant, remember to group similar plants together, kind of like putting all your favorite toppings on one side of your plate. This will make caring for them so much easier later on.
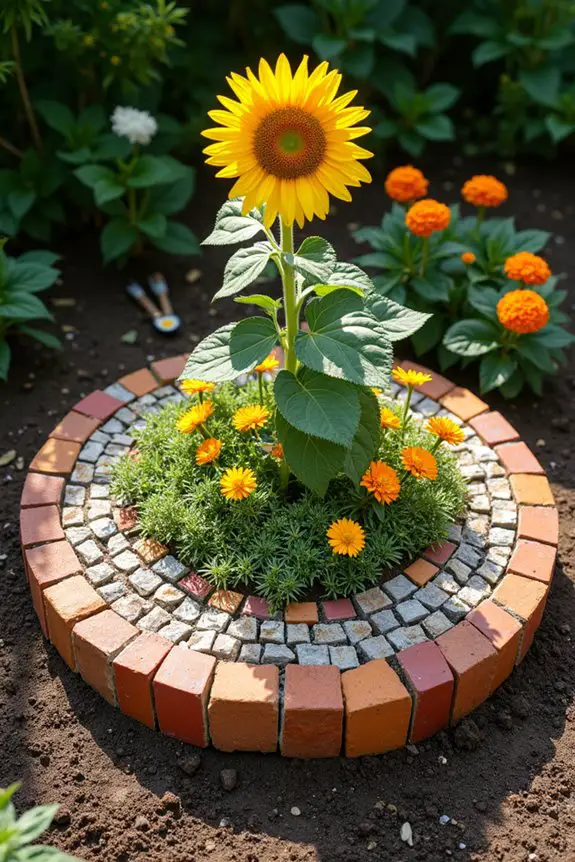
Choosing the right plants is key for a harmonious circular design. Imagine a tall, proud sunflower at the center, surrounded by a ring of cheerful daisies, and edged with a vibrant border of creeping thyme. It’s all about balancing heights, colors, and textures.
Oh, and don’t forget to keep in mind the watering needs; you don’t want a thirsty marigold trying to share a drink with a cactus.
Finally, once your plants are in place, take a step back to admire your creation. This isn’t just a garden; it’s a visual feast that brings joy to your outdoor space. And remember, just like any masterpiece, your circular mosaic garden will evolve over time, so don’t be afraid to experiment and change things up. You might find that your garden becomes a fun gathering spot for you and friends—no fancy restaurant needed, just good vibes and blooming beauty.
6. Lattice-Fenced Garden Sections
Intro: If you want to break away from the traditional garden bed look, lattice-fenced garden sections might just be the perfect solution for you. Not only do they help define different areas of your garden, but they also add a lovely, organized touch that invites a feeling of calm and serenity. Plus, they offer support for climbing plants and create little havens for your favorite blooms—what’s not to love about that?
Now, let’s get started! First things first, grab some lattice panels from your local garden center or hardware store. They come in various sizes and styles, so you can easily find something that matches your vibe. Offer a friend a small favor and have them help you—because, let’s be honest, wrestling with those panels alone can feel like trying to cook spaghetti without water: frustration galore.
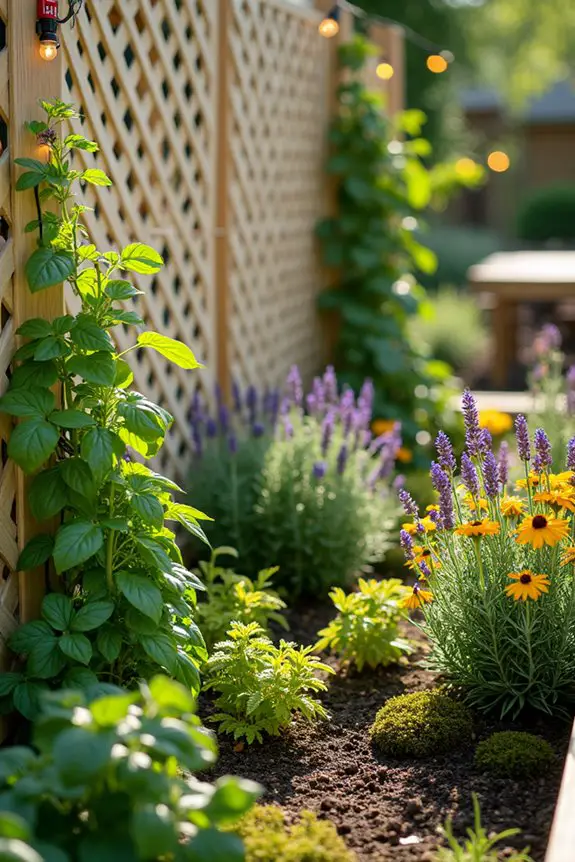
Next, decide how you want to arrange your garden sections. Imagine this: a cozy corner filled with fragrant herbs like basil and rosemary, surrounded by a charming lattice that keeps the space feeling enclosed yet open to the rest of your garden. Use stakes or posts to secure the lattice panels, forming a rectangle or a creative geometric shape—whatever suits your fancy. Make sure to bury those stakes a bit deep; we want your fence to stand firm, not wobble like an undercooked soufflé.
Now it’s time to fill in the sections with your chosen plants. Think about companion planting here; some plants work beautifully together, while others just don’t get along. For instance, combine timely tomatoes with resilient marigolds. Just imagine those vibrant reds and sunny yellows working together harmoniously, kind of like the perfect peanut butter and jelly sandwich.
Add in those tall climbing plants—like pole beans or sweet peas—against the lattice on one side, and let them swirl up to the sky. Meanwhile, on the other side, create a lush bed of colorful, fragrant flowers like lavender and echinacea. This brings both height and richness to your garden and attracts buzzing bees and fluttering butterflies. Who needs a flower shop when you have a magical garden right outside your window?
Don’t forget the fun stuff, like decorative accents! Maybe hang some garden lights along the top of your lattice or drape a string of colorful ribbons. Personalize your space, your way. Perhaps add small stakes with playful labels to discuss your plant arrangements with curious friends. And hey, when you mess up and accidentally plant mint next to other herbs, just say you’re experimenting with an “herbal fusion garden.”
Finally, sit back and enjoy your creation. Envision this sunny little spot as your escape— a place where you can sip lemonade while admiring your ingenuity.
Who knew that such a lovely, lush garden could be so easy to create? The best part is, you’ll have a new layout to mix things up with every growing season, like changing recipes. Embrace the vibe, let the plants flourish, and most importantly, have fun doing it!
7. Zigzag Pathway Arrangement
When it comes to garden bed designs, a zigzag pathway arrangement might just be your ticket to making a stunning garden that breaks away from the ordinary. Not only does it add a sense of rhythm and movement to your space, but it also improves accessibility, allowing you to easily stroll through your blooming oasis. Imagine the delight of your friends and family as they wander through your garden, following the playful curves and angles of your zigzag path, as if on a whimsical adventure.
To get started, first, grab yourself a measuring tape and a decent sketchbook. Trust me, you’ll want to plan out the dimensions before you embark on digging, and believe me, I learned that lesson the hard way after attempting to wing it on a previous project. Picture your path as a giant “Z” snaking through your flower beds or vegetable patches. It can be wider for a spacious feel or narrower for an intimate vibe—whatever fits your garden’s personality. And hey, you don’t have to stress about perfection; the more playful, the better.
Next, mark your pathway outline with some stakes and twine, creating the zigzag shape. This will help you visualize how it flows through the garden, bouncing from one side to the other. Once you’re happy with the outline, it’s time to dig. When you start digging out the dirt, remember to take breaks, because honestly, garden labor is a workout that will have you feeling like you just ran a marathon—and you’re probably just trying to reach for that little trowel in the back of the shed.
Now that you have a beautiful trench for your path, it’s time to decide what to fill it with. You can go for gravel, mulch, or even decorative stones—whatever suits your style and budget. Just make sure it’s something that drains well—because standing water isn’t a good look for anybody, least of all for your lovely garden. Gently pack it down as you go, ensuring that the plants on either side won’t feel sad and cramped.
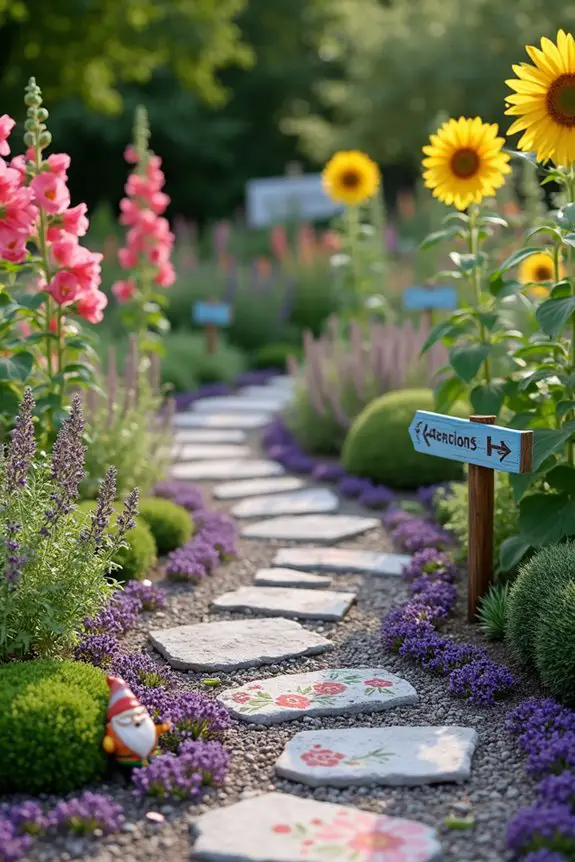
Speaking of plants, let’s talk about how to style the areas alongside your zigzag pathway. Consider planting low-growing flowers like creeping thyme or sedum on the edges, and let taller blooms, such as sunflowers or hollyhocks, fill in further back. You want the pathway to be like a show, with each plant taking center stage in its moment, and the pathway guiding visitors to enjoy every bit of it.
As you finish up, don’t forget to add some fun decorative touches along your zigzag path. A whimsical garden sign, perhaps an artistic stepping stone, or maybe even playful garden sculptures. Who wouldn’t smile at a hilarious gnome peeking out from behind a flower? Those little details can inject personality into your garden and turn simple strolls into an imaginative excursion.
After all, who says gardens have to play by the rules? So grab that shovel, let the creativity flow, and enjoy the process—every twist and turn will be worth it.
8. Intertwined Pathways and Beds
If you want to create a garden that feels like a thrilling journey through nature, intertwined pathways and beds could be your secret ingredient. This design not only enhances the aesthetic appeal of your garden but also boosts functionality—allowing you to easily navigate between different sections. Imagine flowing from one flower bed to the next, surrounded by lush greenery, as if you’re wandering through a living painting. Who wouldn’t want that enticing vibe?
To get started on this whimsical adventure, begin by mapping out your garden space. Grab a notepad and sketch out a layout that incorporates both paths and beds entwined like a beautiful love story. You’ll want those pathways to weave seamlessly; think of it as creating gentle curves and swoops that lead the eye—and your feet—on a delightful tour of your garden.
You don’t have to overthink the shape; a free-flowing pattern often looks the most charming, and you can always adjust as needed while working—trust me, I’ve rearranged more than a few plans mid-digging.
Once you have your layout, it’s time to define those pathways. Using your trusty stakes and twine, outline where you want your paths to go, making sure they connect to various garden beds. This design element not only creates visual interest but also guarantees that you can comfortably wander and admire your newfound flora without stepping on precious plants.
Then comes the enjoyable task of digging out those paths. Remember to breathe and take breaks because, believe me, it can sometimes feel like you’re unearthing a buried treasure instead of a simple walkway.
Now comes the fun part—filling in your paths. You can choose anything from smooth pebbles to wood chips, the options are vast. Just make sure whatever material you pick allows for good drainage to keep your garden healthy and happy.
I’ve made the mistake of using something too compact in the past, turning my garden into more of a mud pit after a rainstorm. You can avoid that disaster, trust me.
As you start planting in the beds alongside your pathways, think about creating layers of foliage and flowers. Short, vibrant blooms can line the front, while taller plants create lush backdrops. It builds depth and variety—just like a well-planned meal has multiple courses.
If you have the space, consider incorporating raised beds with your plantings, allowing even more variation in height and texture, enhancing that artistic flair you’re aiming for.
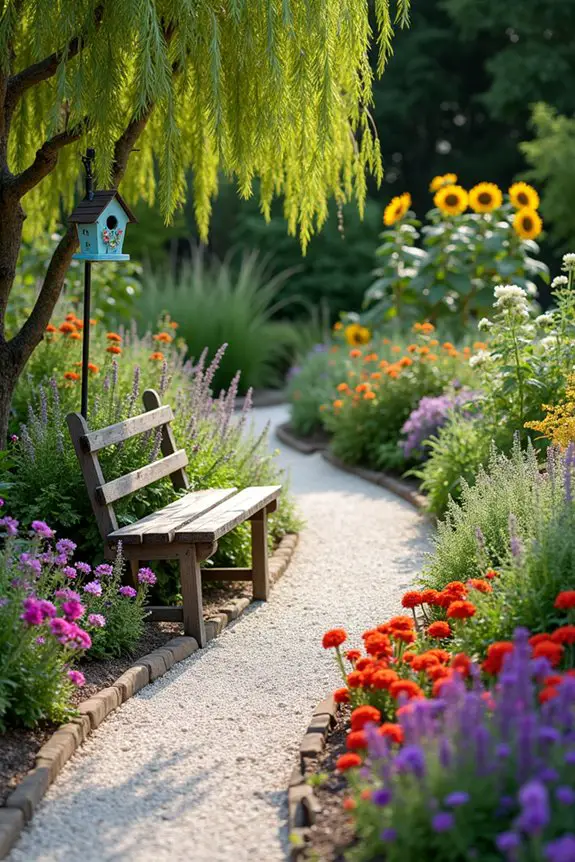
Lastly, give your intertwined pathways and beds a personal touch. Maybe add some charming decor—a birdhouse, whimsical garden art, or even a bench for taking a break.
These little touches bring character to your garden. It’s not just a place to grow plants; it’s a canvas for your creativity. After all, gardening should make you feel like a whimsical creator, not a stressed-out contractor with a to-do list.
9. Multi-Level Planter Boxes
When it comes to maximizing your garden space while keeping everything aesthetically pleasing, multi-level planter boxes are an idea that hits the mark. Not only do they create a stunning visual interest, but they also allow you to make the most of vertical growing, adding layers of texture, depth, and bounty as you cultivate your green oasis. Think of them like a well-stacked, delicious sandwich—each layer brings its own unique flavor while contributing to the overall experience.
To get started, consider the materials you want to use for your planter boxes. You could go with classic wood, which gives a warm, rustic feel, or opt for metal for a more modern twist. If you’re like me, you might be considering recycled pallets because, let’s face it, they add a charming rustic texture and are pretty budget-friendly. Just don’t forget to check for any wood treatment chemicals that could leach into your soil. Safety first, right?
Next up, design your boxes to stack at different heights. Picture it: the shorter planters at the front of your garden and the taller ones at the back. This arrangement won’t only allow everyone to see your plants without straining their necks but also gives you space to indulge in some lovely cascading vines that can spill over the sides.
As for the joining aspect, I like to secure the boxes using screws for a sturdy structure, but if you’re feeling crafty, a wood glue plus screws combo works wonders too. Just make sure everything is level—nothing says chaos like a wobbly stack of planters (trust me, I learned this the hard way when my carefully arranged herb tower decided to take a tumble).
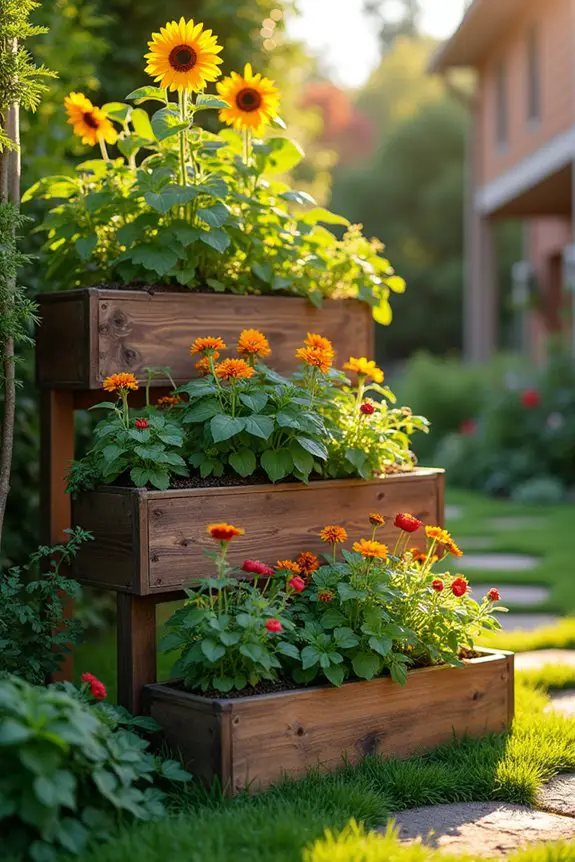
Once your planter boxes are secured and set at varying heights, consider the planting! Taller plants like sunflowers or tomatoes can go in the higher boxes, with shorter herbs or flowers nestled in the lower ones. If you’re feeling adventurous, why not mix in some trailing plants like nasturtiums or sweet potatoes that can spill over the edges?
Imagine the delightful combination of flavors and colors, as if your garden were a vibrant painter’s palette. And, of course, my personal favorite—having a few strawberries tucked in for sweet snacking right off the plant.
Don’t forget about the drainage; it’s essential for healthy plants. Drilling small holes in the bottom of your boxes will help excess water escape. Oh, and a little tip from me: lining your boxes with landscaping fabric can prevent soil from washing out while still allowing for proper drainage.
Finally, when it’s all said and done, step back and take a good look. Can you see the harmony in colors and heights? Does it feel like a little retreat into your own green sanctuary? If it does, then you’ve nailed it.
Multi-level planter boxes not only work wonders for your garden but also add charm and delight, turning a simple plot of earth into a breathtaking work of living art. Besides, it’ll boost your gardening game, and who doesn’t want to impress their neighbors with vibrant, tiered greenery?
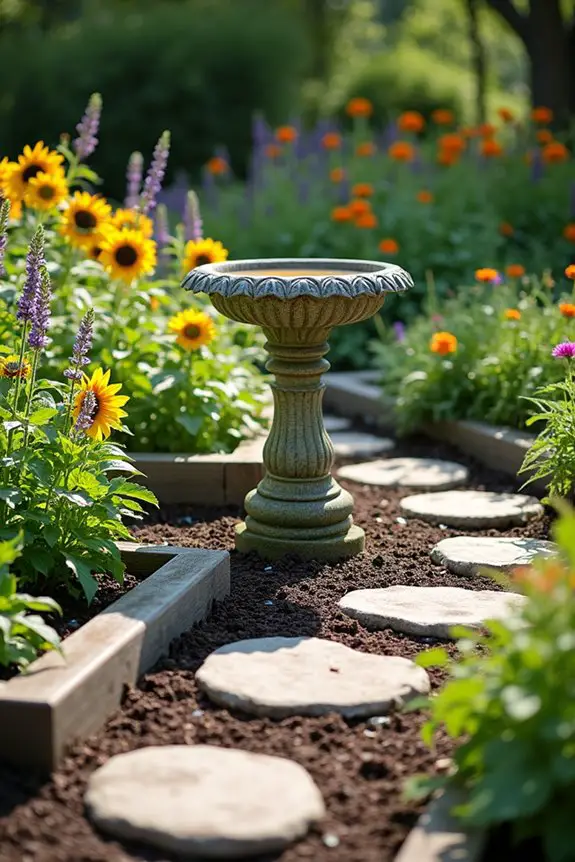
10. Central Hub With Radiating Beds
When it comes to garden bed designs, one trendy option that really shines is the central hub with radiating beds. Imagine a beautifully organized garden that looks like the sun, with beds stretching outwards like rays. It’s not just eye-catching; it’s also practical. This layout makes it super easy to access your plants, and you can grow a variety of crops without feeling overwhelmed. Plus, having a central hub means you can combine your garden chores—watering, weeding, and harvesting—into one efficient trip, like a gardener’s version of the one-stop shop.
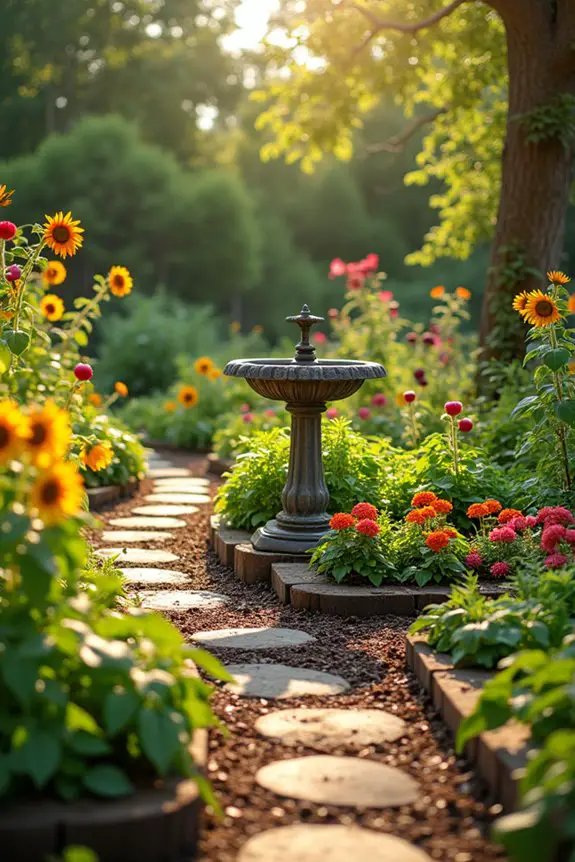
So, how do you create this style in your own backyard? First things first, choose a focal point for your central hub. It could be a lovely birdbath, a cute bench for those sunny afternoons, or even a decorative pot filled with vibrant flowers. Trust me, having something special right in the middle makes everything feel more inviting. You can gather your friends around for a good laugh while you sip on lemonade—like a little garden party, but with dirt under your nails.
Next, your radiating beds should fan out from this central point, almost like the spokes on a bicycle wheel. Depending on how much space you have, you can utilize a circular layout or even create a starburst effect. The beds can be primarily square or rectangular, but let your creativity run wild—curvy edges can add a charming feeling of whimsy. When spacing them out, aim for three to four feet between each bed; this gives you room to maneuver without feeling like you’re doing an obstacle course every time you pick a tomato.
In terms of what to plant, go for diversity—it adds texture and interest. Use taller crops, like sunflowers or tall tomatoes, at the edges of the beds to create a layered effect, then sprinkle in herbs and shorter veggies in the center. Think of your layout as a quirky, delicious garden salad. You wouldn’t just toss in plain lettuce; you’d add a mix of colors and flavors, right? So why not do the same in your garden?
Don’t forget about pathways. You want to easily stroll through your radiating beds, maybe even stopping to take a look at how your herbs are doing. Lay down some stepping stones, or simply keep the soil tilled and loose. Just imagine stepping outside and feeling the cool earth under your feet as you admire your hard work.
And if you can incorporate some mulch, even better—this will keep weeds down while retaining moisture. Bonus points for keeping things neat and tidy.
As you design your garden, embrace that the layout mightn’t be perfect. Sometimes, the best plans go a little wonky, like when your zucchini plant decides it’s going to take over the world. Just roll with it; nature has her own ideas sometimes, and that’s part of the fun.
Soil Layering Techniques
Soil layering might sound like a fancy culinary technique, but it’s actually a game-changer for your garden beds.
Imagine this: you create delicious layers of nutrients, just like a good lasagna. Start by laying down a base of coarse materials, like small rocks or straw, for drainage.
Create nutrient-rich layers in your garden, starting with coarse materials for optimal drainage—like crafting a nutritious lasagna!
Next, pile on some compost and quality soil—it’s where your plants will thrive.
You can even top it off with mulch to keep moisture in, kind of like a protective blanket.
These garden bed ideas aren’t just for looks; they boost growth and reduce weeds too.

