So, you’re dreaming of a garden that’s not just beautiful but also functional, right? Imagine cozy spots to lounge, yummy seasonal veggies, and paths that make you feel like you’re wandering through a fairy tale. Sounds great, doesn’t it? Whether you’re a beginner or a pro, there are so many ideas out there that can transform your outdoor space. Let’s explore these fantastic garden design ideas that’ll help you create that perfect retreat. What are you waiting for?
Eco-Friendly Garden Concepts
If you’re looking to make your garden more eco-friendly, you might start by considering arrangements like raised garden beds or a curvy pathway.
These designs don’t just look great; they create a delightful flow while being kind to the earth.
Imagine a vertical garden wall packed with your favorite herbs—talk about a fresh and functional space!
1. Raised Garden Bed Arrangement
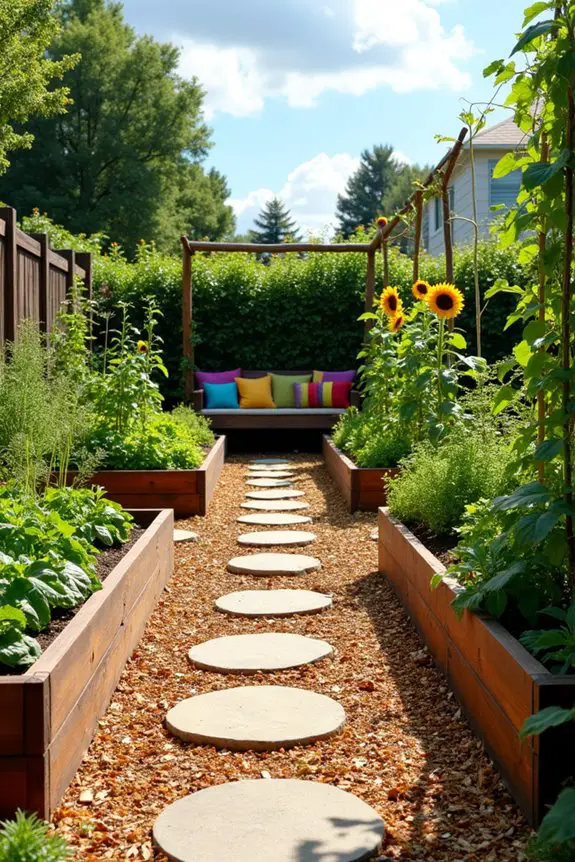
When it comes to garden design, raised garden beds can feel like a game-changer. Not only do they make gardening easier on your back (seriously, who wants to be hunched over?), but they also elevate the whole look of your outdoor space. You get a neat, tidy appearance that can really bring your garden to life and give it a touch of personality. Plus, they’re eco-friendly—what’s not to love?
So, let’s talk about how to arrange your raised garden beds. First, visualize your space. Maybe you have a cozy backyard or a sunny balcony that needs some greenery. Picture a few wooden or corrugated metal boxes, rising from the ground like green jewels.
Try experimenting with different shapes. Rectangles can give you a modern, structured look, while circles or curves can soften the space and add a whimsical touch. And let’s be real, who doesn’t want a garden that feels a bit magical?
Next, think about the plants you want to grow. Group them by height: put your tallest sunflowers at the back and shorter herbs like basil and thyme in front. This nifty trick guarantees every plant gets its fair share of sunlight—no botany-tall or short-guy favoritism in this garden.
Plus, it looks fantastic. Just imagine the layered effect: vibrant greens, bright blooms, and herbs bursting with flavor. Your dinner guests might even start to question if you’re hiding a secret garden magic.
Now, for placement, consider the sun. Ideally, your garden beds should face south or southwest. They’ll soak up all that glorious sunlight, making your tomatoes blush with ripeness. If you only have a few hours of sunlight, choose shade-tolerant varieties like kale or spinach—yes, those leafy greens that are so good for your body.
To add a touch of flair, intersperse your raised beds with pathways for easy access. You could use stepping stones, gravel, or even bark mulch—just make sure you don’t trip while trying to snag that last cucumber.
Fun fact: I once tripped over my own shoes while reaching for a tomato, so trust me, messy falls aren’t just a clumsy person’s fate; they can happen to the best of us.
Finally, don’t forget about vertical elements. Trellises can add height and drama—perfect for climbing beans or cucumbers. They also save space, and let’s face it, the higher your plants climb, the more you can brag about your gardening prowess, right?
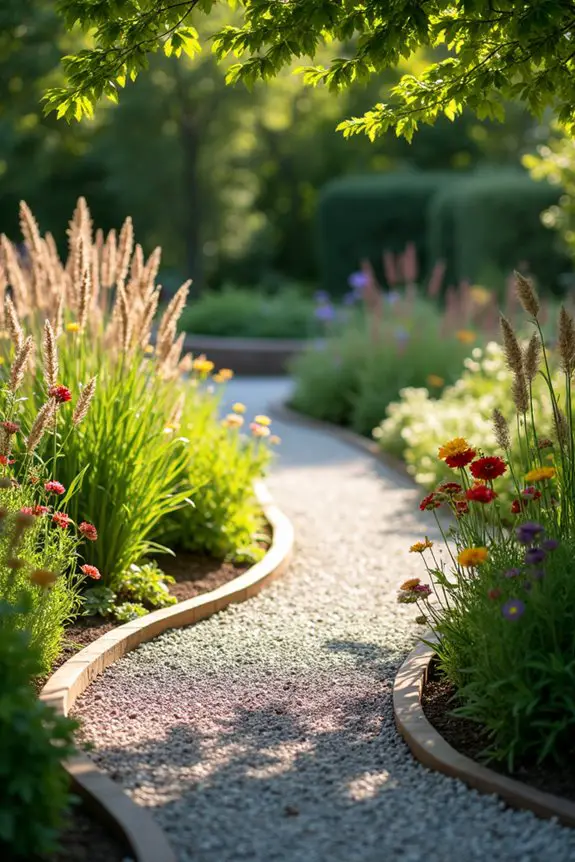
2. Curved Pathway Design
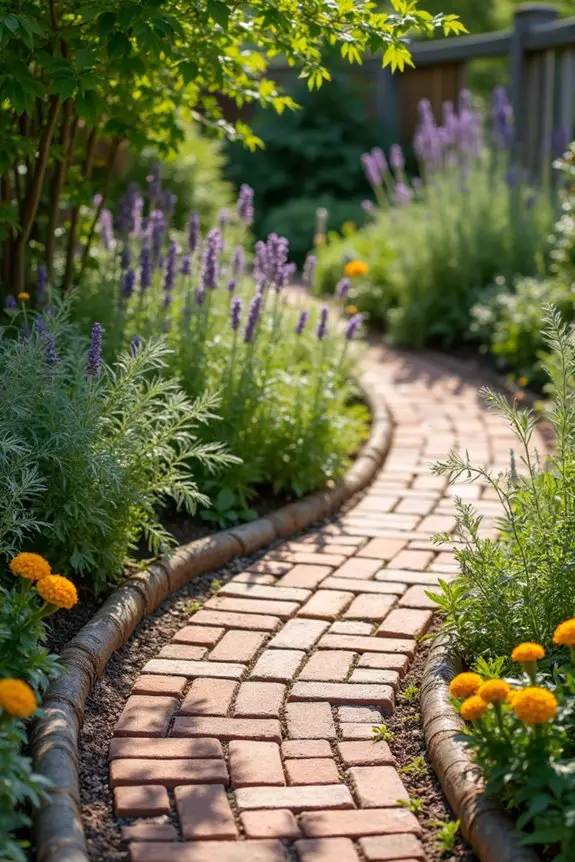
Curved pathways are like the gentle river of your garden—flowing seamlessly through your plants, inviting exploration while adding a beautiful aesthetic touch. Not only do they create a soft and inviting feel, but they also help break up the rigid lines of raised garden beds, making the whole space feel more organic and connected to nature.
Envision this: a winding path that leads your guests deeper into the greenery, encouraging them to meander and take in all the vibrant colors and fragrant scents.
To design a curved pathway, start by sketching out a rough layout on paper or using a garden planning app. Grab some marking paint or even a hose to outline where you want your path to flow. Think smooth curves rather than sharp angles—this creates a soothing experience as you wander through your garden. The width of the path can be about 2 to 3 feet wide, which is just enough to comfortably walk side by side with a friend—or perhaps your overly enthusiastic dog who always seems to be in a hurry.
Now, when it comes to materials, there are lots of eco-friendly options to contemplate. You might want to use recycled bricks, which look charming and weather beautifully, or even decomposed granite, which provides excellent drainage and a rustic appearance.
Gravel is another great choice. Just be cautious to choose fine gravel, as larger stones can trip you or, in my case, lead to a dramatic spill, complete with flourishes and flailing arms.
As you lay down your path, think about adding some edging to keep everything neat and tidy. Wooden logs or repurposed stones work wonders for this. Not only do they hold everything in place, but they also soften the shift between your path and the garden beds.
Plus, it gives you the chance to show off your creativity. After all, who doesn’t get excited about a little rustic charm?
Planting low-growing flowers or herbs along the edges of your path is the cherry on top. Imagine brushing your fingers against fragrant lavender or vibrant marigolds as you stroll. It’s these little details that turn a simple walk into an experience, making every dollop of garden love count.
If you’re feeling adventurous, contemplate planting herbs like thyme or creeping phlox; they add delightful aromas and colors that are sure to charm. Just be prepared for your friends to ask if you’ve become a master gardener, and try not to mention the times you accidentally overwatered everything—everyone has those days.
In the end, a curved pathway does more than just connect different parts of your garden; it creates an experience that draws you and your visitors in.
It’s like a warm hug from Mother Nature, encouraging you to explore, reflect, and appreciate the beauty all around you. And who wouldn’t love a little more nature-inspired kindness in their life?
3. Zoned Garden Spaces Arrangement
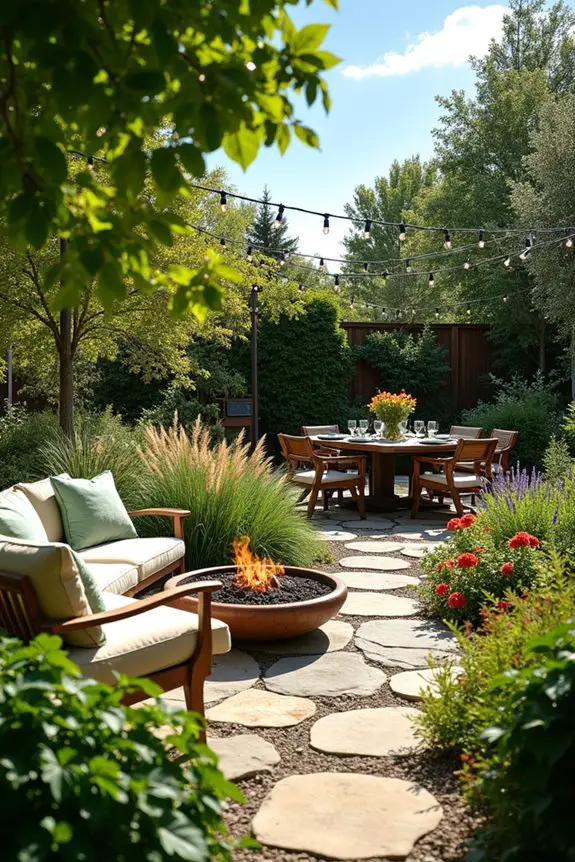
Zoned garden spaces are like the ultimate party planner for your outdoor area, making sure every section serves its purpose while looking fabulous. By dividing your garden into cozy zones, you can create spaces for relaxation, dining, or even growing fragrant herbs. This setup not only adds a sense of organization but also allows different activities to flow smoothly together.
It’s like having your own mini garden town where each neighborhood brings something unique to your overall outdoor experience!
When designing your zoned garden, start by considering the activities you want to enjoy. Do you dream of sipping coffee in a sunny nook or hosting summer barbecues? Think about the sun’s path and the areas that get the most light throughout the day. This way, you can position your seating or dining areas in spots with nature’s warm embrace, ensuring you won’t end up squinting into the sun like a confused squirrel. Incorporating a stand up weed puller can also help keep those sunlit areas tidy and free of pesky weeds.
Now, let’s talk layout! Imagine this: section off areas with low-growing plants or even small fences. It’s like using plants as your garden’s friendly bouncers, guiding people from one zone to another. You could create a comfy lounging area filled with cushions and a fire pit surrounded by ornamental grasses that swish in the breeze.
Then, just a hop away, plant an aromatic herb section where you can snip fresh basil while dodging swarms of buzzing bees, because who doesn’t love a few friendly pollinators?
As you develop these zones, remember to integrate some paths that connect them all. Using natural stones or mulch can provide a beautiful contrast against the greenery, while making it easy to wander from your peaceful retreat to the herb garden without stepping on the plants like some slightly uncoordinated garden giant.
You might want to add a few stepping stones; not only do they provide stability, but they also lend a whimsical touch to your outdoor underfoot experience.
To further enhance the vibe, think about lighting! String lights suspended between trees can add those magical twinkling moments for nighttime gatherings. Solar-powered lanterns tucked along pathways will light up the routes and let your friends know the way to your DJ booth — or even just the snack table.
Don’t forget the seasonal pop of color! Use different plants that bloom at various times to give each section a fresh look. Imagine the joy of seeing your summer flowers shift to autumn leaves, while the evergreen herbs stand strong through it all.
And in the winter, you can revel in the beauty of dormant garden beds, reminding you that nature has a way of resting up for a big show next season.
Creating these zoned spaces doesn’t just mean organizing your garden; it’s a way to immerse yourself and your guests in an experience. Every nook can evoke an emotion, ushering you through a journey of nature’s beauty.
Whether you’re hosting friends or enjoying some alone time with your thoughts — or maybe plotting revenge on the basil that has just a bit too much of a tendency to bolt — living in a well-organized garden helps you savor the little things. Additionally, having the right tools like bypass pruners for maintenance can make it easier to keep those garden zones thriving.
4. Vertical Garden Wall Arrangement

When it comes to gardening, we’re all looking for creative ways to maximize space while still keeping things stylish. Enter the vertical garden wall—an ingenious solution that not only saves room but also spruces up any outdoor area. It’s like going from a drab studio apartment to a trendy loft, all while giving you the satisfaction of growing your own greens and blooms.
Creating a vertical garden wall isn’t just practical; it adds a splash of vibrancy and life, making your outdoor space feel bigger and more inviting. Envision this: a lush green wall filled with colorful flowers, herbs, or even trailing vines that catch the eye of anyone passing by. You’ll not only be dazzling your neighbors but also creating a mini ecosystem that can attract pollinators. Who knew gardening could be so eco-friendly and chic at the same time?
To start your vertical garden adventure, first, pick a sun-soaked spot in your yard or on a balcony that gets good light throughout the day.
Next, gather your materials. You’ll need a sturdy structure to support your plants—think wooden pallets, trellises, or even hanging planters. Just make sure whatever you use is weather-resistant, or you’ll be cursing the rain when your carefully arranged plants flop over like they’ve had one too many at a garden party. Using a bulb planter tool can help you easily create space in the soil for your plants to thrive.
Now comes the fun part—choosing your plants! Aim for a mix of textures and colors. For instance, you might want to combine trailing plants like ivy or succulents for a cascading effect. You could also throw in some herb pots like basil and parsley right at eye level. Honestly, who wouldn’t want to snag fresh herbs while working on their cooking skills? Just picture being the friend who always has the freshest ingredients on hand. Additionally, having the right tools, like ratchet pruning shears, can make maintaining your vertical garden a breeze.
When hanging your plants, think about using small pots attached to a board or wall with brackets or hooks. Start from the bottom and work your way up, so the plants have room to grow without overshadowing each other. You could also get creative with a vertical garden pocket system, which allows you to plant directly into fabric pockets hanging on a wall. It’s like a living art piece that can brighten a dull fence or bare wall.
Remember to water your vertical garden regularly, as those plants are going to need their moisture. You might’ve to get a bit crafty with a watering system; maybe even use a small drip system for convenience. Seriously, I once watered my vertical garden the old-fashioned way and ended up in a home-and-garden style water fight with my two cats who thought I was creating a miniature swimming pool.
Finally, don’t forget about the finishing touches. Adding decorative accents like fairy lights or colorful garden stakes can give your vertical garden that extra oomph while also making it a cozy spot for you to hang out. Think of it as your own little botanical retreat, where you can relax with a cup of tea and watch the world go by.
5. Circular Flower Bed Design
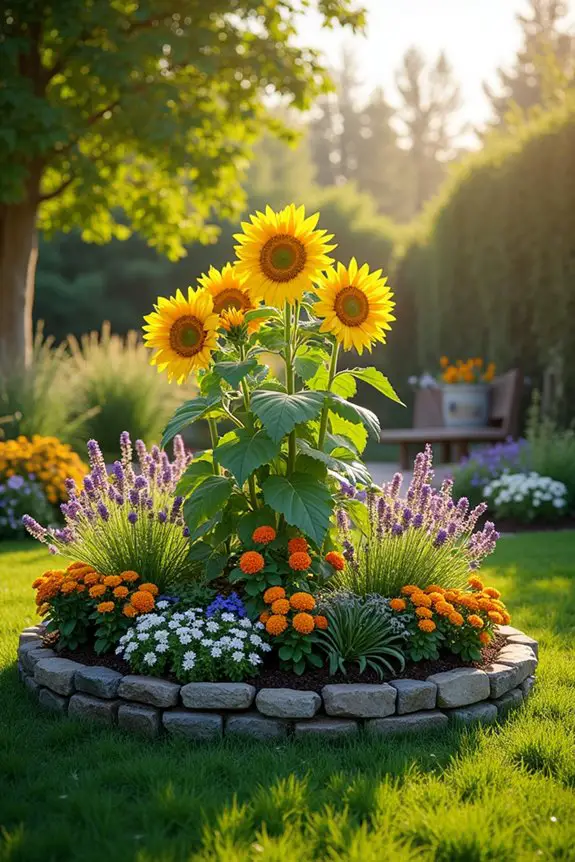
Imagine stepping into your yard and being greeted by a stunning circular flower bed, bursting with vibrant blooms. This design not only focuses on aesthetics but also works wonders for functionality. Circular flower beds provide a natural flow, allowing easy access to every glorious flower, making garden maintenance a breeze. Plus, who can deny the charm of rounded lines in an otherwise angular world? It’s like adding a splash of whimsy to your landscape—who doesn’t love whimsy?
To create the perfect circular flower bed, start by choosing a sunny spot in your garden. Ideally, you want a location that’ll bathe your flowers in sunlight for most of the day. Once you find that sweet spot, grab some stakes and string to outline your circle, making sure it’s as perfect as your grandma’s pecan pie crust. You can adjust the size based on how much space you have or how ambitious you’re feeling—just remember to leave enough room for those plants to stretch their roots and soak up the sun.
Next, it’s time to dig in—literal digging, that is. Remove the sod and turn the soil, making sure to mix in some compost because, let’s be honest, plants appreciate a good meal just like we do. This is where the eco-friendly part really shines: using organic compost not only nourishes your flowers but also helps improve the soil structure, leading to happier blooms. And who doesn’t want a garden full of happy flowers?
Now comes the fun part: choosing your plants. Think about a mix of perennials and annuals for continuous blooms. You might want to use taller plants towards the center and gradually work your way down to shorter ones around the edges. Think of it like a tiered cake but with petals instead of frosting. If you want to make your flower bed pop, consider adding some herbs or fragrant plants—imagine stepping outside and being greeted by the delicate scent of lavender or chamomile, not a bad way to start the day, right?
After planting, don’t forget to create some sort of border for your circular flower bed. You could use stones, bricks, or even recycled materials for an eco-friendly touch. Not only does it keep everything neat and tidy, but it also adds more visual interest to your garden space. All those people passing by will think you’re the next garden guru, and trust me, they’ll start asking for your tips (which you can definitely ‘Google’ later on).
Lastly, remember to water your flower bed regularly and keep an eye out for pesky weeds. I once thought I could let my garden run wild, and let’s just say, my flowers weren’t the only ones enjoying the sunshine—weeds decided to throw a party too. So keep that watering can handy, and give those flowers the love they need. Using all purpose potting soil can also help ensure your plants thrive in their new home.
In the end, a circular flower bed isn’t just about aesthetics; it’s an eco-friendly way to bring beauty and functionality to your garden. So roll up those sleeves, channel your inner gardener, and get ready to create something truly lovely. Your garden—and the butterflies—will thank you!
6. Asymmetrical Plant Grouping
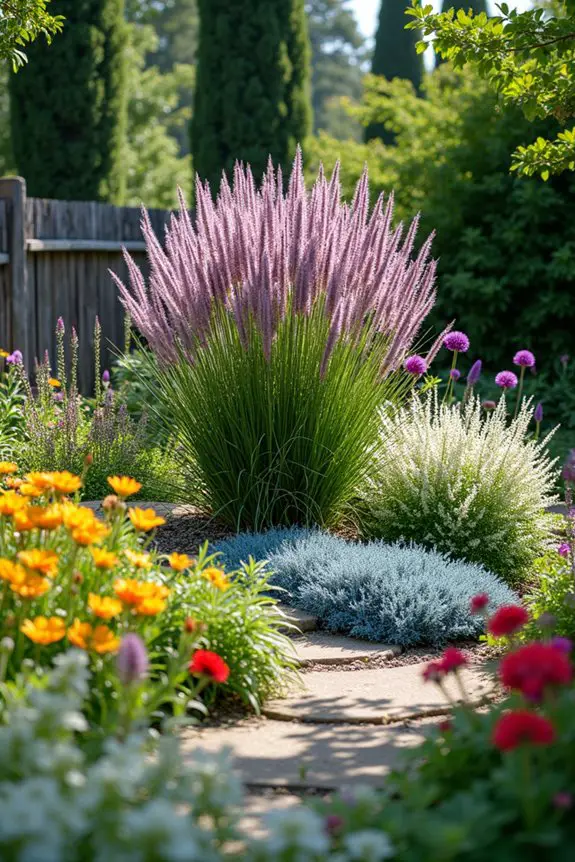
When it comes to bringing personality into your garden, asymmetrical plant grouping is a fantastic option. This design creates a relaxed yet striking vibe, which feels both intentional and effortless. It’s like throwing on a stylish outfit that looks so good you didn’t even try—perfect for those of us who sneakily prefer to keep things casual.
So, how do you work this magic into your garden? First, consider the plants you’re drawn to—think vibrant flowers, lush ferns, or even statement grasses. The key here is to choose a mix of shapes, sizes, and textures. Picture yourself reaching into the pantry, grabbing different ingredients to whip up a delightful dish, all while balancing flavors and colors. Similarly, pull plants from various categories: tall, short, bushy, and airy, and let them play off each other. It’s all about creating visual interest while embracing that delicious chaos.
Once you’ve gathered your plant lineup, it’s time for the real fun—arranging! Now, instead of carefully placing plants in straight lines (yawn), choose an irregular placement. Start by selecting your largest plant as a focal point—a real showstopper. Place it in an off-center position. This technique keeps the eye moving around the arrangement rather than getting stuck in a pattern, like browsing through your cookbook and landing on that one recipe you’ve made a hundred times.
Next, layer in smaller plants, sprinkling them around like confetti. Position taller plants towards the back or sides, while shorter ones spill forward. The beauty of asymmetry is that it allows for flexibility. Don’t be afraid to move those little green guests around until it feels right. Trust your instincts, and remember: gardening isn’t a science; it’s an art! Just because you hoped for a straight line doesn’t mean that’s what you get, and that’s perfectly okay.
As you plant, consider incorporating some textures too. How about mixing broad leaves alongside delicate wisps? Imagine how a chunky potato (hello, comfort food) pairs with the lightness of whipped cream—an unexpected combo that delights! Think about soft ferns next to coarse sedges, or feathery astilbes with plump peonies. This layering helps create contrast and depth in your garden while keeping things lively and engaging.
Finally, don’t forget to step back and assess your masterpiece as you go along. Take a look at your work from different angles—like a good dish, it should look appetizing from all sides. And as your garden matures, those plants will grow and fill out, leading to an even more enchanting scene.
Just remember—no two gardens, just like no two meals, need to be the same. Embrace the beauty of your unique creation, and enjoy the process. After all, a garden, much like cooking, is about experimenting, learning, and savoring the joy of what you create. Happy planting!
7. Geometric Patterned Garden Layout
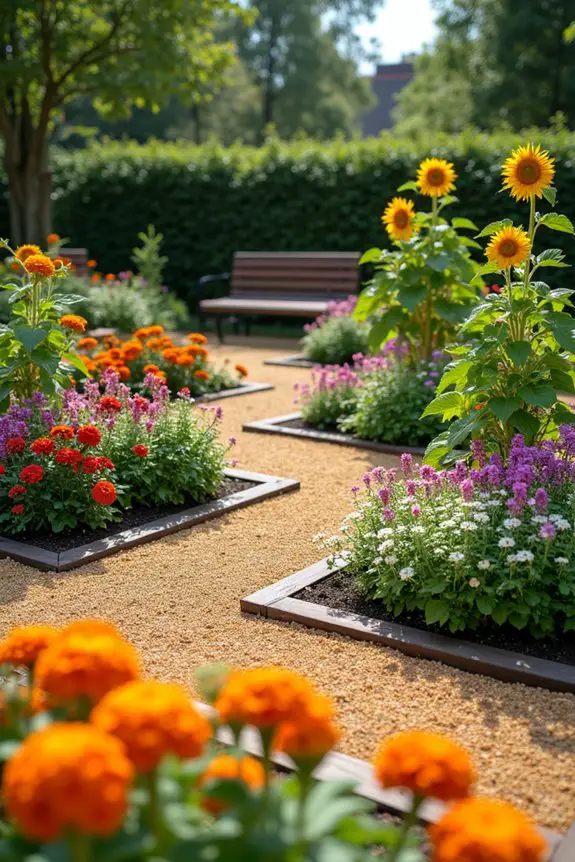
When you think about adding structure to your garden while keeping it stylish, geometric patterned layouts can really do the trick. Imagine your garden like a beautifully baked pie—each slice perfectly arranged, giving it a sophisticated, organized look, but still full of flavor and personality. This design not only offers a neat appearance but also makes traversing your garden easier and more functional. Plus, it’s a fantastic way to integrate eco-friendly practices while letting your creativity shine.
To get started, you’ll want to first pick a geometric shape that resonates with you. Think about squares, rectangles, or even hexagons—each can provide a unique vibe. For instance, a rectangular design gives off a clean and modern feel, while a hexagon can evoke a touch of whimsy, kind of like that quirky dish you serve at parties that always gets people talking.
Once you have your shape in mind, it’s time to map out your layout. Grab some garden stakes or even kitchen utensils like string and tape to outline your space. Channel your inner chef and think of it as prepping your ingredients before a big meal; organization is key!
Once you’ve mapped it out, the next step is planting with intention. Divide your garden into sections based on your geometric layout. It’s like prepping different components for a multi-course dinner. Use diverse plant heights for visual interest; tall plants can form a stunning centerpiece while shorter ones create a lovely border along the edges.
Experiment with colorful flowers and foliage to enhance the design—visualize a rainbow of flavors concluding in a delectable dish. For instance, consider using bright marigolds or lush herbs to create lively sections that draw the eye, almost like tasty garnishes on your plate.
Incorporating paths into your geometric layout can also help tie everything together, allowing you to walk through your garden as if you were meandering through a beautiful market. Use gravel, bricks, or even wood chips to create contrasts and boundaries between your plant sections. Imagine showing off your garden like a perfectly plated dish, where each element has its own space yet contributes to a cohesive presentation.
Don’t be afraid to experiment and adjust your plant selections as time goes on. You wouldn’t stick to the same recipe forever, right? Your garden can—and should—evolve as you learn and discover what thrives best in your unique environment.
Finally, remember to step back occasionally, admiring your geometric masterpiece from afar. This not only gives you a chance to appreciate your hard work but also allows you to reassess if the layout is both functional and appealing.
Just like tasting your dish mid-creation, it’s essential to check if the balance is just right. Embrace the process, enjoy the journey, and soon, your garden will be a stunning space where geometry meets nature in the most delightful way.
8. Water Feature Integration Design
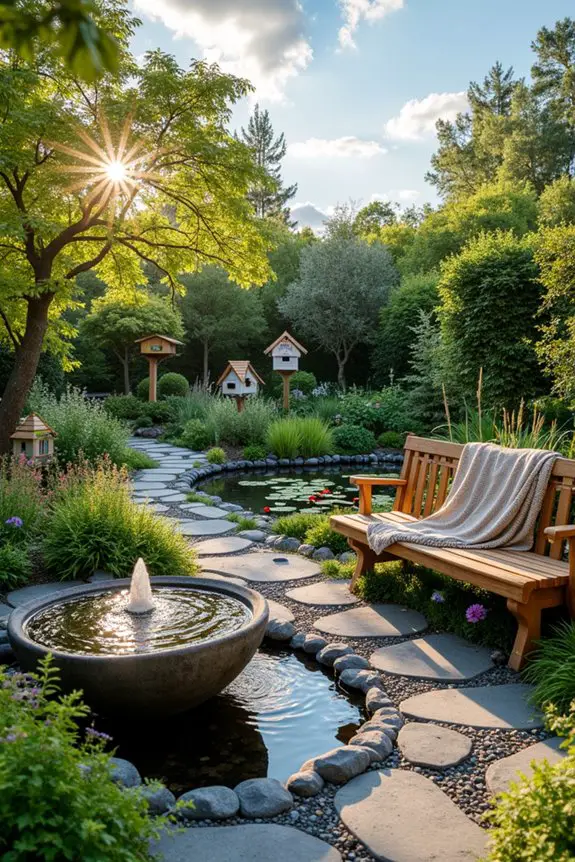
Creating a water feature in your garden can be like adding that secret ingredient to your famous recipe—it just elevates everything! Not only does it serve as a stunning focal point, but it also introduces a calming soundscape, mimicking the gentle whispers of nature that can soothe even the most chaotic days. Picture yourself enjoying a cup of tea while listening to the soft trickle of water as it dances among your plants. How lovely does that sound?
First, let’s talk about placement. You’ll want to find a spot that’s visible from your favorite sitting area, maybe near a cozy bench or by a window, where you can soak in the sights and sounds. Think of it like setting a beautifully garnished dish right in the center of your table for everyone to admire.
If you’re feeling adventurous, contemplate using a small pond or a fountain as a centerpiece in a geometric layout! It can bring balance to the sharp lines of your garden design.
Next comes the fun part—deciding on the type of water feature that suits your style. A fish pond can turn your outdoor space into an aquatic wonderland, while a gentle fountain creates movement and energy. If you’re a bit more DIY-inclined, you might even use a repurposed barrel or a quirky old birdbath. Remember, your garden should have your personality stamped on it, so don’t be afraid to think outside the box.
Now, about those eco-friendly practices! Make sure to ponder water conservation techniques. Installing a small solar-powered fountain isn’t only energy-efficient but also adds a playful shimmer to your garden. You could even complement it with native plants that thrive around water—these beauties can naturally filter water and provide habitats for local wildlife. It’s like planting a mini buffet for the birds and bees. Who doesn’t love a good party in their garden?
When it comes to maintenance, well, let’s just say it’s a balancing act! Regularly check your water levels and cleanliness to keep your feature inviting. But here’s a pro tip: incorporating native aquatic plants can help reduce some of that upkeep. Think of them as the sous chefs of your water feature, working silently behind the scenes to maintain order.
As you sit back and enjoy your handiwork, don’t forget to sprinkle in some seating nearby. A cozy chair or a simple bench can transform your garden into an outdoor sanctuary, where every moment feels like a rejuvenating escape.
Now that’s how you whip up a beautiful garden experience, filled with life, tranquility, and a splash of creativity. Happy gardening!
9. Meandering Gravel Path Design
Imagine wandering through your garden on a lovely day, the soft crunch of gravel underfoot while the sun filters through the leaves above. That’s the beauty of a meandering gravel path—it’s not just about aesthetics; it’s functional too. These paths guide your guests through your outdoor space, create different zones for lounging or planting, and give an inviting, relaxed vibe to your garden. It’s like a welcoming hug that beckons you to explore every nook and cranny.
So, where do you start? Well, first things first, you need to determine the flow. Picture your garden as a well-cooked meal. You want a balance of flavors, right? Think about where you’d want to walk, and where you’d like to pause for a moment to admire a blooming flower or a delightful water feature. You can create gentle curves or sharp angles, but remember, a meandering path feels more natural, as if it’s been there forever.
Once you’ve mapped out the route, it’s time to gather your materials. Gravel is your main star here, but don’t just grab any old bag from the store. Look for a type that complements the rest of your garden—smooth pebbles can evoke a modern feel while larger stones can lend a rustic charm. Your path will feel like a star on stage, so make sure it shines bright against the greenery around it.
Now comes the installation part, and this is where the magic happens. Clear the area where you want the path to go, removing any pesky weeds or large rocks. Next, lay down landscaping fabric—this acts like a secret agent, keeping those weeds from sneaking back in.
Then, pour your gravel over the fabric, spreading it out evenly to create a consistent surface. Aim for about three to four inches, like a comfy bed you can sink into. If you’d like a slightly fancy touch, consider edging the path with wood or stones. It’s like dressing it up for a fancy dinner.
Let’s talk about maintenance. This part can feel overwhelming, but it doesn’t have to be. Regularly raking your gravel will keep it looking fresh and inviting, like keeping your favorite shirt clean. A bit of weed growth is inevitable, but a quick hand-pulling session here and there or a light application of mulch should do the trick.
Trust me; you’ll find that it adds character to your path, like well-loved, comfy jeans.
As you take a stroll down your meandering path, you might notice a little magic happening. The gentle sounds of nature, the shift in light through the leaves, and the delightful crunch of gravel beneath your feet create an experience that’s utterly enchanting. It’s your personal invitation to relax, admire, and appreciate all the hard work you’ve put into your greenery.
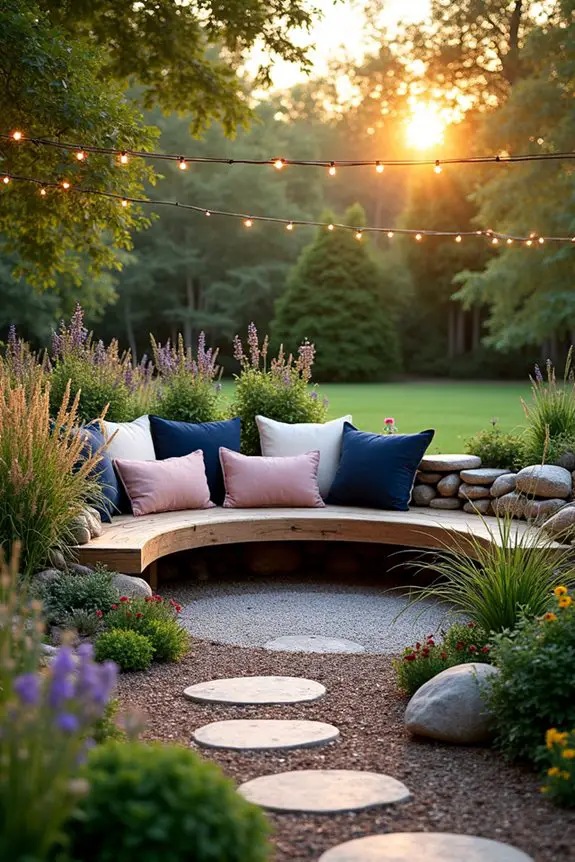
10. Sunken Seating Area Design
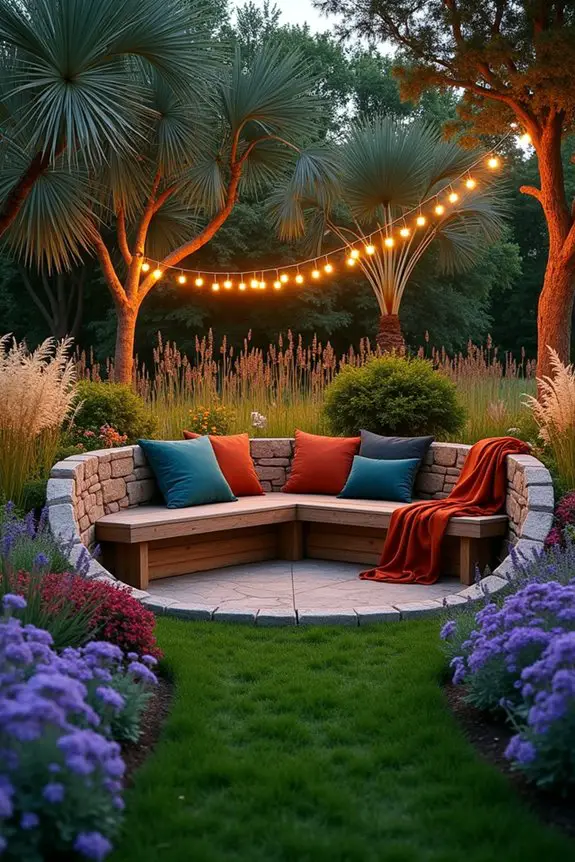
When it comes to creating that perfect spot in your garden to relax and soak in nature, consider a sunken seating area. It’s not just about adding more seats; it gives you a cozy nook that feels like a warm embrace from the earth itself.
Envision that blissful feeling of tucking into a plush couch on a chilly day; that’s the vibe a sunken seating area brings. Plus, it can help define a space in your garden, making it an ideal gathering spot for family and friends.
So, how do you create this inviting little hideaway? First, pick a spot that feels right. Look for a place where the sun dapples through the branches or where you can catch the early morning light. It’s kind of like choosing the best spot for a picnic.
Once you find your ideal location, grab a shovel and start digging. While it may not feel like your favorite hobby (trust me, I’ve been there, trying to convince myself that digging is fun), getting down and dirty is key to creating that sunken effect.
Aim for a depth of about two to three feet—just deep enough to feel embraced by the ground but not so deep that it feels like you’ve dug your own grave! As you dig, don’t forget to break up the soil. It should be loose to make it easier for you to add your seat later on. You can patch that dirt in with a solid layer of sand for stability. This isn’t just for looks, it’s like laying a solid foundation for your kitchen countertops.
Now, let’s talk seating. You could go for outdoor furniture, but let’s think outside the box—literally. Grab some comfy cushions and an old daybed, or even make a simple wooden bench. If you’re feeling crafty, you can build a low wall made of bricks or rocks to create a bordering seat.
Imagine this: a gentle curve of stones, wrapped in bright, soft cushions. It’ll feel like relaxing in a garden hug.
And how about adding a touch of greenery? Surround your sunken area with tall plants or flowers that can sway in the breeze, bringing life and color to your new favorite spot. It’s like decorating your plate with a splash of color; it just makes everything appetizing.
Finally, let’s not forget the ambiance. Maybe toss in some string lights overhead for a magical glow as evening falls—a simple touch that transforms your space into a fairy tale.
The idea is to make it cozy enough that you never want to leave; I mean, who wouldn’t want to sway with the leaves while sipping a decent iced tea?
Seasonal Planting Strategies
Seasonal planting strategies can seriously transform your garden into a vibrant masterpiece, especially if you know what to plant and when. Imagine strolling through your garden, each season revealing a new look.
You could stick with simple garden ideas, such as planting cheerful pansies in spring for a pop of color. In summer, think about adding sunflowers to make you feel like a kid again—big and bold.
As fall approaches, opt for hardy asters, and when winter rolls around, evergreens can keep things fresh.
Don’t forget, staggering your planting times keeps your garden alive and interesting. Just like cooking, timing is everything; you wouldn’t serve dessert before dinner, right?

