So, you’re looking to jazz up your garden, huh? It can feel overwhelming with so many options out there. You’ve got whimsical hanging planters, vibrant stones, and sweet little benches just begging for a cup of tea. Imagine cozy nooks and playful sculptures brightening your space. Don’t you want to create that perfect retreat? Let’s explore some ideas that’ll make your garden a favorite spot, and trust me, you won’t want to miss what’s next.
Creative Patio Arrangements
Want to make your patio the ultimate hangout spot?
Think about zoned seating for relaxation, curved pathways that guide guests through your little oasis, and even some vertical garden structures for that WOW factor.
It’s like designing a cozy living room outside—minus the awkward sofa that never quite fits, right?
1. Zoned Seating for Relaxation

Creating a zoned seating area in your garden or patio is like giving your outdoor space a warm hug. It’s functional because it allows you to set up different spots for different moods—whether you’re basking in the sun with a good book or chatting with friends over cocktails. Plus, it’s a surefire way to create a cozy vibe that encourages relaxation and connection.
Think about it—who doesn’t want a dedicated space to stretch out, unwind, and enjoy nature?
So, how do you achieve this glamorous garden layout? First off, pick your zones. You could set up a lovely lounge area with plush sofas and fluffy cushions, perfect for lazy afternoons, and a dining nook nearby for those sizzling summer BBQs. You could even throw in a couple of hammocks strung between trees for that dreamy, tropical vibe.
Just imagine lying back, swinging gently while sipping lemonade and listening to the birds.
Next, let’s talk about defining these spaces. Use outdoor rugs to anchor each zone—this not only adds warmth but also visually separates the areas. It’s like putting down a welcome mat that says, “Hey, this is where the magic happens.”
You might want to mix and match rugs for a bohemian feel, or stick to a color theme for a more polished look.
Furniture placement is key, too. Keep it functional—arrange the chairs so that folks can chat without topping the Great Wall of Silence. Maybe angle your chairs inwards for intimate discussions or position them towards the view for some picturesque moments.
Trust me, no one wants to strain their neck trying to look at their friends while pretending to listen.
Don’t forget to sprinkle in some greenery! Planters filled with colorful flowers or herbs can create borders between zones, while also bringing life to your setup. Plus, if you’re anything like me and you can’t keep a houseplant alive to save your life, the outdoors are a bit more forgiving.
And lighting? Oh, don’t get me started. String lights woven through trees or solar garden lights can transform your space during the evening, making it feel magical and inviting.
Imagine the stars twinkling overhead while you enjoy good company—might as well call it your little slice of paradise.
Creating a zoned seating area not only maximizes your space but enhances the entire outdoor experience. So grab that idea notebook, because your dream patio awaits.
Trust me, you’ll be the host everyone talks about!
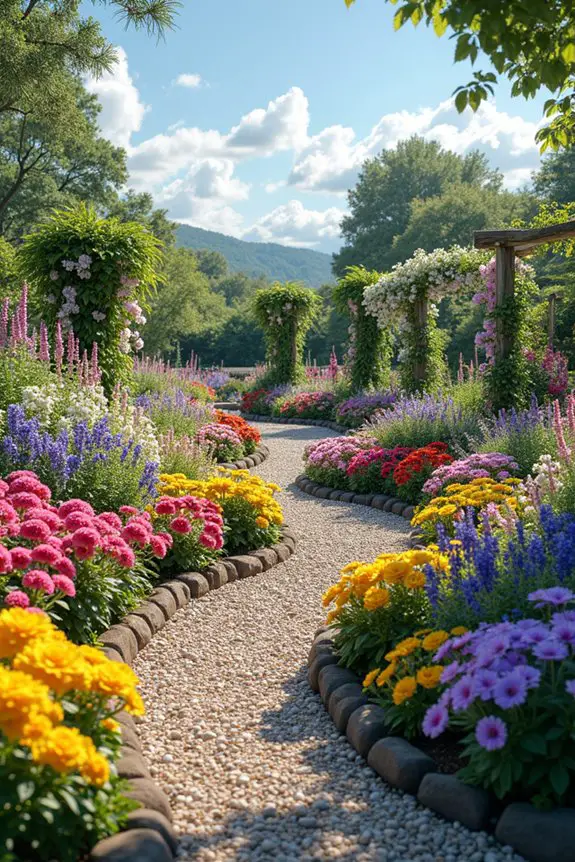
2. Curved Pathways for Flow

Imagine strolling through your garden, where the path seems to wrap around you like a gentle embrace. Curved pathways do just that—they invite you in and create a sense of flow. Instead of a straight shot that feels rushed and impersonal, a meandering path encourages you to slow down, take in the sights, and appreciate each corner you turn. It’s all about creating a vibe that feels relaxed and organic, just like nature intended.
So, how do you bring these whimsical pathways to life? First, consider the layout of your garden. Find spots that naturally draw the eye—like a stunning flower bed, a cozy seating area, or a calming pond. Once you’ve pinpointed these highlights, start sketching out your curved path. You can use a garden hose to create a rough outline; it’s a super easy way to visualize your design without commitment.
Just remember, the goal is to create gentle curves and bends rather than sharp angles, which can feel jarring. Moreover, incorporating elements like a wood garden bench can enhance the appeal of your pathway, providing a perfect resting spot to enjoy the surroundings.
Next, think about the materials. Gravel, stepping stones, or even grassy paths can work wonders. Gravel is especially forgiving—if you mess up the curve, just rake it back in place. Stepping stones can add a touch of charm, giving your path a fairytale feel. You might want to sprinkle in some colorful, flat stones or tiles for visual appeal too.
Trust me, it’s like giving your path a stylish outfit.
When it comes to the planting along your path, think layers. Choose flowers and shrubs that vary in height, creating a lush, inviting look. Fragrant herbs on the edges can add another layer of sensory delight—imagine brushing against a mint plant and getting a whiff of freshness as you pass. Plus, who doesn’t enjoy a little garden a la nature’s perfume?
Lighting adds the final touch to your curved pathway. As the sun fades and the sky shifts to hues of twilight, strategically placed solar lights or lanterns can create a magical ambiance. Picture soft glows lighting your way as you stroll under the stars. It’s like nature turned down the lights just for you and your guests.
Curved pathways are more than just functional; they’re about creating an experience. They invite curiosity, encourage exploration, and add a sense of enchantment to your garden. So, roll up your sleeves and get ready to carve out a path that not only directs foot traffic but also leads your heart to a happy place. Plus, don’t forget to wear your garden apron with pockets, giving you easy access to tools as you work.
Who knew doing a little garden work could feel so rewarding?
3. Symmetrical Flower Bed Design
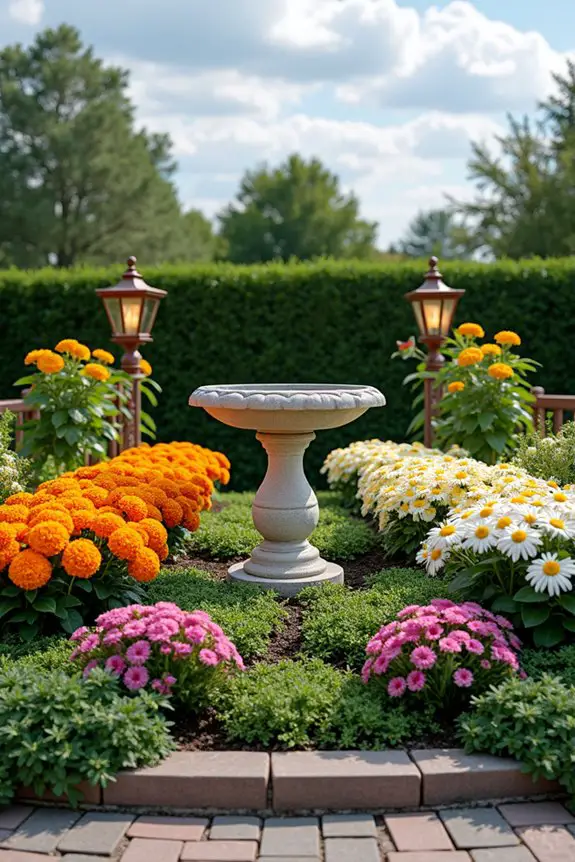
When it comes to adding charm to your garden, symmetrical flower bed designs are like the perfectly arranged toppings on your favorite pizza—they just bring everything together. Symmetry creates a sense of order and harmony, making your garden feel more polished and intentional. Plus, it draws the eye in a really pleasing way, inviting visitors to pause and appreciate the beauty around them.
To start, you’ll want to pick a focal point for your flower bed. This could be a spectacular sculpture, a vibrant tree, or a cozy bench. Envision this: you have a pretty birdbath at the center of the bed, shining in the sunshine. You can choose one side to be a mirror image of the other. Reflect on the types of flowers you want to include—bright marigolds on one side can be balanced with pretty daisies on the other. Mix it up a little bit with different colors, but try to stay in the same family for a cohesive look.
Next comes the fun part—planting! Use a measuring tape to help keep things evenly spaced, but no one is judging you if you eyeball it a little. Maybe a foot apart for larger plants and six inches for smaller ones. Dig holes in a neat line, and make sure to plant the flowers at the same depth. It’s kind of like following a recipe: too deep or too shallow can ruin the whole flavor (or in this case, the whole look). To ensure your plants receive adequate hydration, consider using soaker hoses, which provide a steady supply of water directly to the roots.
Now, while you stand back admiring your symmetrical masterpiece, don’t forget to think about the heights of the flowers, too. Taller plants should be in the back (or at least behind your focal point), with medium-sized flowers in the middle and the shorter ones at the front. This creates depth and makes sure every bloom gets its moment in the sun (figuratively speaking, of course).
Don’t forget the borders! Edge your flower bed with stone, mulch, or even low-growing plants like thyme to give it that finished look. Trust me; those little details tie everything together like a beautiful bow on a gift. And let’s be honest, any chance to bring in more greenery is a win in my book.
Finally, if you really want to amp up the style, add some decorative accents—like lanterns or whimsical garden gnomes. It’s like accessorizing your outfit. You wouldn’t wear just a plain shirt without some cute earrings, right? They’ll make your symmetrical flower bed pop while showing off your personality. Additionally, having the right tools like a good sprinkler timer battery will help maintain your garden’s health by ensuring it gets the water it needs.
Creating a symmetrical flower bed isn’t just about planting flowers; it’s an expression of your creativity and how you see beauty. As you dig into this project, remember that this isn’t just a chore; it’s a way to make your garden a little slice of paradise for you and those who visit.
Plus, if you mess up a little, it’s all good—gardens are like friendships; they grow and change over time.
4. Vertical Garden Structures
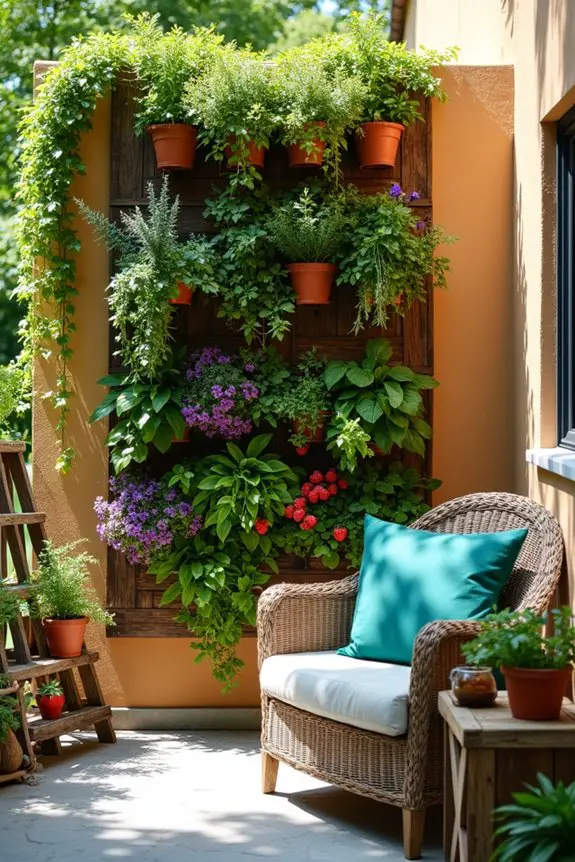
When it comes to making your outdoor space feel alive, vertical garden structures are a game-changer. Not only do they add an eye-catching element to your patio, but they also maximize space and bring a lively vibe to small areas. Imagine transforming a dull wall into a lush canvas of greenery, creating a magical escape that feels almost like stepping into a secret garden. Who wouldn’t want a bit of that charm in their life?
First things first: let’s talk about the basics. Vertical gardens can take on many forms, from simple trellises to elaborate living walls. One approach is to start with a standard trellis—these are inexpensive and super easy to set up. You could plant climbing vines, like sweet peas or morning glories, which will quickly fill in the structure and offer beautiful blooms.
Pick a sunny spot, and in no time, you’ll have a vibrant green backdrop that makes your patio feel like an artistic retreat. If you’re feeling a bit more ambitious, why not consider a modular living wall? These sleek panels can house various plants, from herbs to succulents. Imagine cracking open the door to grab a handful of basil for dinner without stepping into the garden.
To set this up, you’ll need to choose a wall or fence that gets a good amount of sunlight, and make sure you have access to water. Installation may sound intimidating, but trust me, it’s like piecing together a puzzle. Just follow the instructions, and you’ll be turning your plain wall into a garden that wows.
Now, onto the fun part—plant selection! It’s all about variety, so mix things up with textures and colors. Think about how different plants will grow together; some love the sun, while others prefer the shade. Consider adding edibles like herbs or strawberries. There’s nothing quite like snipping fresh mint and throwing it into your iced tea, right?
And if you’re like me, who’s probably killed one too many houseplants, remember that some plants are more forgiving. Succulents, for instance, can handle a little neglect.
Also, don’t forget to incorporate something rustic into your design. Old crates or vintage ladders can double as plant holders, giving your vertical garden layers and dimension. Trust me when I say it feels more like art than just planting—it’s your very own masterpiece.
Lastly, think about the maintenance. Regular watering is essential, and with an arrangement like this, you won’t want to forget about fertilizing either. A little plant food goes a long way in keeping those greens vibrant. It’s kind of like making sure you eat your veggies (though I could probably use a reminder for that too).
In a nutshell, vertical garden structures aren’t only functional but also create a lush, inviting atmosphere that brightens any patio. So grab your gardening gloves and get ready to channel your inner landscape designer—your outdoor space is about to get a whole lot more fabulous.
5. Natural Stone Borders
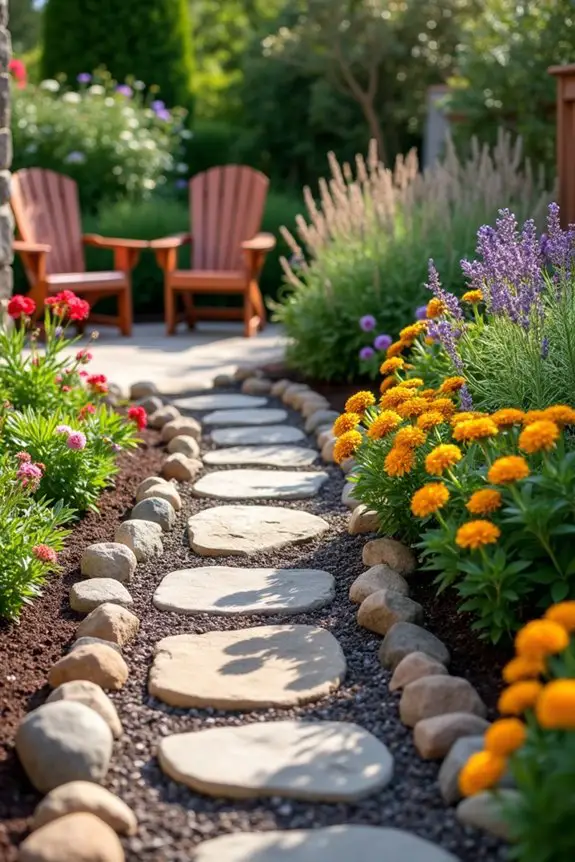
When it comes to defining spaces and creating visual appeal in your patio area, using natural stone borders is a fantastic choice. Not only do they provide structure and organization to your garden beds and pathways, but they also add a touch of earthy elegance that seamlessly blends with nature. Imagine this: a cozy patio edged with rugged stones, creating a warm, inviting atmosphere that makes you want to kick back and relax for hours. Doesn’t that sound nice?
To get started, think about where you want to place your stone borders. Do you have a flower garden that needs a little definition? Or maybe you want to mark off a pathway leading to your outdoor seating. Simply laying out some stones can change the whole vibe of your patio like a well-timed seasoning in your favorite dish. Trust me, the right placement can transform an ordinary space into something special.
Now, choosing your stones is key. You can go with something classic like river rocks or flagstone for a smooth, refined look, or consider using rustic field stones for a more natural and rugged feel. When I first attempted this, I was overwhelmed by all the options, but then I realized – go with what feels right to you. Pick stones that make your heart sing (or at least hum quietly). Whether they’re large, medium, or small, just make sure they’re somewhat uniform for a cohesive look.
After you’ve selected your stones, it’s time for the fun part—arranging them! Start by laying them out in a dry run. No glue, no mortar, just you and your stones having a little chat. Play with different shapes and patterns. I once thought I could create a perfect circular border but ended up with a bizarre octagon that looked like it had seen better days. Sometimes, you stumble upon a design that works even better than what you planned, so embrace those happy accidents.
Next, dig a shallow trench where the stones will go—it doesn’t need to be too deep, just enough to keep them stable. Place each stone into the trench, pressing them firmly into the soil. As you do, consider adding some soil or sand around the edges to help them settle in nicely. It’s like tucking them into bed, ensuring they feel cozy and secure. And remember, you can always adjust them later if you think something looks off.
Finally, finish off your beautiful stone border with some mulch or gravel around the edges. This not only enhances the overall look but also helps with weed control. Weeds can be like uninvited guests that just won’t leave, right? By adding a layer of mulch, you keep your patio looking neat and tidy while reducing maintenance time.
Using natural stone borders can truly elevate your outdoor space. They provide a simple yet elegant way to offset plants while adding texture and charm. Plus, every time you walk through your garden path, you’ll feel that warm fuzzy feeling of pride, knowing you created something beautiful—all by yourself. And who doesn’t want a little piece of nature right outside their door? Additionally, enhance your landscape with beautiful brick garden edging to further define your garden’s character.
6. Sunken Fire Pit Area
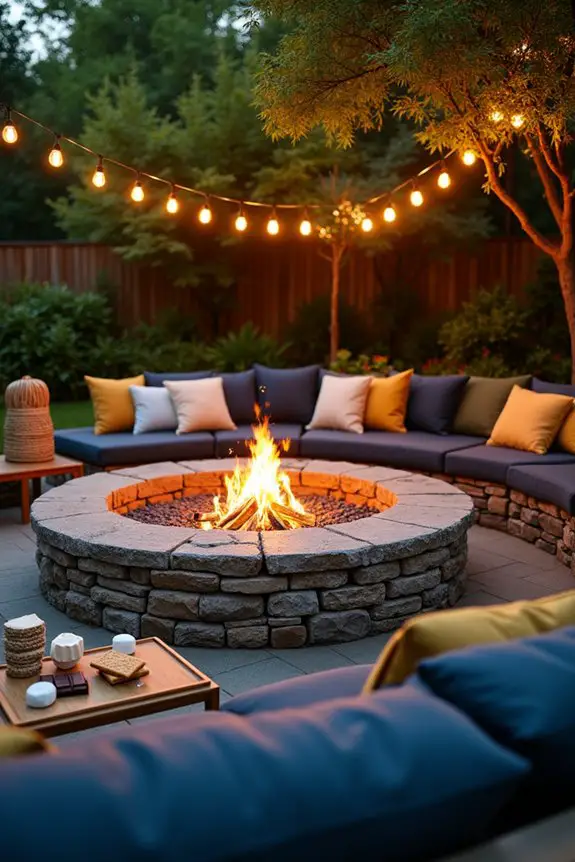
When you think about cozy nights spent under the stars, what comes to mind? A fire crackling away, friends gathered around, laughter filling the air—it’s that perfect scene that can be created in your very own backyard with a sunken fire pit area. This idea works wonders, as it merges functionality with a snug ambiance that really sets the mood. Not only does it provide a safe space for a roaring fire, but the sunken design also invites conversation and intimacy, making everyone feel connected.
Plus, the added elevation around the pit can help shield you from a cool breeze, extending those lovely evenings outdoors just a little longer.
To start designing your sunken fire pit area, first, pick a suitable location in your yard. Ideally, you want it a bit away from trees and structures to guarantee safety and to get a clear view of the sky. I once set mine up too close to my beloved patio plants, and I nearly roasted them a few times with my marshmallow roasting frenzy. Learn from my mistakes—space is essential.
Once you’ve found the perfect spot, begin envisioning the shape of your sunken pit. Don’t be afraid to dream big; whether you want a classic circular design or something more unique (like an irregular hexagon, which I tried unsuccessfully), just go for it.
Next comes the digging part. Grab a shovel and get ready to break a sweat. You’ll want to dig down about 12 to 18 inches, depending on how deep you want your fire pit to be. As you dig, think about creating a gentle slope instead of straight down. This way, you’ll have a comfy spot for cushions and towels later on, not to mention a little more character to your pit.
It’s like making a perfect batch of mashed potatoes: too lumpy or too flat just won’t do, right?
Once your pit is dug out, it’s time to think about materials. You can use bricks, stones, or even concrete blocks to create the walls of your fire pit. I went with a mix of local stones for that rustic vibe—each piece adding its own charm. Start placing the stones at the bottom of your pit first, layering them up to create walls. Use outdoor-safe adhesive (yes, it exists, and it’s a lifesaver) to secure them in place as you go.
Trust me, there’s nothing worse than watching your carefully built walls tumble into the pit like a game of Jenga in slow motion.
Now, you’ll want to think about seating. I highly recommend surrounding your fire pit with comfy chairs or built-in benches that hug the edges. You want to create a space that people can sink into, allowing that homemade s’more magic to unfold. I made the mistake of using my old folding chairs once, and let’s just say they weren’t designed for prolonged sitting—my friends brought their own cushions after that.
Last but not least, don’t skimp on the finishing touches. String lights strung above can turn any space into a charming rendezvous spot. Add some outdoor cushions for comfort, and maybe even provide a few blankets for cooler nights. I always keep mine handy for those surprise chilly evenings.
Nothing beats wrapping up in cozy warmth while you enjoy the flicker of the fire and the company of friends.
There you have it! A sunken fire pit area in your patio can elevate your outdoor space, combining practicality with a warm, inviting vibe. Remember, after all the crafting and digging, it’s all about creating memories. So, go ahead and make that area your own ready for those unforgettable moments.
7. Circular Seating Arrangement
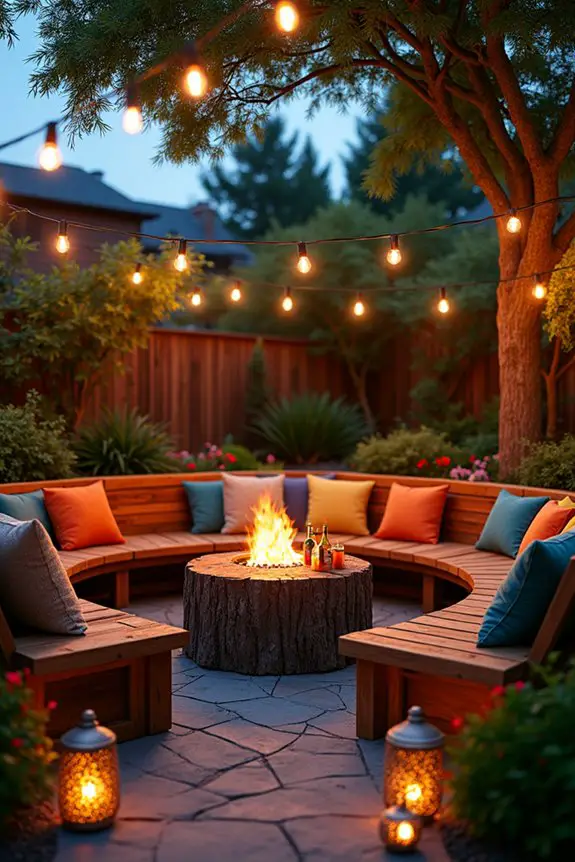
When it comes to creating an enchanting outdoor space, a circular seating arrangement deserves a gold star. This idea not only maximizes functionality, allowing everyone to gather closely around a focal point, but it also fosters a warm and inviting atmosphere. Imagine friends chatting comfortably while enjoying drinks or watching the flames flicker in your sunken fire pit—plenty of good vibes all around. Plus, the circular design subtly encourages interaction, making it easy for everyone to chime in on the conversation.
So, how do you go about crafting that perfect circular seating arrangement? Let’s explore it together. First, decide where your seating area will be located. If you’re near that wonderful fire pit we just discussed, great choice! Next, measure out your space. You want a comfortable circle that allows enough room for people to move freely—think about a 6- to 8-foot diameter if you want everyone to feel cozy without stepping on each other’s toes.
Now, let’s talk about seating options. You could opt for stylish patio chairs that can be moved around as needed, but I highly recommend built-in benches if you want something a bit more permanent. There’s a certain charm to benches, especially when you can cushion them with your favorite outdoor pillows (trust me, nothing beats the support of a well-placed cushion after a long day).
When I initially built my seating area, I thought I was a master carpenter—let’s just say I learned that a level is a necessary tool when building benches. Who knew that a slight tilt could lead to a few awkward moments when guests tried to get comfy?
Once your seating is in place, think about adding a few essentials. A side table is a no-brainer—everyone appreciates a place to set down their drinks and snacks. If you can, choose a table in line with your circular vibe. Got an old tree stump lying around? Sand it down and use that as your table. It’s quirky, rustic, and you best believe it sparks conversation. Just make sure it’s relatively level; nobody wants to experience a tomato sauce mishap during dinner.
Lastly, don’t skimp on the ambiance! String lights draping above your circular seating can transform the entire atmosphere as dusk settles in. I sometimes catch my guests just gazing up at the lights, smiling like kids on a school trip. You can also scatter a few garden lanterns around the edges for added warmth. Who doesn’t love the glow of lantern light dancing across everyone’s faces?
Trust me, with a circular seating arrangement, you’ll have a space that draws people in, allowing connections to flourish while creating beautiful memories. Just keep that cooler stocked, and you’re all set for some unforgettable evenings.
8. Asymmetrical Plant Groupings
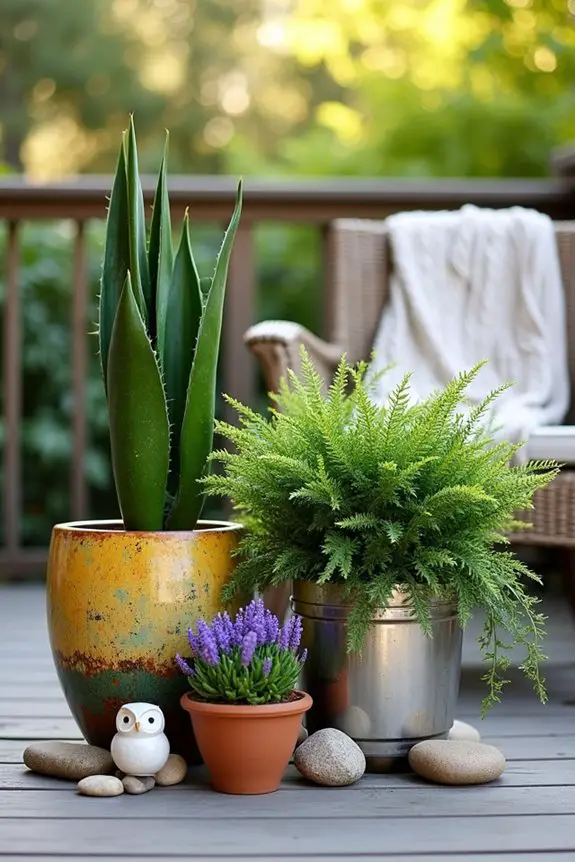
Asymmetrical plant groupings can elevate your patio from ordinary to extraordinary with minimal effort. This design technique not only maximizes visual interest but also encourages a relaxed, organic vibe. Think about it: nature isn’t symmetrical, so why should our gardens be? By mixing and matching different plant heights, colors, and textures, you genuinely create a dynamic space that feels alive, vibrant, and inviting—a perfect backdrop for those lazy afternoons with a good book or that evening glass of wine with friends.
So, how do you go about crafting these delightful asymmetrical plant arrangements? First, gather your favorite pots or planters. I’ve learned the hard way that it’s best to stick with various sizes and shapes; if everything matches perfectly, you kind of lose that fun, free-spirited vibe we’re going for. A quirky ceramic pot might pair beautifully with a sleek metal planter—don’t shy away from mixing materials and styles.
Next, think about your plant selection. Choose a mix of tall, medium, and trailing plants. For instance, a tall, spiky plant like a snake plant or a dracaena can stand proudly next to a bushy fern and trailing ivy. This combo not only creates interest but also provides a nice layer of depth. When I first attempted this myself, I found myself hunched over the selection at my local nursery like it was a treasure hunt, trying to pull together a collection that felt just right.
Placement is where the magic truly happens. Start by anchoring your arrangement with the tallest plant in the back or at one side, then let shorter plants dance around it, radiating out in a way that feels casual yet deliberate. Trust me; it’s all about playing with height and spreading things around in an asymmetrical fashion. A friend once told me that if something feels wrong while you’re arranging, it probably is. So go with your gut, and don’t be afraid to pivot the pots around until they feel just right.
Once you’ve got your plants set up, it’s time to add some little touches that bring it all together. A few stylish garden stones scattered throughout the arrangement or a small decorative figurine can add personality. And let me tell you, I once tried to include a gnome that was supposed to look charming but ended up looking like it was confused about life—sometimes, less is more.
Don’t forget about soil and maintenance! Make sure your plants have ample drainage and are in the right soil for their needs, as that can make or break your gorgeous creation. Water them regularly, and give them some love while you’re at it—after all, the better you care for them, the better they’ll look.
In the end, have fun with your setup. Asymmetrical plant groupings are all about expressing your unique style while inviting a sense of natural whimsy to your patio. So, grab those pots and plants, and let your creativity flow! You might just surprise yourself with the beautiful sanctuary you create.
9. Layered Planting Techniques
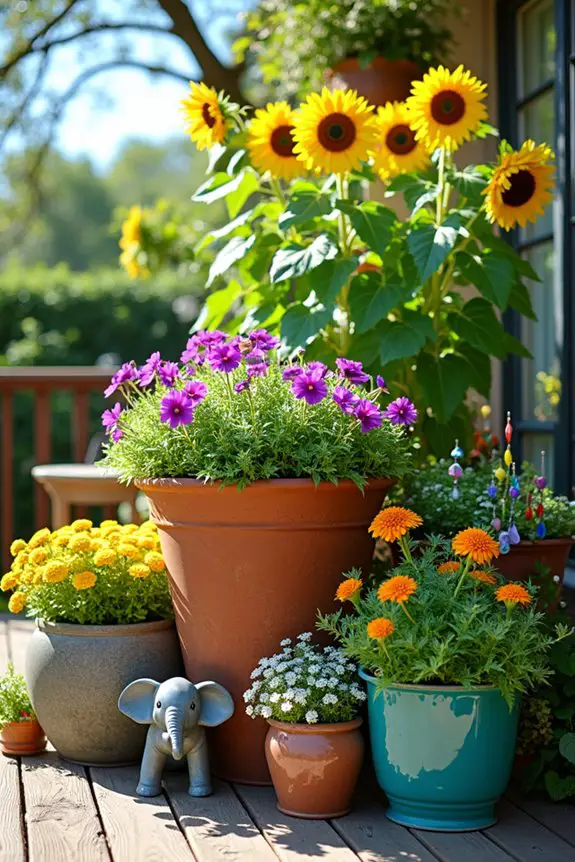
Layered planting techniques are like a secret weapon in your garden design arsenal. They add depth, dimension, and an undeniable wow factor to your patio. Visualize peering into a garden that’s not just a flat patch of greenery but a layered masterpiece that draws you in and makes you want to explore. It’s all about creating a visually stunning scene while maximizing your space and making the most of your favorite plants.
So how do you start layering like a pro? First off, you’ll want to think about your plant heights. A mixture of tall, medium, and low-growing plants is essential. Envision this: grand, tall sunflowers at the back, soft, feathery ferns in the middle, and cheerful ground covers, like creeping thyme, flowing in front. It’s like a garden fashion show where everyone gets to strut their stuff.
When I first tried this, my layout ended up looking more like a messy pile of laundry than a layered garden, but hey, practice makes perfect, right?
Next, consider the pots and containers, which can really amp up your design game. You don’t need to stick to just one type. I mean, who wants a sea of boring? Try tall, geometrically-shaped planters mixed in with shorter, round ones. You can even throw in a rustic wooden box for some organic charm.
Play with textures too. A shiny ceramic pot can be a stunning contrast to a weathered terracotta one. Mixing it up like this keeps your arrangement interesting, and trust me, it reflects your unique style.
Now, placement is where the magic happens, and this is where you can really let your creativity shine. Start with the tallest plants at the back or in the center of a circular arrangement, and let them cascade or peer down at the shorter ones in front. It should feel natural—a little mayhem can actually enhance the look.
I once spent a whole afternoon arranging my plants only to realize I’d put the shortest ones in the back. Oh, the struggle was real. It’s all about adjustment. So, don’t be afraid to lift things up, switch them around, and have fun experimenting.
A little embellishment goes a long way too. Consider using decorative elements to fill in gaps or add a personal touch. A whimsical garden sculpture or a vibrant wind chime can bring your layered design together beautifully.
I once found a quirky elephant statue that made my garden feel like a wild safari—but beware, not all decor matches every theme. Sometimes it’s best to go with something understated rather than that over-the-top flamingo that doesn’t really fit the vibe.
Finally, let’s talk about maintenance. Make sure your plants are comfortably nestled in the right soil for their needs. Layering doesn’t mean neglecting; it just means you’ll need to keep a watchful eye on their watering needs.
Trust me, I’ve learned that plants have a sneaky way of letting you know they’re thirsty—droopy leaves don’t lie.
10. Connected Flower Bed Designs
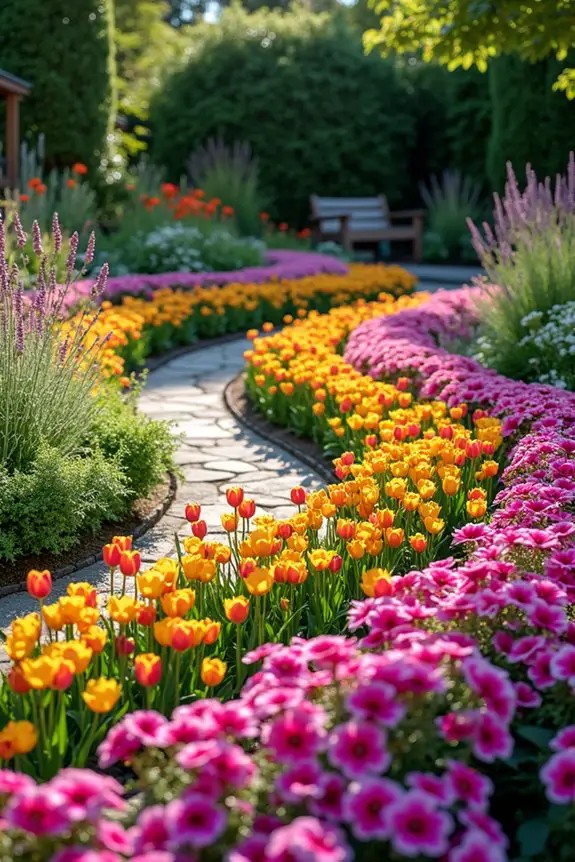
Connected flower bed designs are a game-changer for your outdoor space, blending style and functionality seamlessly. They enable you to create a cohesive look while maximizing every inch of your patio or garden area. Imagine walking out your door and being greeted by a vibrant tapestry of flowers that seem to flow together, each bloom telling a story while complementing its neighbors. It’s this kind of connection that makes your garden feel alive, dynamic, and totally worth showing off.
To get started with connected flower beds, first, reflect on the overall shape you want to achieve. Think of it this way: are you feeling like a curvy, natural silhouette, or do you prefer sleek, geometric lines? I once went for a wild, wave-like design, thinking it would feel like an enchanting beach retreat. Spoiler alert: it ended up looking more like a giant squiggle. Learning from that experience, I now lean towards gentle curves for that organic feel or straight lines for a more polished look.
Whatever you choose, sketch it out if you can—it’s an excellent way to visualize before you dig in.
Next up is plant selection, which is where you can really let your personality shine. Choose a mix of perennials and annuals to guarantee continuity throughout the seasons. I’ve learned to plant some of my favorite flowers in clusters for a bold impact—like a vibrant explosion of petunias here, followed by cheerful daisies there. It’s like arranging a bouquet in the ground, and who doesn’t want that?
Height and color are essential parts of this design. Arrange taller plants in the back or center with shorter ones flanking them, then sprinkle in some low-growing plants at the front to create that layered look we talked about earlier. Each time I do this, I feel like a garden maestro, conducting a beautiful floral symphony.
Now, let’s chat about some practical tips for connecting those flower beds. Use edging materials like stones or bricks to give each bed a defined boundary—this not only looks great but helps keep your soil in place. You might want to create paths between the beds for easy access, especially when the blossoms bloom into a chaotic riot that you’ll want to maintain without getting lost in a maze of petals.
I once stumbled into my own flower bed while trying to retrieve a trowel, which was quite the laughable moment—flowers weren’t the only things being uprooted that day.
Don’t forget to reflect on the theme and colors to guarantee everything flows beautifully. Are you aiming for a whimsical garden, or perhaps a sleek modern vibe? Mixing styles can be fun, but it might lead to some unexpected clashes, much like wearing stripes with polka dots. Choose a palette that resonates with you, and stick to it. Trust me, after trying an unpredictable color scheme, I realized that sticking to one or two similar shades gives a more polished appearance.
Lastly, always remember to enjoy the process. Gardening can be messy and unpredictable, but that’s part of the charm. When you step back and see your connected flower beds thriving, it’ll give you that warm, fuzzy feeling as though you’ve created your own slice of paradise.
I still chuckle thinking about my earlier mishaps in the garden, but now each bloom feels like a victory. So grab your trowel, roll up those sleeves, and get to planting—it’s all about creating that connected, vibrant atmosphere that invites a little sunshine into your life.
Garden Maintenance Strategies
Keeping your garden looking its best doesn’t have to feel like a full-time job—trust me, I learned that the hard way after spending one entire weekend pulling weeds like a contestant on a reality show.
To keep things simple, set aside just a few minutes each week for quick checks. Grab a cup of coffee and stroll around, pruners in hand. You can snip away brown leaves or dead flowers, making instant improvements.
Set aside a few minutes each week to stroll through your garden, snipping away brown leaves for quick, effortless improvements.
And don’t forget about mulch; it helps prevent pesky weeds and retains moisture.
Think about how garden decor ideas can make maintenance easier too—using decorative rocks instead of barren soil is visually pleasing and practical. A little planning goes a long way, and before you know it, you’ll be enjoying your oasis, effortlessly.

