Did you know that well-designed garden borders can increase your property value by up to 15%? That’s pretty impressive for just a dash of creativity. Whether you’re a novice who thinks gardening means yelling at weeds or a seasoned pro who’s just tired of looking at the same old fence, there’s something here for you. Curious about how simple stones and whimsical sculptures can transform your landscape? Let’s explore some fresh ideas that can turn your yard into a paradise.
Unique Border Patterns
Ready to jazz up your garden with some eye-catching border patterns? Think colorful stone arrangements that pop against green grass, or how about integrating pathways that lead the eye all around your yard?
With ideas like natural wood edging or bold geometric shapes, there’s no shortage of creative ways to frame your floral masterpieces and make your garden the talk of the town.
1. Colorful Stone Arrangements
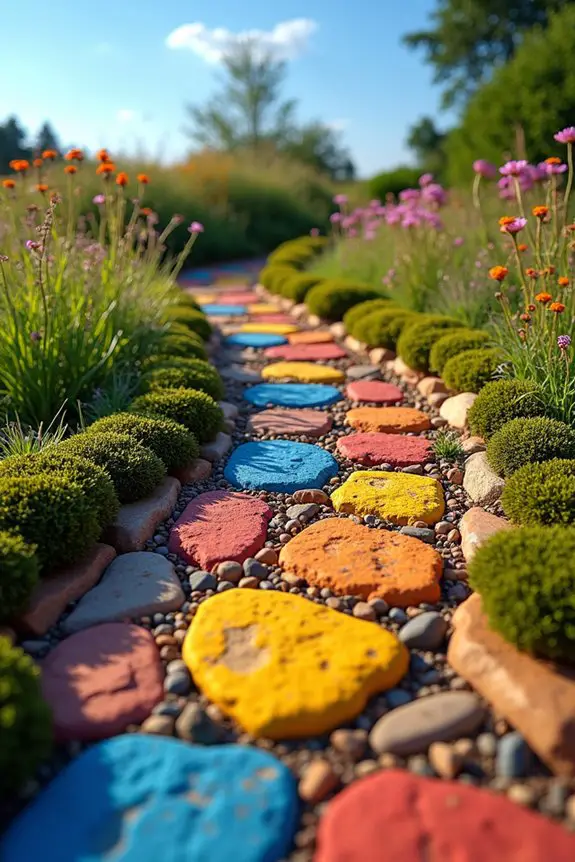
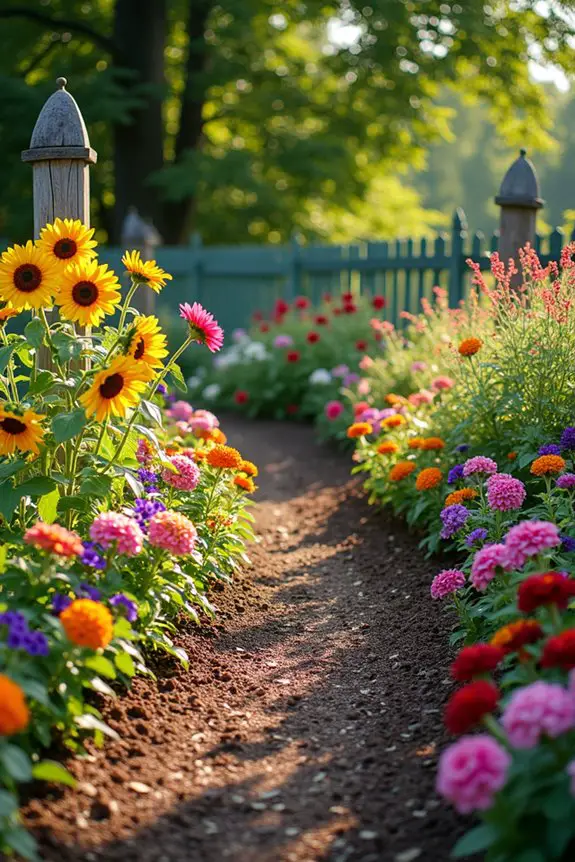
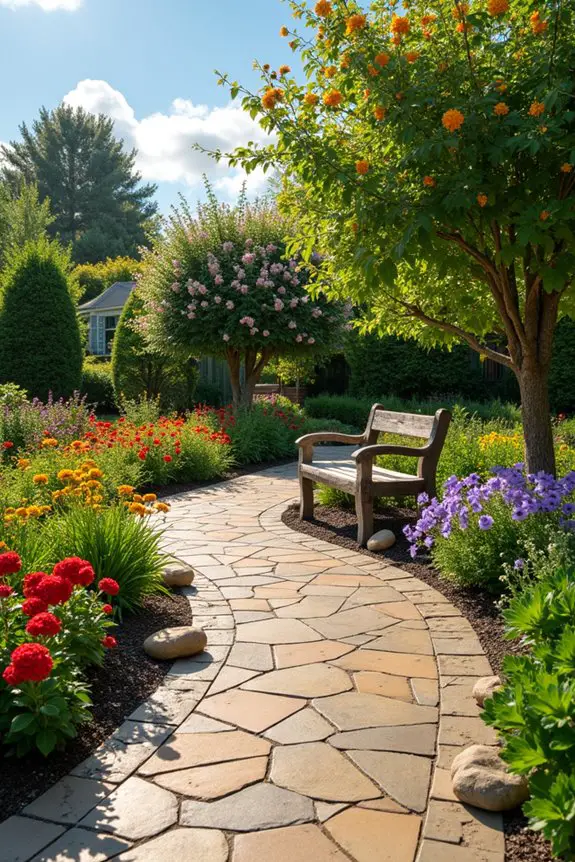
Creating a garden border with colorful stone arrangements can transform your outdoor space into a vibrant masterpiece. Not only does it serve a practical purpose by defining different areas of your garden, but it also adds a visually appealing element that invites exploration. Imagine strolls through your garden, where each turn brings a new burst of color that matches your style.
So, how do we get started? First, gather your materials. Think about using stones in various sizes and hues. A mix of deep reds, sunny yellows, calming blues, and earthy browns works wonders. If you’re anything like me, you might’ve a pile of interesting rocks you’ve collected over the years. Dust them off and bring them back to life!
Next, sketch out a simple design on paper. Don’t worry if you’re not Picasso; a rough draft will do. Consider arranging the larger stones in the back to create a tiered effect, with smaller rocks in front for depth.
Curvy lines can give your border a soft, inviting feel. You want it to be interesting, like a good plot twist in a book—unexpected but satisfying.
When it comes to laying them down, think of it like puzzle pieces. It’s easy to change and swap until you find the perfect arrangement that feels right. Channel your inner artist; move those stones around like you’re performing a delicate dance.
Lastly, don’t forget to secure your stones. A little bit of gravel or soil can help hold them in place. Trust me, you don’t want them rolling away when someone strolls by for a closer look. You’ll thank yourself later—no more awkward “Oops, where did that stone go?” moments.
And there you have it—a playful, vibrant border that not only enhances your garden but gives your outdoor space a personality of its own.
Now, take a step back and admire your handiwork. Doesn’t that just make you want to plan a garden party? Be honest; I’m sure your neighbors are already eyeing your colorful creation with envy.
2. Pathway Integration Techniques
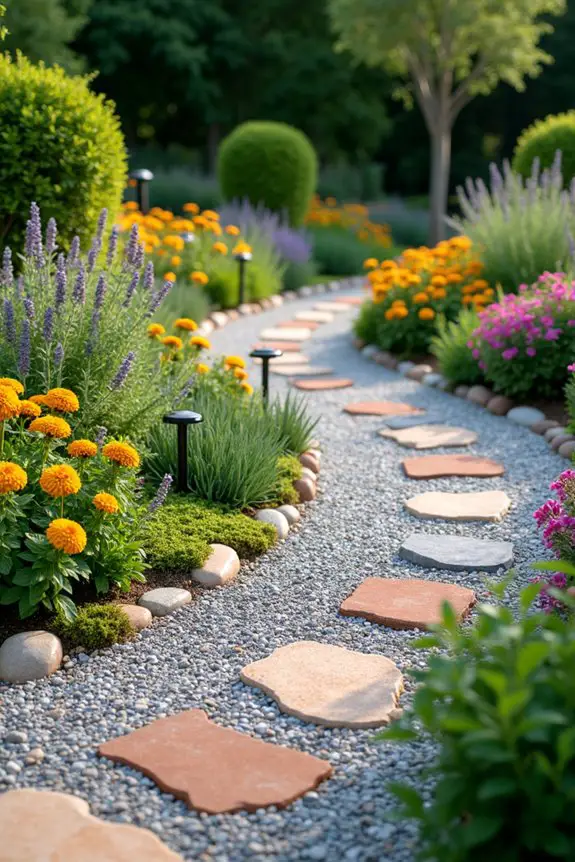
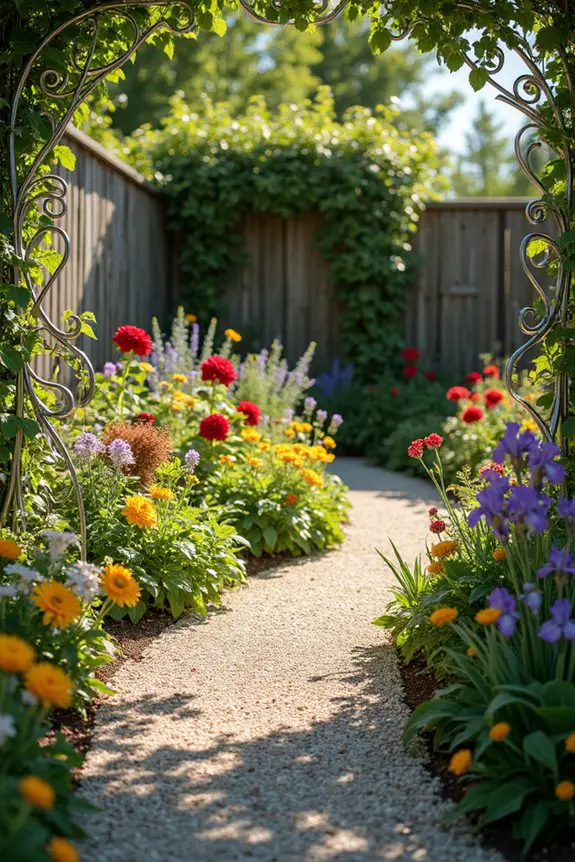
Integrating a pathway into your garden border design isn’t just smart; it’s like inviting your guests on a little adventure through your outdoor paradise. Envision a winding path beckoning them to take a stroll, all while your colorful stone borders create a striking frame. It enhances the look and serves the practical purpose of guiding footsteps—essential for those of us who might trip over our own excitement.
So, how do you create unique border patterns that blend seamlessly with your pathways? Start by thinking about the shape. Curvy pathways create a relaxed vibe, while straight paths give it a more formal touch. You can mix and match—yes, you can! Imagine this: a gentle curve bordered by those lively stones we just talked about, paired with some straight sections that provide an urban feel. It’s like wearing sneakers with a fancy dress—unexpectedly chic.
As you layout that pathway, consider inserting stones at intervals along your borders to break up the visual. It’s like the garden version of adding a splash of color to an outfit. You want to verify that your stones are proportionate to the pathway’s width; you wouldn’t want a giant boulder stealing the show from your perfectly laid gravel path. Trust me; you’re going for harmony here, not chaos.
Now, here’s a fun tip from my own gardening trials: think layers. If your path is slightly elevated, opt for taller stones at one end and gradually decrease the height towards the other. It’s like a little fade effect—only instead of hair, it’s your garden getting the stylish treatment. Additionally, having the right tools can greatly improve your gardening experience and ensure your borders are well-maintained. Solar lights can beautifully accentuate these pathways and illuminate your garden during the evening hours.
And don’t worry about placement being perfect. Remember, nature is all about imperfection, and your garden should be no different.
Once you’re satisfied with your unique border patterns, step back and appreciate the blend of colors and textures. You’ll feel like a garden designer—even if your only prior claim to fame was that solo tomato plant you managed to keep alive.
3. Natural Wood Edging Ideas
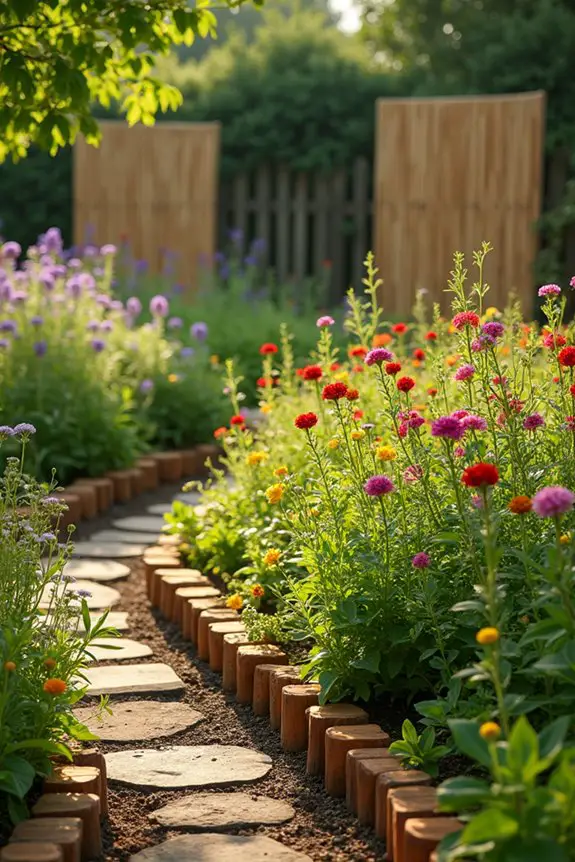
When it comes to garden borders, using natural wood edging can elevate your garden design while also keeping things rustic and charming. It’s like adding a cozy blanket to your favorite chair—it just makes everything feel a bit more inviting.
Wooden borders not only delineate your spaces; they also add warmth and a natural vibe that blends beautifully with your lush greenery.
So, how do you incorporate wood edging into your garden? First off, think about the type of wood you want to use. Untreated cedar or redwood is ideal, as they’re naturally resistant to decay.
I once made the mistake of using regular softwood, and let me tell you, it didn’t end well. A few months in, the wood turned mushy, looking more like soggy bread than a garden border. Not a good look.
Next, consider the height of your wood edging—this is key. Low borders work wonders for defining flower beds, while taller pieces are perfect for raised beds or even as a barrier against pesky critters.
Imagine a sturdy piece of wood that stands about six inches tall, keeping out all those garden knuckleheads (like rabbits and raccoons) without being too intense. It’s all about setting boundaries, but in a nice way.
Now, here’s a little tip from my own gardening escapades: if you’re feeling fancy, try staggering your wood pieces or alternating between thick and thin sections. It’s like building a fun puzzle with your garden—it can make things visually exciting.
Plus, I’ve found that this kind of playful approach can turn a simple garden border into a storybook experience, inspiring imaginary woodland creatures to come visit (or maybe that’s just my wishful thinking).
And don’t worry if things don’t look perfectly straight—nature isn’t exactly a “perfect geometry” kind of place, and neither should your garden be. Embrace the dips and rises; they add character. To complement your wooden borders, consider adding reed garden fence screens, which can further enhance the charm and privacy of your outdoor space.
4. Floral Mosaic Inspirations
Floral mosaic designs are a whimsical and enchanting way to create borders in your garden. Not only do they add a splash of color and cheer, but they also serve a practical purpose by keeping your plants neatly contained. Think of it as framing a beautiful painting—it enhances the beauty of what’s inside while adding a unique flair of its own.
To create a stunning floral mosaic border, start by selecting a variety of flowers and plants with different colors and heights. This adds layers and visual interest to your garden. I once ended up with a garden so colorful that even my neighbors jokingly asked if I’d summoned a rainbow. Classic.
When choosing your flowers, consider their blooming seasons to guarantee long-lasting visual appeal. Mix perennial and annual plants to keep your design blooming year-round.
Now comes the fun part—arranging your floral pieces! Consider creating a pattern or a flow that guides the eye around your garden. You might try a zig-zag or spiral layout. Maybe you want to create a flower “dance party” where taller plants go in the back and shorter ones in the front. It’s like setting your garden up for a grand gala.
Just remember to leave room for growth; plants can be a bit like teenagers—full of surprises and sprawl.
Don’t stress if things don’t match up perfectly. Nature has its own set of rules, and a little chaos can add character. I once tried to create a perfectly symmetrical arrangement only to find that my plants had other plans. They grew wild and free, reminding me that gardens, like life, are best when they embrace a little unpredictability.
So, when designing your floral mosaic, allow for some whimsy and spontaneity. Additionally, incorporating decorative garden obelisks into your landscape can further enhance the visual interest and structure of your floral arrangement.
In the end, a floral mosaic border turns your garden into a vibrant and inviting space. It’s like walking into a living canvas every day, making it the perfect backdrop for those lazy afternoons spent sipping tea or pondering life’s mysteries.
Trust me; you’ll want every neighbor and friend to see your floral masterpiece, if only to hear them say, “Wow, I didn’t know you were such a garden artist.”
5. Geometric Shape Compositions

Geometric shapes can add a modern twist to your garden borders, breaking the mold of traditional floral arrangements. Think of it as giving your outdoor space a stylish haircut. Not only do geometric patterns guide the eye and create structure, but they also help define spaces, making your garden feel organized and chic—even when it’s just a patch of dirt and weeds you’ve been trying to tame.
To start, consider using shapes like circles, triangles, or squares in your plant arrangements. For a circle, plant low-growing flowers or ground covers in a ring around taller plants in the middle. It’s like a garden hug, showcasing your centerpieces while keeping everything cozy.
Want something a bit sharper? Go for triangles! Arrange plants in a staggered fashion that creates a zig-zag effect along the border. It adds energy, making your garden feel a little more alive and a lot more playful.
Now, maybe you’re wondering about materials. Don’t worry; you don’t have to break the bank. Use bricks, pavers, or even repurposed wood to create your geometric shape outlines. I once used old tiles I found at a garage sale. It ended up looking like a funky patchwork quilt—definitely a conversation starter, even if I went a little overboard on the design.
Just be sure to secure your shapes well so they don’t shift around like my attempts at a yoga routine. Brick garden edging can provide a sturdy and attractive framework for your geometric borders.
And here’s the best part: You can adjust your layout seasonally. Swap out plants as they bloom or wither, allowing you to keep that fresh, modern look going all year round. Want to try something completely different? Mix in some ornamental grasses for added texture—they sway beautifully in the wind, bringing an extra layer of movement to your composition.
Creating a geometric shape composition is like crafting an architectural masterpiece—well, if that masterpiece had flowers and butterflies all around, of course. So get out there, have fun, and don’t forget to show off your unique style when friends come over. Who knew borders could be this much fun?
6. Vertical Plant Stacking Techniques
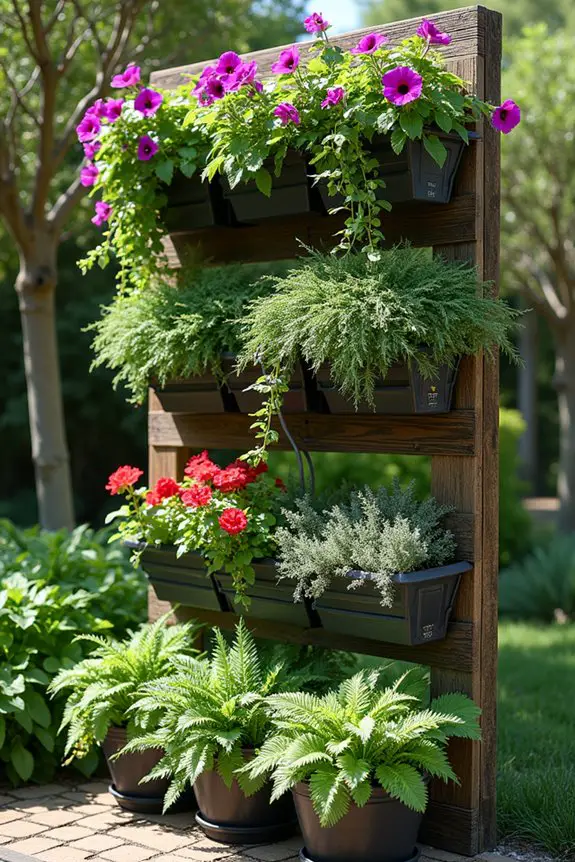
When it comes to garden borders, vertical plant stacking techniques can really turn up the volume on your outdoor space. Imagine adding layers to your garden, like a delicious, multi-tiered cake. Besides being visually appealing, this approach optimizes space, making your garden feel lush without going overboard on square footage.
Plus, it creates a stunning backdrop that can change the entire mood of your yard.
To get started with vertical stacking, think about using planters or boxes. You can stack them up on a ledge, build a tiered system, or even hang them from a sturdy trellis. For example, if you have a small area, a ladder-style planter can make a great focal point.
It allows you to display a variety of plants—maybe some flowering beauties at the top, cascading greenery in the middle, and fragrant herbs at the bottom. It’s like a plant family reunion, where everyone gets their place in the sun!
Plant selection is essential here. Opt for trailing plants, like English ivy or petunias, for those that hang down, while larger, bushier plants like ferns or small shrubs can serve as your tall, proud guardians at the top.
I’ve made the mistake of throwing in too many unexpected friends without considering their height—let’s just say my poor geraniums had a tough time reaching for the sunlight.
Watering can get a little tricky with stacked plants. Just remember to check the moisture levels, as the top layers might dry out faster than the ones below. A simple drip irrigation system can help maintain the whole stack without requiring you to turn into a contortionist trying to reach the back.
Creating vertical plant stacks is like designing a vertical garden; it invites creativity and whimsy into your outdoor haven. It’s all about making efficient use of space while giving your garden that eye-catching flair.
7. Seasonal Color Coordination
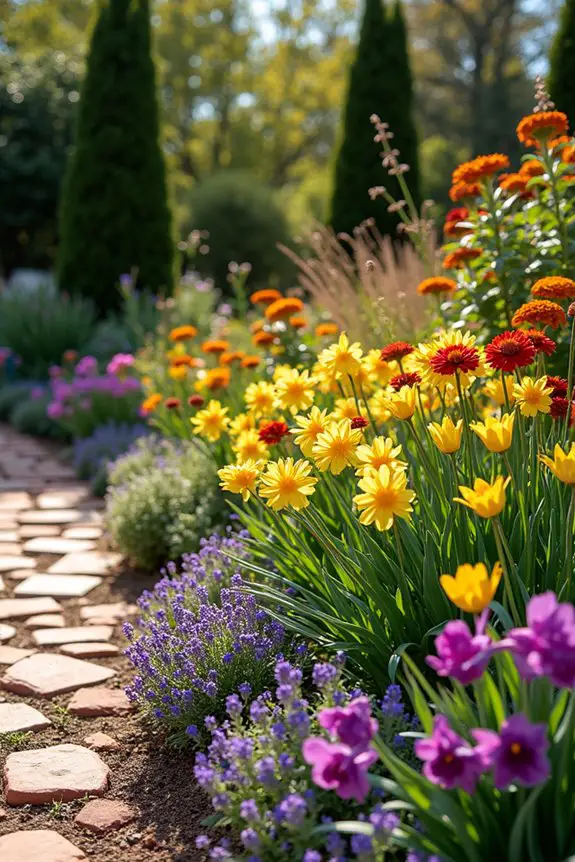
When it comes to creating a stunning garden border, seasonal color coordination can really elevate the aesthetic! Just like a well-planned meal, where every dish complements each other, selecting plants that bloom in harmony through the seasons adds not only beauty but also a delightful rhythm to your outdoor space.
Imagine the way colors change and flow from spring to summer, and into autumn. It brings life, vibrancy, and that warm fuzzy feeling that makes you want to cozy up in your garden.
Start by choosing plants that bloom at different times of the year. You’ll want some early risers like daffodils and tulips for a cheerful spring start. As those bloomers fade, make way for stunning summer stars like zinnias and marigolds that bring heat and brightness. Then, as fall rolls around—hello, those golden-hued chrysanthemums and ornamental grasses—your garden will still put on quite the spectacle.
Think of it as a colorful curtain call, with each group taking their turn in the spotlight.
Now, let’s talk about patterns. You can mix shapes and sizes to create rhythm; imagine a swirling pattern of colors where the tall sunflowers stand proud behind the low-growing pansies, or a wavy line of reds and yellows that carries your eye through your garden.
Just be cautious not to go overboard—believe me, I once ended up with such a chaotic mix that my neighbor joked it looked like a paint bucket exploded in my yard. Lesson learned: cozy chaos is fun; wild chaos is not.
To keep your border looking fantastic, it’s crucial to plan for upkeep. This means rotating out certain plants as they finish blooming, so you always have something at its peak. And don’t forget about foliage—the leaves can bring depth and contrast, even when the flowers have taken a break.
Incorporating evergreens ensures that even in winter months, your garden remains vibrant in its way.
Incorporate a few whimsical elements too—like colorful garden ornaments or decorative stones placed strategically to enhance the color scheme. After all, a little quirkiness can add personality to your space.
8. Innovative Lighting Concepts
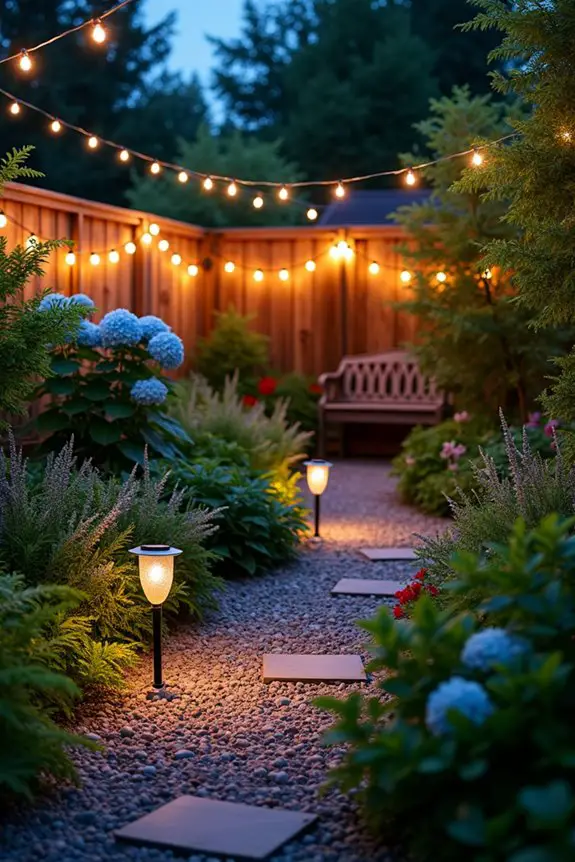
When it comes to enhancing your garden borders, innovative lighting concepts can truly transform your outdoor space from ordinary to extraordinary. Think of it as adding the perfect seasoning to your favorite dish—it elevates everything and sets the mood. By incorporating well-placed lights, you can highlight unique patterns and designs in your garden, adding a magical ambiance that draws you in, whether it’s day or night.
To start, consider using string lights. These little gems can be draped along the top of your garden border, creating a cozy glow that feels inviting. Envision this: a soft twinkling that brings a whimsical touch to your evening gatherings, making your garden the go-to spot for friends and family. You might even feel like a fairy godparent, as the lights gently bathe your space in warmth.
Just remember to keep the spacing even—trust me, an uneven string light setup can feel like a bad haircut; you never quite forget it.
You could also think about solar path lights. These aren’t just functional, helping to guide visitors and keep nighttime mishaps at bay, but they can add flair too. Choose lights with unique shapes or colors to complement the plants you’ve lovingly paired together. Imagine a glowing orb peeking through your lush ferns—it’s a sight that can make anyone stop and say, “Wow.”
And the best part? They’re eco-friendly and save you from the clutter of extension cords, which can sometimes feel like an unwanted guest that overstays their welcome.
Another fun idea is to use spotlights to accentuate specific areas, like a beautifully shaped bush or a vibrant flower. I once spotlighted a hydrangea that I thought would make a statement…and it didn’t disappoint. The light made it almost look like it was glowing, and people couldn’t help but admire it.
Just be careful not to overdo it; too many spotlights can turn your garden into a scene from a bad horror movie. Aim for balance—after all, subtlety can be key in creating an inviting atmosphere.
For a bit of artistic flair, you can even use colored filters over your lights, casting playful shades onto your plants. Picture your border aglow in soft purple one night and golden yellow the next, creating a dynamic display that keeps up with your ever-changing moods.
Just remember, with great power (or colors) comes great responsibility; moderation is your safety net here.
9. Textured Concrete Borders
When it comes to adding a unique flair to your garden, textured concrete borders can be a game changer. These borders not only define your garden space, but they also add layers of visual interest. It’s like dressing your garden in a stylish outfit, providing a solid foundation while making a statement! Plus, concrete is durable enough to withstand the elements, saving you from the heartbreak of frequent repairs.
Creating textured concrete borders is easier than you might think. First, decide on the shape and size of your border. Do you want wavy lines for a whimsical look, or straight edges for a more modern vibe? Imagine how it will frame your plants as you sketch it out; it’s like planning the best seating arrangement for a dinner party—it’s all about making the right connections.
Next, gather your materials. You’ll need concrete mix, water, a trowel, and some fun tools to create texture. This could be anything from a sponge to stamps—yes, those art supplies sitting in the garage can finally see some action. Mix the concrete in a bucket, following the instructions on the package. It’s like making the perfect pancake batter; you want it smooth but not too runny.
Once your concrete is mixed, pour it into your chosen shape. Use the trowel to spread it evenly and fill the edges. Now for the fun part: texturing. Before it dries, use your tools to create designs. I once tried a leaf imprint and ended up with something resembling a dinosaur footprint, but hey, at least it sparked some conversation.
After the concrete has set—usually 24 to 48 hours, depending on the weather—you can paint or stain it for a pop of color, or leave it as is for a more natural finish. Being the creative genius I think I am, I painted mine bright green, only to realize it looked more like a giant lime than a garden border. Lesson learned—sometimes less is more.
Finally, place your textured concrete borders around your garden. Step back and admire your work. It’s like the grand reveal of a cookbook; you can’t wait to see how it all came together. So, grab a cool drink, invite some friends over, and let them revel in the beauty of your garden’s new standout feature.
10. Bespoke Metal Sculpture Borders
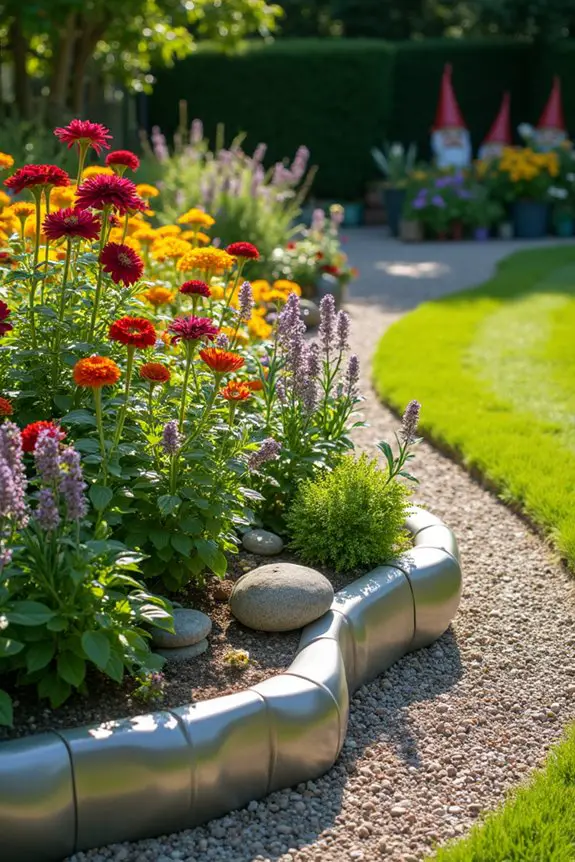
When it comes to adding style to your garden, bespoke metal sculpture borders are a brilliant choice. Not only do they set clear boundaries around your flower beds or pathways, but they also inject a sense of artistry that turns ordinary spaces into extraordinary ones. Think of them as the bold statement jewelry of your garden—elegant and eye-catching without being over the top.
To kick things off, think about the design you want. Do you dream of a sleek, modern look with geometric shapes, or are you leaning towards something more whimsical that resembles nature? Envision this: a swirling vine pattern that dances around your roses. It’s like decorating a cake—there’s no limit to how creative you can get. Just remember to sketch it out first; trust me, having a plan can save you from some regrettable decisions (like the time I tried to sculpt a giant flamingo and ended up with a metal pigeon).
Now, onto materials. You’ll need some metal sheets—the heavier gauge, the better for durability—metal cutting tools, and a welding machine if you’re feeling brave. If welding isn’t your thing, consider seeking out local artisans or metalworks that can bring your vision to life. I once thought I could DIY this all and, well, let’s just say my neighbors were “entertained” watching me struggle.
Once you have your materials, it’s time to cut and shape them according to your design. Take your time here, as precision matters. If you’re working on intricate details, a steady hand is key—not like the time I tried to paint my nails and got more polish on my fingers than the actual nails. Just think of it as art in progress.
After your pieces are shaped, it’s time for assembly. Use metal screws or welding to connect your sections, making sure everything is secure. Having a friend lend a hand can make this part much easier—metal doesn’t play nice when it’s solo. Plus, there’s a certain joy in sharing the satisfaction of building something with someone else.
Once your sculpture borders are ready, the big reveal comes when you install them in the garden. Carefully position them to frame your plants and paths. Stand back, take a deep breath, and admire your creation. Like hitting the right note in a song, there’s a thrill in seeing your vision come to life. And who knows? You might just inspire a neighbor to up their garden game, too.
Maintenance for Lasting Borders
Taking care of your garden borders might sound like a chore, but it can actually be quite satisfying. Think about it—what could be better than nurturing those beautiful edges you’ve created with your favorite garden border ideas?
Regular weeding is a must; trust me, nothing ruins a chic border like a rogue dandelion sneaking in. Use mulch to keep the moisture in and those pesky weeds out.
You’ll want to re-check your borders seasonally, making sure everything’s nice and tidy. Trim back overgrown plants to maintain shape; it’s like a haircut for your garden.
And don’t forget to refresh your soil. It’s like giving your borders a nutrient boost. After all, happy plants make for happy borders, right?

