So, you’ve got a front garden space that needs some love. Where do you even start? You’ve got a million ideas swirling in your head, right? You want it to be vibrant, inviting, and maybe even a little quirky, but how can you pull that off without breaking the bank or turning into a gardening guru overnight? Let’s explore some unique design ideas together that’ll transform your dull patch into a stunning visible hug, just waiting for that first impression.
Top 10 Garden Essentials
When it comes to sprucing up your front garden, having the right essentials can make all the difference. You’ll want sturdy garden tools, like a spade and shears, for those unexpected nature battles—trust me, weeds can be fierce.
Next, consider quality soil and mulch; they’re the backbone of your plants’ success.
Don’t overlook a watering can or hose; keeping your greenery hydrated is key.
Decorative stones or garden art adds personality, making your space a little slice of you.
Pathways or stepping stones are perfect for guiding guests (and avoiding muddy shoes).
And finally, garden gloves—because let’s be honest, no one enjoys dirt under their nails.
With these essentials, you’re well on your way to fabulous front garden ideas.
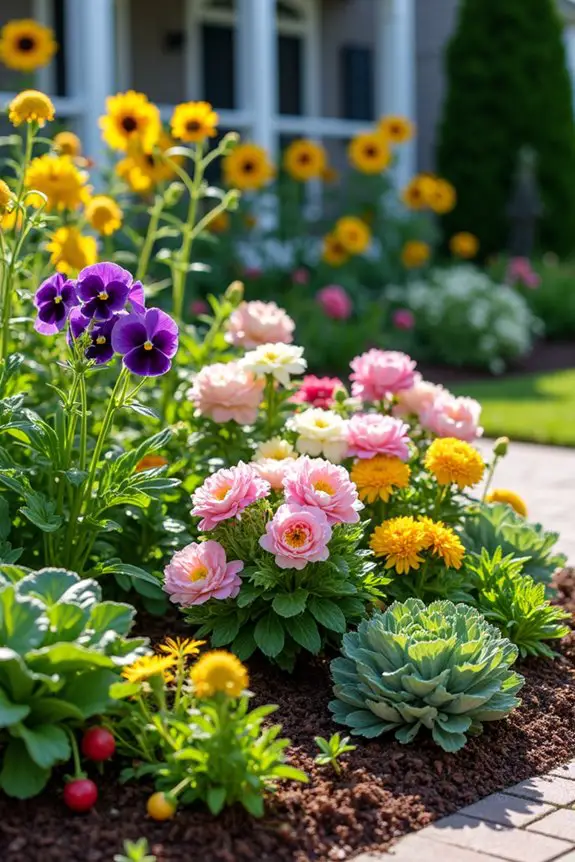
1. Flower Bed Arrangement Ideas
When it comes to front garden flower beds, finding the right arrangement can truly elevate your home’s curb appeal. Not only does a well-planned flower bed bring beauty and character to your space, but it also offers a practical way to showcase colors and textures throughout the seasons. A burst of blooms can set the tone for a warm, inviting atmosphere that makes anyone feel welcome. Additionally, using liquid plant food can boost your flowers’ growth and vibrancy, ensuring they flourish throughout the season.
Elevate your home’s curb appeal with a stunning flower bed that showcases vibrant colors and inviting blooms year-round.
To create a stunning flower bed, start by choosing the right location. Do you have a sunny spot or a shady corner? Check how much light your plants will get—this can really make or break your flower bed.
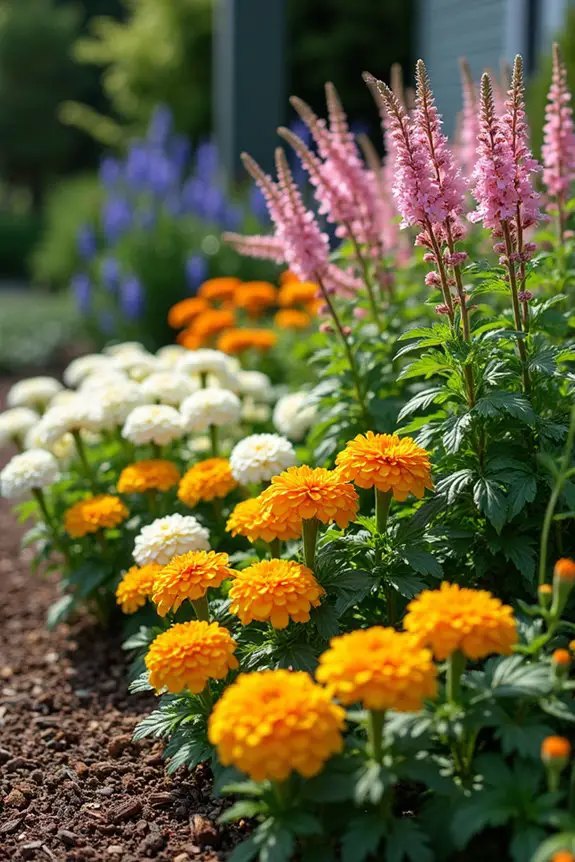
Once you know the light conditions, select flowers that thrive in that environment. For sun-loving spots, try vibrant marigolds or cheerful daisies; in shadier areas, you can’t go wrong with hostas or astilbes.
Next, consider height and layering. I’ve learned the hard way that having taller plants at the back of the bed and shorter ones in front is key. It’s all about ensuring every flower gets to shine and that none are overshadowed—literally!
Think about creating a “color wheel” effect, mixing different hues and harmonizing shades for a pleasing visual impact. And don’t shy away from mixing foliage with flowers for added texture.
Plant in odd numbers, like three or five, to create a more natural look. I know it sounds counterintuitive, but trust me on this one. Odd-numbered groups give a more organic vibe, like a happy little garden accident.
Spacing is important too—each plant should have enough room to grow so they aren’t squished together in a leafy struggle for sunlight.
Finally, keep maintenance in mind. I’ve spent more weekends than I’d like to admit weeding and pruning, so look for low-maintenance options if you’re not up for a gardening marathon. Using organic fertilizers, such as organic fertilizer pellets, can also help promote healthy growth in your flower beds.
And remember to mulch—this not only keeps your flower bed looking tidy but helps with moisture retention. So, grab your spade, throw on those gloves (because indeed, dirt isn’t a fashion accessory), and start planning your flower bed arrangement that’ll make the neighbors turn a little green with envy.
2. Decorative Pathway Designs
Let’s explore some decorative pathway designs that will have your guests admiring your garden instead of just their shoes.
To start, reflect on the materials. Bricks, stones, gravel, or even wood can all create unique looks—rustic charm, modern sleekness, or something in between. A garden pole pruning saw can be a helpful tool for trimming any overgrown plants along your pathway, ensuring your design remains clear and inviting.
If you’re aiming for a cozy cottage feel, try using irregularly shaped stones for that organic vibe. Want something more contemporary? Sleek, linear pavers might be just the ticket. Trust me; the material sets the mood.
Now, contemplate the shape of your pathway. Straight paths can seem formal and neat, while curved paths invite curiosity, leading visitors on a little adventure.
Picture it: you stroll along a winding path, surrounded by blooming flowers and fluttering butterflies. Doesn’t that sound dreamy? When creating your pathway, sketch out your design first. You wouldn’t build a Lego castle without a plan, right?
Next, let’s talk about width. A comforting, wide pathway feels welcoming, while a tight, narrow one may make you feel like you’re about to squeeze into an elevator with too many people.
Aim for at least three feet wide if you hope to walk two people side by side. If you’re decorating for a gathering, make sure you have the space.
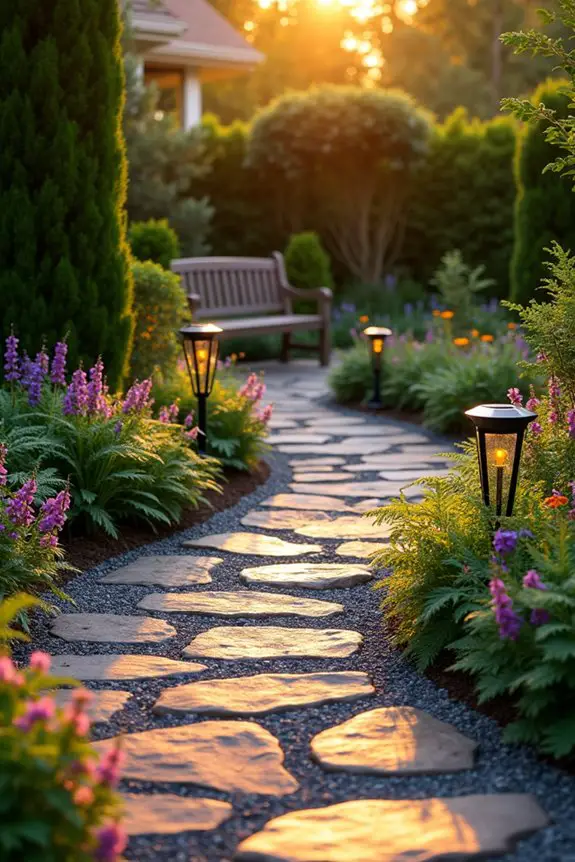
And let’s not forget lighting! Soft, ambient lights along your pathway can create a magical environment in the evening.
Solar-powered lights are an easy and eco-friendly option—just stick them in the ground, and you’re good to go. They’ll magically illuminate your garden as if fireflies decided to throw a party in your front yard.
Before your garden becomes the scene of a fairy tale, remember to reflect on planting too. Think about lining the path with low-growing plants or colorful flowers. It brings life to the path, harmonizing nature with your design.
Before you start digging, take a moment to reflect on the upkeep. If you’re not keen on spending your weekends battling weeds, go for materials that will provide good drainage and won’t get muddy during rainy seasons. A rain barrel stand can help collect water for your plants, making upkeep easier.
I learned the hard way that gravel can end up everywhere unless contained properly with garden borders or edging. Think of it as a stylish moat around your garden kingdom.
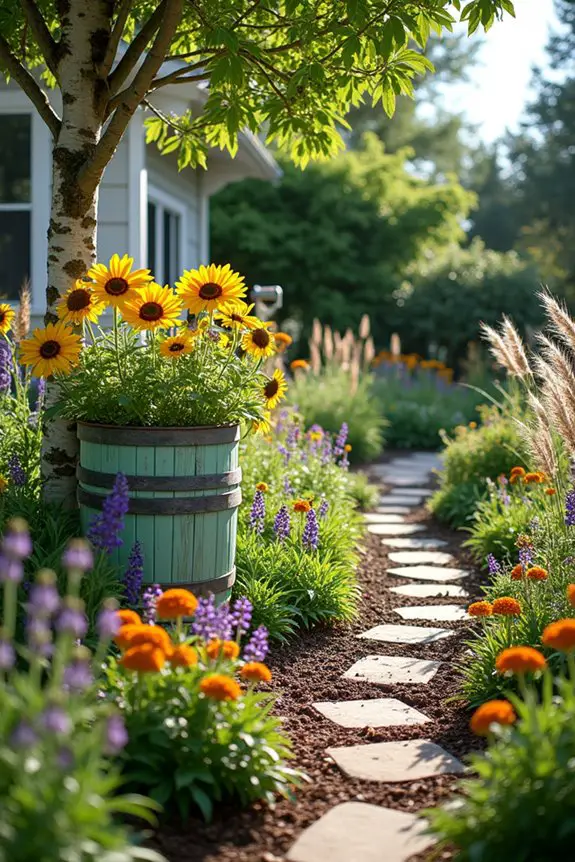
3. Colorful Container Gardens
Alright, let’s immerse ourselves in the vibrant world of colorful container gardens. If you’re short on soil space or just want to add a dash of pizzazz to your front yard, this is the way to go. Imagine this: blooming flowers, lush greenery, and eye-catching pots placed strategically around your entrance. It’s like dressing your home in its Sunday best without having to commit to a lawn makeover.
Plus, container gardening gives you the flexibility to change things up each season, which is a huge bonus when you crave variety.
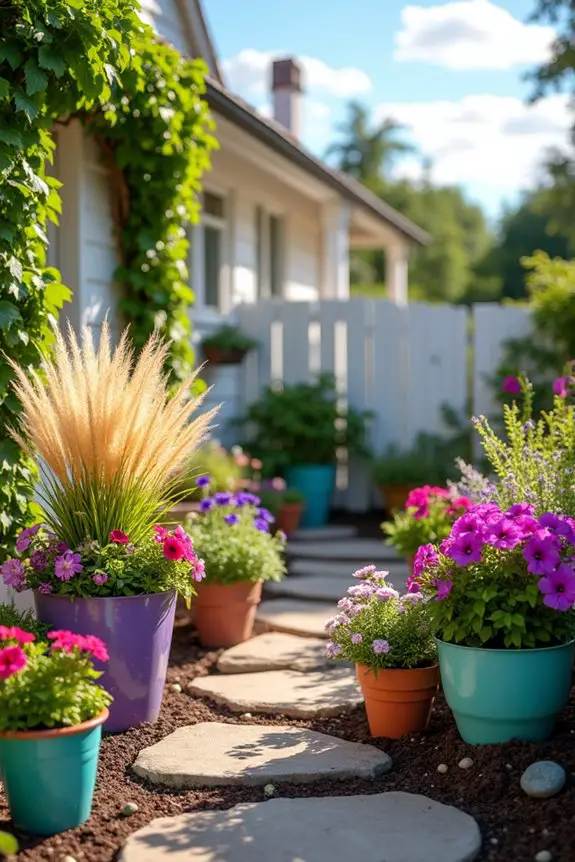
To create a colorful container garden, first, you need to choose your pots. Go bold with bright, patterned containers that match your home’s exterior or pick classic terracotta for a rustic charm. Here’s a handy tip: make sure your pots have drainage holes. Otherwise, you’ll end up creating a little swamp, and let me tell you, no plant wants to live in that. Trust me, I’ve learned the hard way—turns out, no one appreciates a waterlogged basil plant.
Next comes the fun part: selecting your plants. Combine different sizes, shapes, and colors to create visual interest. Think tall grasses paired with cheerful petunias or trailing vines mixed with spunky succulents. Just remember, some plants have different sunlight and watering needs.
It’s like trying to have a good chat with someone who only wants to talk about the weather, which we can agree isn’t ideal.
As you’re potting, fill your containers with high-quality potting soil. Then, carefully plant your chosen greenery, leaving a little space for growth—nobody likes feeling crammed.
And speaking of crammed, don’t forget to think about layering those colors and textures. Taller plants can stand in the back or center, and the shorter flowers can peek out at the edges, like a surprise party waiting to happen.
Now, you can’t forget about maintenance. Keep an eye on the watering—depending on your plant varieties, some might need more love than others. A good rule of thumb? Stick your finger in the soil about an inch deep. If it feels dry, it’s time for a drink.
And who doesn’t love a little chat with their plants? Throw in some compost or a balanced fertilizer every month or so to give them a nutritional boost. It’s like serving them a five-star meal.
Finally, play around with seasonal themes. For winter, consider evergreens and red berries, while summer can explode with vibrant blooms—think yellows, pinks, and purples.
The great thing about container gardens is you can switch it up whenever you like. One day, you’re welcoming guests with a bright, cheery display of annuals, and the next, you’re shifting to a cozy autumn vibe.
4. Vertical Garden Installations
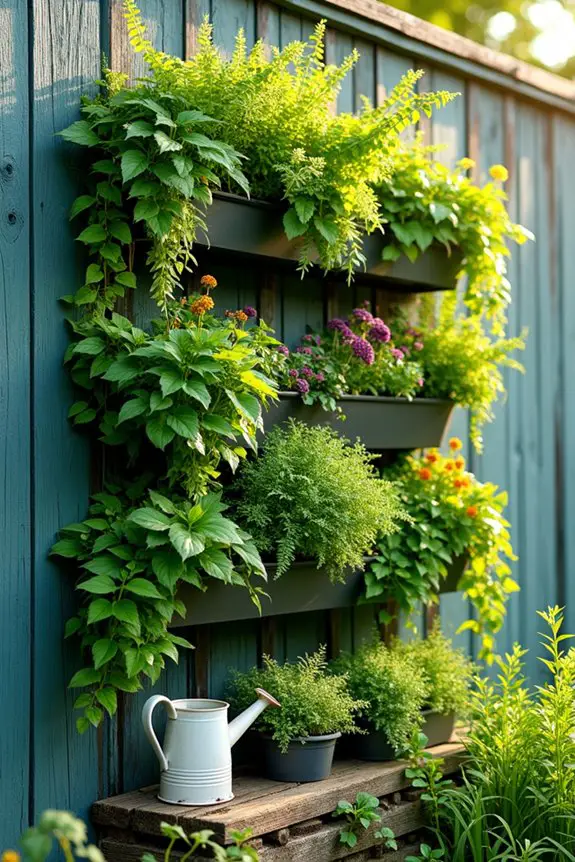
If you’re looking to breathe life into your front garden without sprawling out on the grass, vertical gardens might just be your new best friend. Not only do they save space and add an element of intrigue to your home, but they also create that lush, tranquil vibe that makes a house feel like a welcoming oasis. Imagine arriving home to a beautiful wall cascading with greenery—it’s like having a secret garden that springs to life vertically.
To set up your very own vertical garden, start by selecting a suitable wall or fence. It can be anything from a bare side of your house to a trellis or even a repurposed pallet. Keep in mind, this feature will be a centerpiece, so pick a spot that’s visible and accessible.
The great thing about vertical gardens is that they can be as big or as small as you want—truly a customizable experience that showcases your personality.
For the planting process, consider using containers or pockets that can hold soil, like felt bags or store-bought vertical planters. You want to make sure that water can drain well to avoid the dreaded soggy root debacle. Seriously, nothing kills the garden vibe faster than mushy roots. I once lost a beautiful fern to the swamp that was supposed to be its home. Let’s just say I don’t do well with plant funerals; they really dampen the mood.
Once you’ve set up your framework, it’s planting time! Choose a mix of plants that thrive in your particular light conditions. Ferns, herbs, and flowering plants can all work well—just imagine a beautiful basil hanging there ready to perk up your cooking when you need it.
When planting, remember to layer strategically. Start with the larger plants at the bottom, followed by medium-sized ones, and top it all off with trailing vines that can cascade beautifully over the edges. The effect is both stunning and lush, creating a feast for the eyes.
Don’t overlook watering. Keeping your vertical garden hydrated might need a bit of extra planning. A drip irrigation system can be a game-changer, giving you more time to sip iced tea while lounging instead of lugging around a watering can.
If you’re feeling adventurous, you could also set up a small rainwater collection system, which not only helps the planet but adds a sprinkle of charm to your gardening routine.
Lastly, don’t forget about maintenance. Prune away dead leaves and check for pests every now and then. Allowing some plants to trail helps create volume, but sometimes they can go a bit rogue. Trust me, nothing makes a plant parent feel more chaotic than trying to contain a rogue vine that looks like it’s auditioning for a horror movie.
Celebrate the wildness, but also give it a good trim now and then.
In the end, a vertical garden is a fun and functional way to bring some outdoor magic into your front yard. With a little planning and care, you’ll create a fresh green masterpiece that brings joy every time you walk through your door.
5. Creative Edible Landscaping Techniques
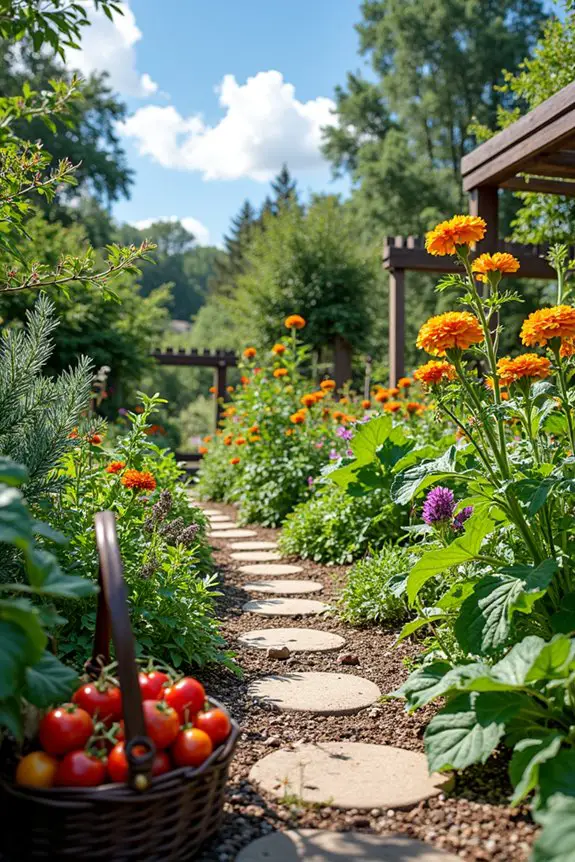
To get started on this culinary adventure, consider adding edible plants where you’d typically place ornamental ones. Think colorful pepper plants nestled among your flowers or rows of vibrant lettuce where you might’ve traditionally planted decorative borders. The key here is to mix and match. Just like when you’re assembling a tasty salad, combining different textures, colors, and heights makes everything more interesting. Small shrubs of herbs like rosemary or thyme can double as garden accents while boosting flavors in your kitchen—talk about a win-win.
For setup, make sure to pick the right spots in your garden. Observe your sun patterns; most edibles love a good dose of sunlight! If you’re unsure, watch your space throughout the day—most plants are like sunbathers, they’ll thank you for those sunny spots. Now, don’t forget about the soil, either. Nourishing, well-drained soil is a must. You can even enrich your dirt with compost, which is just a fancy way of saying, “It’s time to recycle food scraps and help our earth.” Don’t worry if you aren’t a gardening whiz; even my neighbor’s dog can smell compost and recognize it as ‘the good stuff.’
When planting your edible gems, be strategic. Grouping plants that have similar water needs can save you time during watering sessions—unless you’re like me, who tend to forget to water things for days on end (sorry, plants).
Think about the aesthetics too; a beautiful rainbow of cherry tomatoes, bell peppers, and leafy greens can be just as eye-catching as any flower bed. And don’t scrimp on spacing—plants need room to breathe, grow, and put on a show.
Now, let’s talk about maintenance. Growing edibles can be more demanding than your average flower bed; pests love them just as much as we do. Regularly inspecting your plants helps prevent infestations. You might find that sprinkling some harmless diatomaceous earth can keep the nibblers at bay without ruining your homegrown dinner plans.
And if you’re feeling particularly brave, try companion planting. That just means planting certain plants together to benefit each other—like pairing marigolds with your tomatoes to keep pesky bugs away. Who knew your garden could have friendships too?
Finally, harvesting should be an exciting ritual. You can make it a family affair or a reason to grab your favorite basket and stroll outside in your PJs—because let’s face it, nobody judges when there’s fresh produce involved.
Freshness is key, and when you pluck that perfect pepper or basil sprig, you’ll know all your garden efforts were worth it. Plus, cooking with your very own fresh ingredients? That’s culinary satisfaction you can’t put a price tag on.
6. Seasonal Plant Selection Guide
Picking the right plants for your garden isn’t just about looks; it’s about timing, too. Choosing seasonal plants helps guarantee your garden stays vibrant and productive all year long. Imagine stepping outside to a kaleidoscope of flowers bursting with color as the seasons change—talk about a mood booster. Plus, each season offers its own unique options, allowing you to play with textures and colors in ways that transform your garden into a living, breathing work of art.
So, how do you get started with seasonal selection? First, familiarize yourself with the plants that thrive in your area during different times of the year. Do a little research (no need to go full botanist on this) but check your local USDA Plant Hardiness Zone or even swing by a nearby garden center to chat with the pros. They’re usually more than happy to give guidance, and you might even learn about fun, unexpected plants perfect for your space—like perennial sunflowers that bloom an exuberant yellow in late summer.
Next up, think about what you want from your garden at different times of the year. Are you yearning for blooms in spring to welcome the warmer days, or do you want a casual flop of herbs that keep your kitchen fresh in the summertime? Here’s a tip: make a wish list of your favorite plants and categorize them by season. This way, you won’t forget that you promised yourself gorgeous peonies for spring or zinnias to spice up your summer evenings.
When it comes to planting, aim for a good mix. For example, in early spring, you might plant vibrant pansies alongside delectable lettuce varieties. Pansies are like the cheerful welcome mat of your garden, while those lettuces will soon be gracing your dinner plate.
If you’re late in this planting game, fear not. You can always sneak in fast-growing crops, like radishes or snap peas, which give instant gratification with their quick harvest times.
Watering schedules also change with the seasons, so keep an eye on your plants. In the heat of summer, they may demand more hydration, while in fall, a good morning mist of water will suffice.
Pro tip: using a soaker hose can save you time and trouble—just lay it out, and let it do all the work. Trust me, your future self will thank you on those days when you’re too busy binging your favorite series to remember you have living things in the garden.
And don’t forget: as the seasons shift, so should your garden’s maintenance plan. Regular pruning, deadheading, and weeding help keep your plants good-looking and productive. I’ve learned the hard way that letting those pesky weeds take over can turn your lovely garden into a jungle—who knew a small patch of dandelions could grow into a full-on wildlife habitat overnight?
In a nutshell, having a seasonal plant selection strategy helps you create and maintain a garden that’s a feast for the eyes, a delight for the senses, and quite frankly, a bit of a bragging point at the neighborhood barbeque.
7. Natural Stone Borders
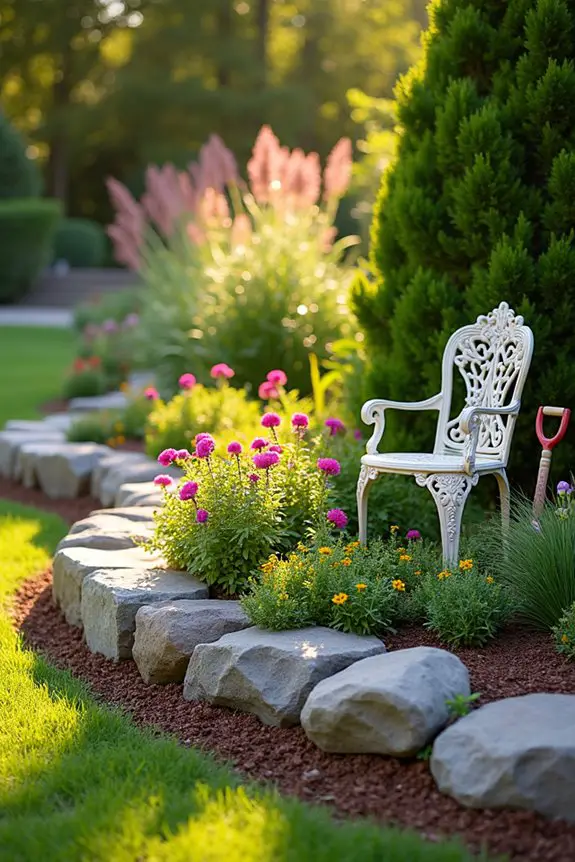
To get started with your natural stone borders, first, you’ll need to select the type of stones that will suit your garden best. There are plenty of options, from flat stones that create clean lines to larger boulders that add a dramatic touch. Head over to your local garden center or quarry to see what’s available. Trust me, feeling those stones in your hands will help you imagine how they’ll look in your space.
Once you’ve chosen your stones, mark out where you want your border using garden stakes or simply some twine. This is your chance to let your creativity flow; you can create straight lines for a polished look or gentle curves for a more organic feel. Just remember, the border should complement the plants rather than overshadow them. Sometimes, less is more—even though I often forget this (my garden is a bit of a chaotic jungle).
When you’re ready to install the stones, start by digging a shallow trench along your marked line. Aim for about 2 to 3 inches deep, depending on the size of your stones. This will give your stones a nice base to sit on, preventing them from shifting later on.
Next, lay down a 1-inch layer of sand at the bottom of the trench. This acts as a cushion and helps with drainage, which is vital if you want your garden to thrive.
Now, it’s time to place your stones in the trench. Start with the largest stones first, and fit them snugly together—think of it as a puzzle. Secure each stone by backfilling around it with soil or gravel. You can give your stones a gentle tap with a rubber mallet to settle them in place. I learned this the hard way: the first time I didn’t secure my stones properly, a heavy rain turned my masterpiece into a soggy mess. Not my fondest gardening memory.
For a professional finish, consider planting low-growing ground covers or colorful flowers in the gaps between your stones. This not only softens the look but also helps with weed control. Plus, it’s like an extra layer of charm, and who doesn’t love a bit of charm?
Finally, keep in mind that maintenance will play a part in how your stone border looks. A quick check for any shifting stones after heavy rains or seasonal changes is wise, and topping off the soil around the stones now and then will help keep everything looking tidy.
You’ll be amazed at how a little upkeep transforms your garden into a breathtaking escape. So, roll up those sleeves, channel your inner garden artist, and create a stone border that speaks volumes about your green space. Your future self, sitting among the flowers and stones, will surely thank you.
8. Sustainable Garden Practices
When it comes to creating a garden that not only looks beautiful but also supports our planet, sustainable practices are the way to go. Imagine transforming your yard into a thriving ecosystem while reducing your carbon footprint—sounds pretty enticing, right?
Plus, cultivating a sustainable garden gives you that warm fuzzy feeling, knowing you’re doing your part for Mother Earth, one flower at a time.
So, let’s unpack some easy and effective sustainable practices. Start with composting. Not only does it reduce kitchen waste, but it also creates nutrient-rich food for your plants. Just toss in those vegetable scraps, eggshells, and even that sad-looking lettuce you forgot about in the back of your fridge (we’ve all been there).
After a few weeks, you’ll have dark, crumbly goodness to mix into your soil. Remember to turn your pile occasionally; it’s like giving your compost a little workout, which is about as much labor as I want to handle on a Saturday afternoon.
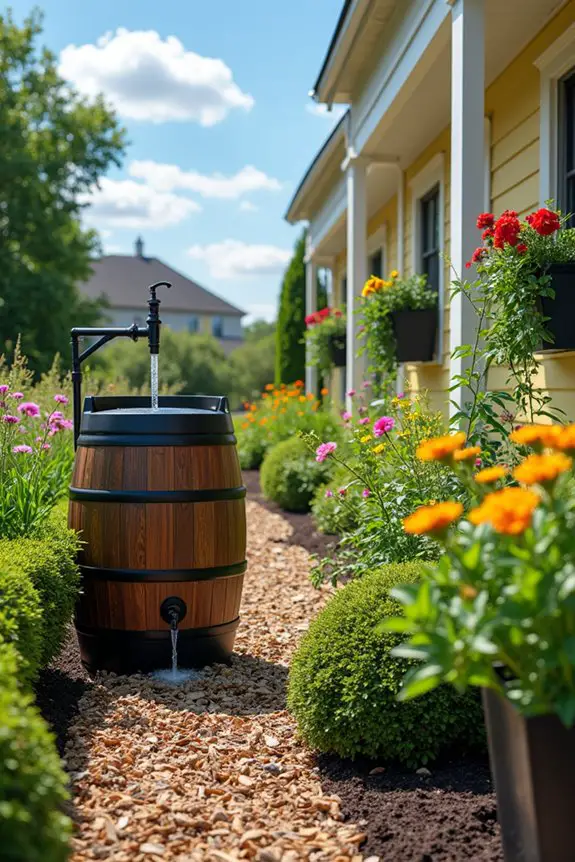
Next up is water conservation. Installing a rain barrel can be a game-changer. You know those rainy days when you feel a little gloomy? Well, turn that rain into garden gold.
Just place a barrel under your downspout to catch all that precious rainwater. Not only is it free irrigation, but it also helps reduce stormwater runoff and protect local waterways. When it’s time to water the plants, simply fill up a watering can from your barrel—feel free to channel your inner garden superhero as you do.
Then there’s the idea of planting native species. These plants are already adapted to your local climate, need little maintenance, and attract pollinators like bees and butterflies.
It’s like hosting a garden party for the buzzing buddies of the ecosystem. You can visit your local nursery or do a bit of online research to find plants that thrive in your area. Trust me, you’ll end up saving yourself from excessive watering, and who doesn’t want more time for that Netflix binge?
Don’t forget about using organic mulch. Not only does it keep your soil moist and temperature stable, but it also adds nutrients as it breaks down.
Think of it as a cozy blanket for your garden—because let’s face it, we all love a good cuddle, including our plants. A good layer of mulch can also keep pesky weeds at bay. Just make sure you keep it a few inches away from plant stems, so you don’t end up giving them a cozy burrowing spot for unwelcome pests.
Finally, let’s chat about the beauty of companion planting. It’s like buddying up plants that get along well—some even protect each other from pests.
It’s like they’ve got each other’s backs in the plant world. For example, planting marigolds along with your veggies can help keep aphids away. This kind of teamwork can lead to a flourishing garden, and you might get a chuckle from how your plants have formed their little society.
9. Garden Lighting Options
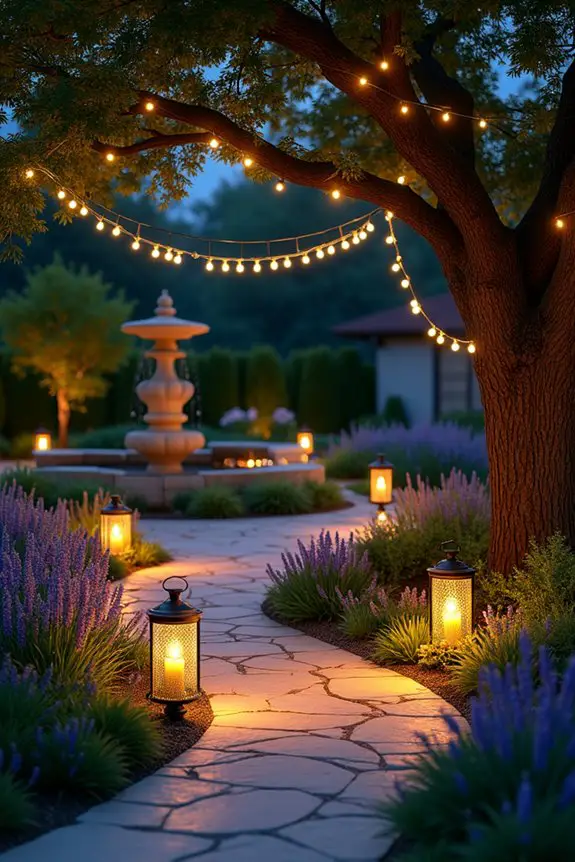
When it comes to gardening, we can’t forget about lighting. The right garden lighting creates a magical atmosphere as the sun sets, illuminating your plants and pathways with a soft glow. Not only does it enhance the beauty of your yard, but it also makes your garden feel more inviting for evening strolls or outdoor gatherings.
Imagine sipping a cold drink on a warm summer night, surrounded by twinkling lights that dance among your flowers—how dreamy is that?
Sipping a cool drink on a warm summer evening, with twinkling lights weaving through your garden—pure bliss!
Let’s explore some garden lighting options that are functional and fun. First up, string lights. These whimsical beauties can be draped around trees, fences, or along your patio. They give off a warm, inviting vibe that makes everything feel a bit more festive, kind of like a garden party happening just for you.
To set this up, simply buy a strand or two from your favorite home goods store and hang them where you want the magic to happen. Just be cautious to use outdoor-rated lights to handle the elements. A quick tip? Opt for solar-powered string lights to save on your electricity bill while being eco-friendly.
Next, consider pathway lights. These little guides not only help safely navigate your pathways in the dark, but they add a layer of charm to your landscape. Choose solar-powered ones for an effortless setup, or go for low-voltage landscape lighting if you’re feeling a bit more adventurous.
Install them by placing them at even intervals along your walkways for a polished look. As a personal tip from someone who’s tripped over their own garden paths too many times, confirm they’re bright enough to light your way while still remaining visually soft.
Lanterns are another fantastic option. Hanging lanterns from hooks or setting down table lanterns can add that cozy, storybook feel to your garden. You can find lanterns made from various materials, like metal or glass, so choose something that speaks to your style.
To set them up, just fill them with candles or LED lights. And here’s a little secret: if you’re using candles, mix it up by adding some essential oils to make your garden smell divine while you enjoy the view.
Finally, don’t overlook spotlights. They can highlight the star players in your garden, like your favorite tree or striking sculpture. A well-placed spotlight can create shadows and depth, bringing a whole new dimension to your yard.
To go about this, position the spotlight at the base of the item you want to highlight, angling it slightly upward. Just remember not to flood the whole area with light; we want to create a soft ambiance, not a mini-football field.
10. Eco-Friendly Watering Solutions
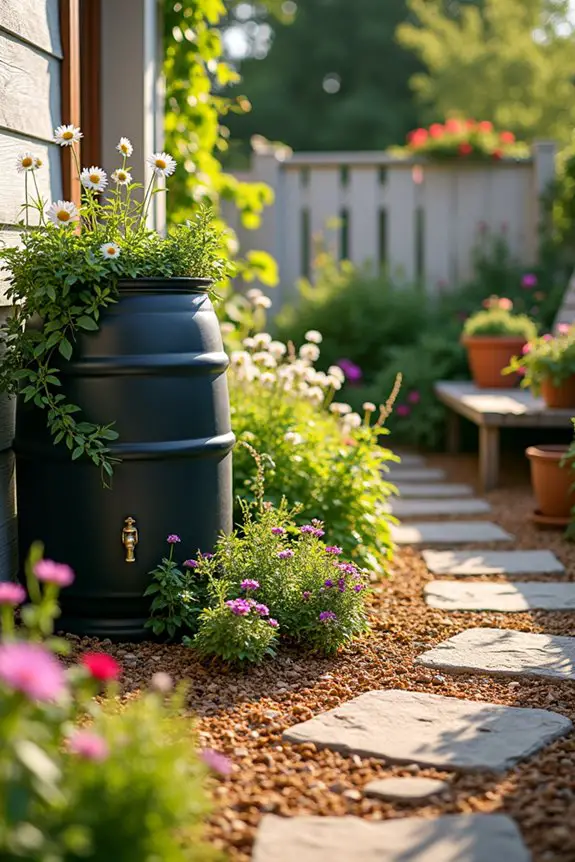
When it comes to nurturing a vibrant garden, watering is essential—not just for keeping your plants alive but for giving them that special boost to thrive. Eco-friendly watering solutions can help you save water, reduce your bill, and guarantee that you’re doing your part for the environment. Plus, they can give your garden an effortless, sustainable vibe that feels like you’re walking in nature rather than just in your backyard.
One of the best ways to start is with rainwater harvesting. Sounds fancy, right? But it’s pretty simple. All you need is a rain barrel placed under your downspout to collect rainwater. This not only prevents water from running off your roof but also gives you a free source of water for watering your plants.
Make sure to choose a barrel that’s made of food-grade material, and be sure to keep it covered to prevent mosquito breeding—because trust me, nobody wants an unexpected swarm at the garden tea party. You can use a simple spigot to access the water whenever your garden is thirsty.
Drip irrigation is another fantastic option—you’ll wonder how you ever gardened without it. This system allows water to go directly to the roots of your plants in a slow and efficient manner. To set it up, you’ll need some tubing, emitters, and connectors, which you can usually find at your local garden center.
Just think of it like creating a mini water park for your plants, only with less splashing and no lifeguard needed. Position the emitters close to the base of each plant, and voilà—you have a guilt-free watering system that can save you tons of water while keeping those roots nice and happy.
And let’s not forget about mulching. A good layer of organic mulch around your plants does wonders to retain moisture in the soil. It helps keep the ground cool and reduces water evaporation, so you don’t have to keep filling your watering can.
Pine needles, wood chips, or compost are all excellent choices. So, grab a wheelbarrow and get ready to turn those bagged clippings into mulchful magic. Remember, the thicker the layer, the better it’s at conserving water.
Lastly, consider using self-watering containers. These clever pots allow your plants to absorb water as they need it, providing a constant moisture level without drowning them. It’s like being a caring parent but for your ferns—worrying about overwatering while making sure they stay hydrated at all times.
You can buy – or even DIY – a few if you’re feeling crafty. They simply require a reservoir at the bottom and a way for the soil to wick up moisture. Just make sure to keep an eye on the water level—finding out too late that your plants are thirsty can sometimes feel like a romantic comedy gone wrong.
In the end, embracing eco-friendly watering solutions can make your garden not just thrive but also reflect your commitment to the planet. It’s about creating a space that feels good, looks great, and gives back to nature. Plus, it’s a little win for you—fewer trips with a watering can mean more time enjoying your beautiful oasis.
Maintenance Scheduling Strategies
Keeping your garden in tip-top shape can feel like a never-ending puzzle, but it doesn’t have to be stressful. First, create a maintenance calendar; mark days for weeding, pruning, and feeding your plants. Trust me, it’ll keep you sane. Maybe even set reminders on your phone—who doesn’t love a good buzz?
Next, tackle chores in chunks. Devote 30 minutes to deadheading flowers one weekend and focus on trimming the bushes the next. Short bursts make tasks feel less overwhelming.
And, pour yourself a drink while you work; it somehow makes pulling weeds less painful.
Finally, don’t hesitate to ask for help. Whether it’s a neighbor or a gardening buddy, sharing the load makes everything more fun. Your garden will thank you.

