Are you tired of your garden looking like a jumbled puzzle? A good border can tidy things up and add personality, almost like the perfect seasoning in your favorite dish. With options ranging from rustic stone to sleek pavers, each design brings its own vibe. Ever tried curved wooden edging or a zigzag pathway? They can really elevate your space. Let’s explore the exciting possibilities that can turn your garden into a peaceful retreat. How about we jump in?
Stylish Border Design Examples
When you think about jazzing up your garden, the right border design can make all the difference. Imagine transforming your space with natural stone accents that whisper elegance, or maybe a quirky curved wooden edging that’s as welcoming as your favorite porch swing.
Let’s explore some trendy border ideas, like geometric paver patterns and raised beds that not only look fantastic but also keep your plants feeling special—because who wouldn’t want a garden that feels like a cozy hug?
1. Natural Stone Border Accents
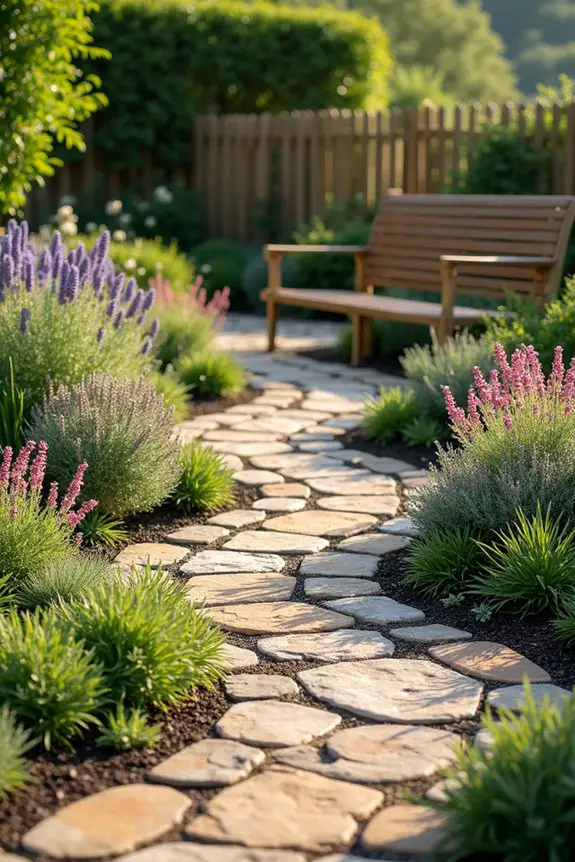
When it comes to garden borders, natural stone accents are like the icing on a cake — they make everything look more refined and put together. Not only do they serve a practical purpose by keeping soil in place and separating flowers from the lawn, but they also add a rustic charm and an earthy vibe that just feels right, you know?
Picture walking down a path framed by beautiful stonework; it’s like nature’s little embrace.
So, how do you get started with these fantastic natural stone borders? First up, you’ll need to choose your stones. Go for something in your local area — river rocks, slate, or even granite can work wonders. Think about the shapes and sizes. Large, chunky stones can give a robust look, while smaller, smoother pebbles can add a delicate touch.
Trust me, nothing beats the satisfaction of wandering around a stone yard, searching for that perfect piece… just me? Okay, moving on!
Once you’ve chosen your stones, it’s time to map out where you want them to go. Grab a garden hose or some string and lay out a border shape that feels right – a gentle curve can be more inviting than a straight line. Just try not to get too carried away.
I once ended up with a spiral so wild that my neighbor asked if I was trying to start a rock band. Spoiler: I was just trying to be artistic.
Now, clear your chosen area of weeds and grass. It’s like cleaning your plate before dinner — you want a fresh start. After that, lay down a landscaping fabric if you want to keep pesky plants from popping up between your gorgeous stones.
It’s like giving your stones a cozy blanket; helps them stay in place and look neat.
Next, start placing your stones! Lay them out, testing how they fit together. You may need to shimmy them a bit, but it’s kind of like a puzzle. Fill in gaps with smaller stones or gravel; this not only holds them in place but gives a lovely, polished look.
As you work, you might find a few stones that look like they belong together, something like an accidental couple. Trust your instincts!
Finally, stand back and admire your work. Did you just transform your garden’s look? Yup, you did! Sipping a cup of tea while admiring that natural stone border isn’t just delightful, it’s the kind of small victory we all need. And if you’re ready for outdoor dining, consider how beautifully it will complement your patio dining set, creating the perfect ambiance for gatherings.
And if your family asks why you spent the whole day moving stones? Just tell them it’s all about creating a sanctuary. Who wouldn’t want that?
2. Curved Wooden Edging Design
Curved wooden edging can be a delightful addition to your garden, blending functionality with an organic, charming aesthetic. There’s something about the soft curves of wood that seems to bring a calm energy to your outdoor space, creating a warm, inviting atmosphere. Plus, wooden borders aren’t just pretty to look at; they also do a great job of keeping soil and mulch where they belong while giving your plants a defined area to thrive. It’s like setting a stage for your blooming star performers.
So, how do you plunge into this splendid design? First, gather your materials. You’ll need wooden planks or logs – cedar or redwood are fabulous choices because they’re durable and naturally resistant to decay. As you shop, think about the thickness and height of your wood; you don’t want a tiny border dwarfed by those lovely dahlias, right? A good rule of thumb is to aim for a height of about 6 inches, which is perfect for making a statement without overwhelming the plants.
Next, let’s get to the fun part: laying out your design! Use a garden hose or rope to outline your desired curves. Remember, the goal is to create smooth, flowing lines that will look effortlessly natural. If you’re feeling adventurous and want a wave effect, just go for it. My first attempt at curves turned out resembling a roller coaster track, but hey, it was a conversation starter.
Once you have laid out your design, it’s time to prepare the soil by clearing away any weeds and grass. You want to create a clean canvas for your wooden masterpiece. You could even dig a shallow trench to set your wood into — it helps keep everything stable and looking slick. If you’re like me and your shovel has mysteriously vanished again, don’t worry, just pack the soil tightly around the edges afterwards.
Now, place your wooden pieces into the trench or along your outlined path, adjusting them as necessary to keep the lines smooth. You might need to cut the wood to fit its place — a handsaw or power tools will do the trick. Full disclaimer, I once learned the hard way that using a power saw isn’t the same as slicing butter. Just take your time and measure twice, cut once, as they say.
Lastly, secure those beauties in place. You can use stakes on the inside of the curve to hold the wood firmly while adding a little mulch on the outside to enhance the look. This not only stabilizes your border but makes it pop with vibrant color and texture. Wooden borders can also help prevent soil erosion from happening in your garden.
Once you’re done, step back to admire your handiwork. Did you create a stunning little haven? Absolutely. Sip that lemonade and take a moment to relish your triumph. And if someone asks about your artistic vision? Just tell them it’s a “curvilinear lifestyle.” They’ll nod in approval, or at least with a raised eyebrow.
3. Geometric Paver Patterns
Geometric paver patterns can be a stunning way to elevate your garden borders, merging practicality with a punch of modern flair. These designs not only offer a solid, stable edge to your planting beds, helping keep soil contained and tidy, but they can also transform the look of your outdoor space, giving it a sophisticated, almost artistic vibe. Who doesn’t want a garden that feels as intentional as it does inviting?
Let’s explore how you can create your own geometric masterpiece! First things first, gather your materials. You’ll need pavers—these can range from square to rectangular, and even hexagonal shapes. It’s like building with LEGO, but for adults, so choose colors and textures that either complement or contrast with your existing garden elements. If you’re feeling daring, a mix of different shapes can create a playful and dynamic pattern. Just imagine your garden being the talk of your neighborhood.
After that, it’s all about planning. Start by deciding on your pattern. A popular choice is the classic herringbone layout—it’s timeless and gives a sense of movement as your eye travels across it. Or try a basket weave for an interesting twist; it adds depth and complexity while still remaining visually cohesive. To visualize your design, lay the pavers out on the ground first. This could take a little trial and error, but hey, your garden isn’t going anywhere while you figure it out. Just make certain you keep a good cup of coffee nearby to fuel your creativity.
Once you’ve settled on a pattern, it’s time to prepare the area. Clear the chosen spot of grass and weeds. A weed-free space guarantees that your lovely pavers won’t be competing for attention with unwanted greenery. You might want to dig a few inches into the soil to create a solid base for your pavers; consider it giving them a cozy home. Trust me, I learned the hard way that a shallow base ends up looking more like a jigsaw puzzle than a polished design.
Now comes the fun (or slightly nerve-wracking) part—laying those pavers down! Start from one corner and work your way out, following your laid-out pattern. Use a rubber mallet if you need to nudge a paver into its perfect spot. In my early attempts, I may or may not have dramatically flipped a paver into the air, only for it to land with a loud thud. No harm done, just a little dust cloud; lesson learned—gentle is key.
As you lay each paver, make sure to leave small gaps between them for sand or gravel to fit in. This not only stabilizes the structure but also adds a clean finish. A quick note: if you have a critical eye, consider leveling the pavers with a straight edge. This helps maintain that stunning, cohesive look. Plus, your OCD will thank you later. Additionally, using gardening gloves will protect your hands from rough edges and chemicals that may be present in your garden space.
Finally, once everything is laid out and looking fabulous, fill in those gaps with sand or gravel and compact them down. Give yourself a pat on the back—you’re nearly there. Take a step back, admire your work, and don’t forget to snap a few pictures for social media. Because let’s face it, when you pour your heart into your garden, it deserves its moment in the spotlight. Not to mention, having the right garden tool set can make the whole process much easier and more enjoyable.
Just remember, whether your design turns out as planned or takes a quirky turn, it’s all part of the beautiful chaos that’s gardening. Now, let’s move on to our next stylish border design—raised bed configurations that will take your green oasis to new heights.
4. Raised Bed Border Configuration
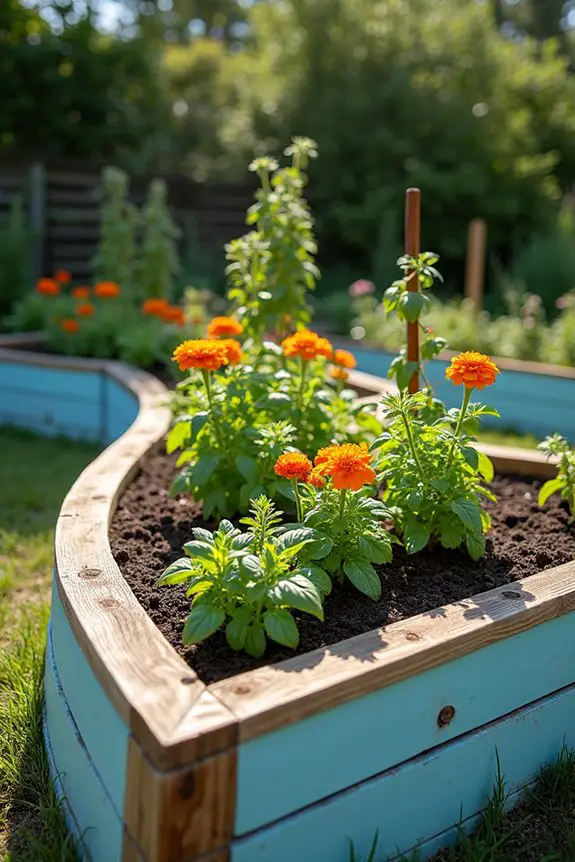
When it comes to raised bed borders, the design options are as varied as your favorite pasta shapes. Not only do they add a touch of style and structure to your garden, but they also provide a practical solution to keeping your plants contained and organized. Imagine walking into a garden that feels polished yet welcoming, where each border serves as a neat little frame for your blooming masterpieces. It’s an inviting space that calls to you. How could you resist spending an afternoon there?
One stylish idea is to use wooden planks to create a rustic charm. The organic texture of the wood not only complements your plants but also helps regulate soil temperature. First, gather your materials—pressure-treated lumber or cedar boards work wonders for durability. You’ll need enough planks to outline the shape of your raised beds, along with screws, stakes, and a saw if you need to cut them down to size.
Remember, though, measuring twice and cutting once is the name of the game. Trust me, I’ve learned that lesson the hard way, and my rogue plank is still haunting my garage.
Next, it’s all about shaping your raised bed. A rectangular design is classic, but don’t shy away from curves or even zigzags if you’re feeling adventurous. To get started, outline your desired shape on the ground with some garden string—this will be your guide. Once you’re satisfied with the layout, use a shovel to dig out a bit of the sod. Think of it like giving your plants a nice, fluffy bed to rest on. It might sound silly, but it’s like setting the scene for a cozy sleepover.
After your shape is ready, it’s time to build. Take your planks and position them along your outline, securing the corners with stakes driven into the ground. If you’re going for the rustic vibe, you might even want to leave a little wood grain exposed, so don’t be afraid to embrace a few knots and imperfections.
In my early attempts, I went a bit overboard trying to sand everything down and ended up with a plank that resembled a dodgeball rather than a refined border. Who knew wood could have such a playful spirit?
For added flair, consider painting your wooden borders in bright colors or soft pastels, maybe even something that ties in with your garden theme. You could even stencil floral designs for a touch of whimsy. The world is your oyster when it comes to creativity. Just picture yourself strolling through a cheerful garden where each corner delights the eye—you’ll be a garden design hero in your own right.
Finally, fill those raised beds with nutrient-rich soil and plant your favorites—herbs for fresh summer salads, colorful flowers, or even some veggies if you’re up for the challenge. A garden tower obelisk can also elevate the garden’s aesthetic while maximizing vertical growing space.
With your stylish borders hugging your plants, your garden will be a delightful sanctuary. So, get those hands dirty and create a space that truly reflects your personality. It’s not just a garden; it’s your personal paradise, one stylish border at a time.
5. Vertical Trellis Integration
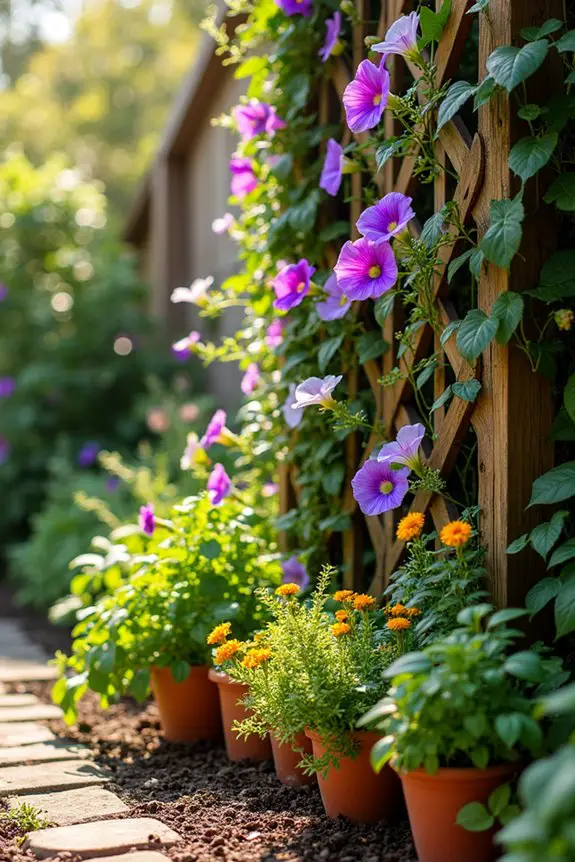
Vertical trellis integration is such a fantastic way to spice up your garden borders. Not only do these vertical structures provide support for climbing plants, but they also add height and dimension to your garden beds. Think of them as the cherry on top of an already delightful dessert. Plus, they can create an enchanting backdrop that brings together the entire garden design, making even your humble plot feel like a botanical paradise.
So, how do you get started on this vertical journey? First, consider the materials you want to use for your trellis. You can go for something sturdy like wood or metal, or you might even opt for a more eclectic look with repurposed materials like old gates or window frames. That’s right—give those forgotten items in your garage a new life.
Just be cautious; what seemed like a chic idea to me once turned out to be a three-legged trellis that looked more like it belonged at a circus than my garden.
Once you’ve picked your material, decide on the layout. Picture your climbing plants stretching gracefully upward, filling the space with lush greenery and blooms. A simple linear design might work well against a fence or the edge of a raised bed, while an arching trellis could beautifully frame a pathway or entrance to a garden nook.
To create this trellis, measure the height you’d like—think tall enough to be impressive, but not so tall that you need a ladder to appreciate it.
Now, here’s where the magic comes in—fill in those trellises with climbing plants! Some wonderful options include sweet peas, pole beans, or even morning glories for a vibrant pop of color. Just imagine stepping outside and being greeted by delightful blooms draping over your trellis like an enchanting curtain. You’ll feel like you’ve been transported to a secret garden.
Here’s a handy tip: make sure to secure your trellis firmly into the ground. After all, it needs to support not only the plants but also withstand any breezy moments. I learned this the hard way when my first trellis wobbled precariously after a strong wind left it resembling a confused flamingo.
A good rule of thumb is to bury at least a foot of the trellis into the soil. That should do the trick.
Don’t forget to add a personal touch. You could paint your trellis to match your garden’s theme or even create a cozy vertical garden by adding smaller pots of herbs and flowers at different heights.
When done right, these vertical designs can transform even the coziest corner of your garden into a fascinating storybook setting. So go ahead, give your garden the tall, stylish flair it deserves and watch the transformation happen.
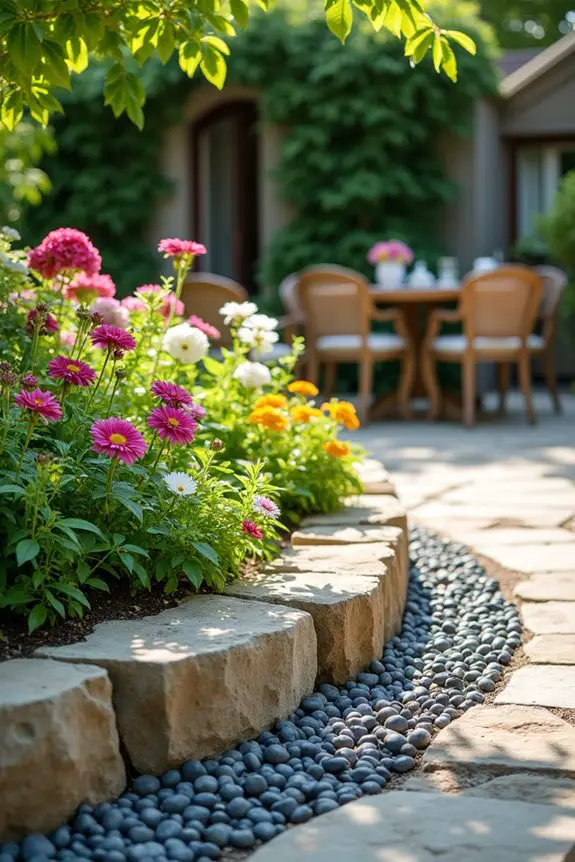
6. Layered Gravel and Plants
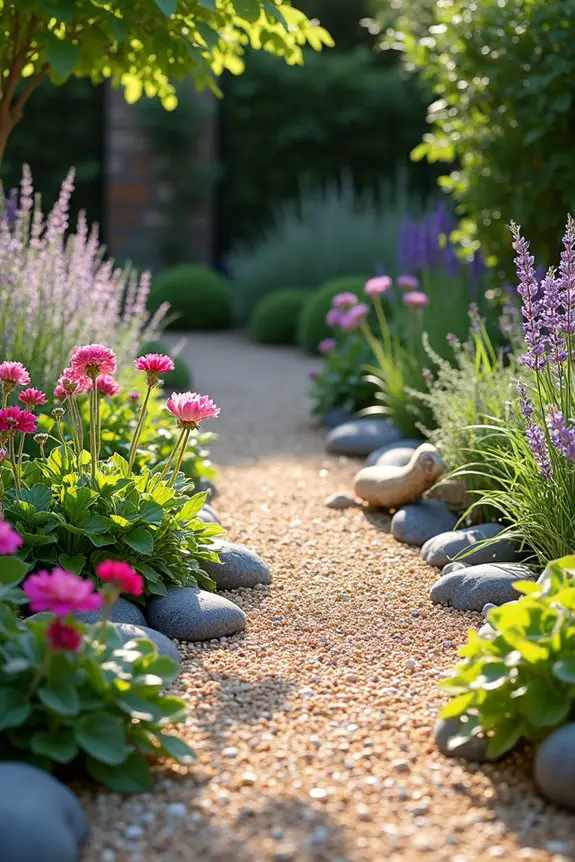
When it comes to garden borders, layered gravel and plants is a fantastic choice that combines practicality with flair. This design not only helps to define your garden space, but the mix of textures between the gravel and the greenery gives your garden a chic, natural vibe. You might even get a fond “wow” every time you step outside, feeling like you’ve stumbled upon a trendy garden oasis rather than just a backyard.
To start, you’ll want to choose your gravel. Take a trip to your local garden center and check out the different kinds. You’ve got your classic pea gravel but don’t overlook options like crushed stone or decorative river rocks. Each type can contribute to the overall style of your garden—think sleek and modern with smooth stones or a more rustic feel with rougher textures.
I personally went all out with a wild mosaic of colors once, and let me tell you, it looked like a rainbow exploded instead of a neatly arranged gravel path. Lesson learned: less can be more sometimes.
When you’ve selected your gravel, it’s time to create your border. Start by marking the outline of your garden with string or garden stakes. This will give you a clear idea of where to shovel. Once you have your outline, dig down about four to six inches, depending on how deep you want your gravel – this is essential for minimizing weeds and integrating your plants.
Yes, I know, digging isn’t the most glamorous part, but think of it as your squat workout. Consider it a two-for-one deal.
Now, spread a layer of landscape fabric over the soil. This part is vital to keeping pesky weeds at bay. Trust me, you don’t want a surprise garden intruder trying to crash your beautifully manicured look later. After that, pour in a thick layer of gravel—about two to three inches should do the trick. Smooth it out with a rake or your hands if you want to get a little personal (just don’t blame me if you suddenly end up covered in gravel dust).
Next comes the fun part: planting! Choose a mix of plants that thrive in your growing zone and will enjoy basking in the sun. Look for plants with varying heights, colors, and textures. Think about adding some low-growing sedums, vibrant geraniums, or even aromatic herbs.
The key is to have a little variety, so when summer rolls around, your garden looks like a lush tapestry rather than a monotone paint job. I learned this the hard way the time I thought I’d create an all-green border; it ended up looking more like a salad bar than a vibrant garden.
As you arrange your plants, try to create a layered effect, with taller plants at the back and shorter ones at the front. It’s all about depth, darling, just like in a well-crafted cake. Water them well after planting, and make sure you keep them hydrated as they get established.
Consider adding some decorative stones or driftwood on top of the gravel for that extra “I totally planned this look” vibe.
7. Rustic Log Border Concept
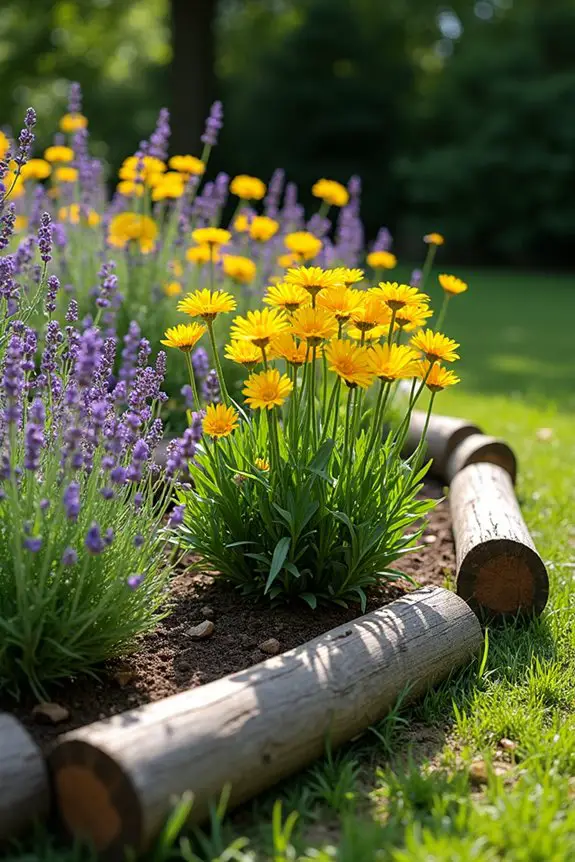
If you’re looking for a garden border that exudes charm while being functional, the rustic log border concept is the way to go. This design softens the edges of your garden while adding a touch of nature, creating a lovely cabin-like vibe that invites you to sit back with a cup of coffee and enjoy the view. Not to mention, using logs or branches ties in beautifully with various landscapes, whether you’ve got a sprawling estate or a cozy yard.
To get started on your rustic log border, first, gather the materials. Hunt for logs that are the right size, preferably those that are at least a couple of feet long and sturdy enough to take a beating. If you’re feeling particularly adventurous, you could even use fallen branches from your yard (just make sure you’re not robbing the local wildlife of their homes).
When I did this, I felt like a true lumberjack, albeit a slightly clumsy one who’d to dodge a few spider webs. Once you’ve got your logs, it’s time to lay them out. Arrange the logs in a straight line or in a gentle curve to define the space. I always find that a slight bend in the border adds a natural flow, rather than a rigid look.
Just give it a try – the easiest way to see what works is by placing the logs on the ground first. It’s less pressure than making a permanent decision, and your inner artist will thank you.
Now, dig a shallow trench where you’ll be placing your logs. About 3 to 5 inches deep will do. This step is essential because it helps to keep the logs in place and provides a neat appearance. Remember – it’s not a workout session, but you might break a light sweat. Moving those logs around can be a bit of a test, and don’t worry if they don’t sit perfectly straight.
It’s rustic; a little wonkiness adds to the charm, right? Next, secure your logs in the trench, filling any gaps with soil and tamping it down to make sure everything holds together as planned. If you want to add a touch of whimsy, you can even leave some logs sticking out a bit – the more natural, the better.
You’ll feel like a garden designer at this point, planting pride in your efforts and enjoying the process. Finally, the fun part: plant! Fill the inside of your border with your favorite flowers, herbs, or even some charming ground cover.
Remember my earlier mishap with an all-green border? Spice things up with splashes of colors, like cheerful daisies or fragrant lavender – trust me, your garden will thank you every time you step outside. Now go ahead, create your very own woodland retreat, and bring your outdoor spaces alive with personality.
8. Circular Flower Bed Arrangement
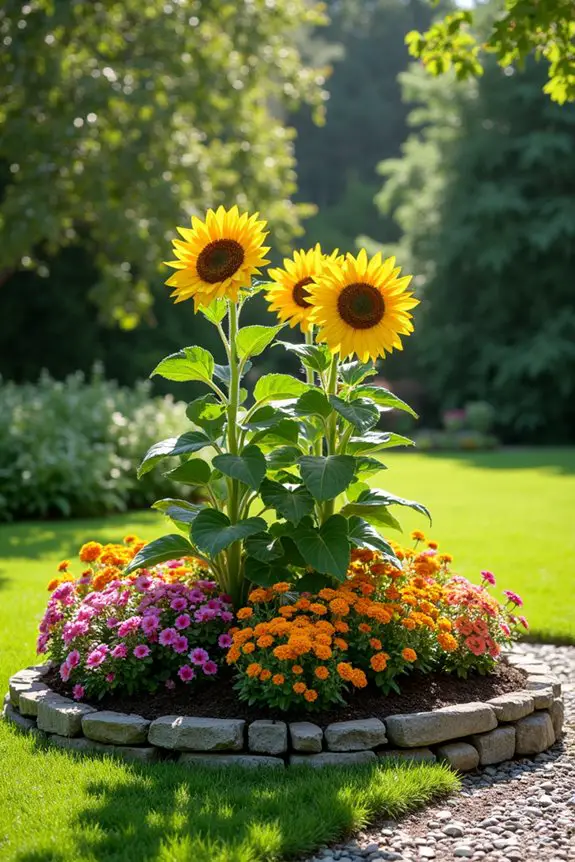
When it comes to creating a stunning garden, a circular flower bed arrangement can be a game changer. This design not only adds a sense of harmony and balance to your garden but also allows you to create an eye-catching focal point that draws people in. Imagine a circle of vibrant blooms inviting you to step closer, feel the soft petals, and inhale the sweet scents. It’s like a warm hug from nature, making your garden an alluring spot to relax or enjoy a quiet moment.
To get started with your circular flower bed, first, you’ll want to find the perfect location. Look for a space that gets good sunlight and is visible from your favorite hangout area—maybe your patio or living room window. Once you’ve spotted the ideal spot, grab a garden hose or some string and outline your circle. Trust me, this step is essential. It’ll prevent you from accidentally creating an oddly shaped blob. Aim for a diameter that’s comfortable for your space, usually around 3 to 5 feet works well.
Now, let’s dig in—literally! Grab your spade or fork and start loosening the soil inside your circle. This part can be a bit of a workout, and you might find yourself huffing and puffing. But just think, you’re not only sculpting a beautiful garden; you’re also getting a mini workout in the fresh air. Make that soil nice and fluffy so your plants can thrive. If it helps, put on some upbeat music—it’s amazing how much easier digging becomes with a little groove.
Next, it’s time to reflect on your plant selection. Go wild! Choose a mix of heights and colors for a delightful explosion of texture and visual interest. Maybe some tall sunflowers to sway in the breeze, cheerful marigolds creating a warm glow, and trailing petunias spilling over the edge like nature’s confetti.
Oh, and don’t forget to think about the blooming seasons. You want something flowering at different times so your circle remains bright and inviting all year long.
Once you’ve picked out your flowers, gently plant them in a circular pattern within the border. Here’s a tip: place taller plants in the center or back, depending on your viewing angle, and let the shorter ones grace the edges. This way, everyone gets a front-row seat to your garden’s beauty. And don’t be shy about getting your hands dirty—there’s something about touching the soil that connects you to your garden.
As you water and nurture your flower bed, take a moment to sit back and admire your handiwork. Maybe make a cup of tea (or a strong coffee, if you need that extra kick) and just enjoy the view.
With a circular flower bed, you’ve created not just a garden border, but a serene retreat that beckons you to relax and unwind. It’s your little slice of paradise, and after all that effort you put in, you absolutely deserve it.
9. Framed Pathway With Low Plants
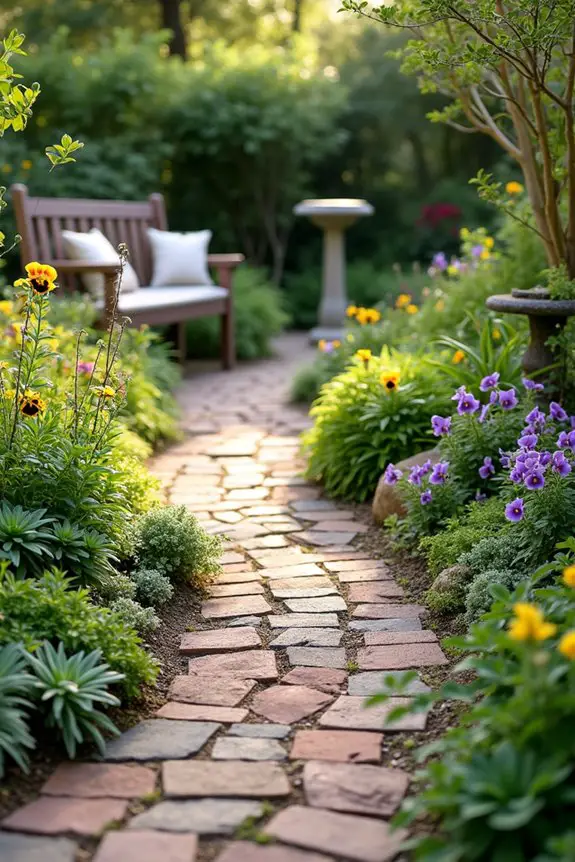
A framed pathway with low plants is an excellent way to elevate your garden’s aesthetic while keeping it functional. Think of it as the stylish border that guides guests through your little slice of paradise. Not only does this design create a welcoming vibe, but it also serves to define spaces in your garden, leading the eye gently from one area to another without overwhelming anyone.
Imagine strolling through a pathway lined with delicate blooms, feeling as if you’re walking through a secret garden. Isn’t that the dream?
To begin, you’ll want to choose the perfect area for your framed pathway. Look for high-traffic spots or areas where you want to encourage guests to explore. A narrow path meandering through your garden or leading gracefully to a cozy seating area can make the space feel intentional and inviting.
Mark where your pathway will go using garden stakes or spray paint. Don’t panic if it looks a little wonky at first—this is just part of the creative process. You’ll fix it later.
Now let’s talk materials. A framed pathway can be created with bricks, stones, or even wood—whatever suits your style and budget. Lay down your chosen material, ensuring the edges are straight and well-aligned.
If you’re using stones or bricks, try to leave a tiny gap in between for a charming look. These little spaces can be perfect for tiny plants or for letting rainwater seep through, keeping your pathway both stylish and practical.
Once you’ve set the frame, it’s time for the fun part—choosing your low plants. This is where you can really get creative. Think of plants that won’t grow too tall and overshadow your beautiful pathway. Maybe some cheerful low-growing sedums, creeping thyme, or lovely little pansies?
They’ll hug the ground and add a pop of color without obstructing the view. Consider using plants that thrive in your local climate; nothing’s worse than planting something gorgeous only to have it wilt in the heat or freeze in the cold.
As you plant, be sure to dig small holes that allow for root growth. Place your plants at varying distances apart to create a more natural look.
I once planted my flowers a little too close together, and let me tell you, it turned into a botanical wrestling match all summer long. Give each plant enough space to breathe, and watch as they flourish!
Finally, after you’ve planted your greens, don’t forget to give them a good drink of water and some love as they settle in. While you’re at it, take a moment to appreciate your handiwork.
Maybe grab a little seat nearby and just soak in the beauty. You might find that taking a pause is as invigorating as those lovely plants you’ve just added.
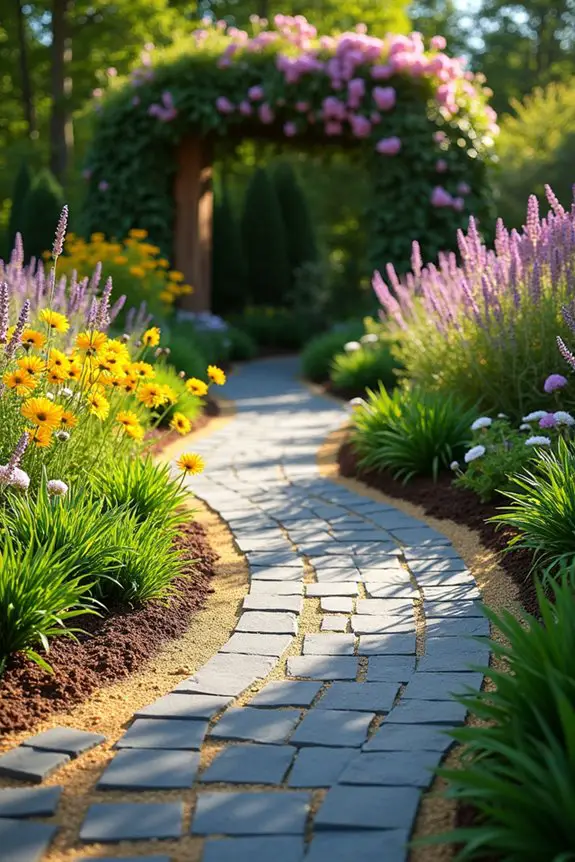
10. Zigzag Stone Pathway Design
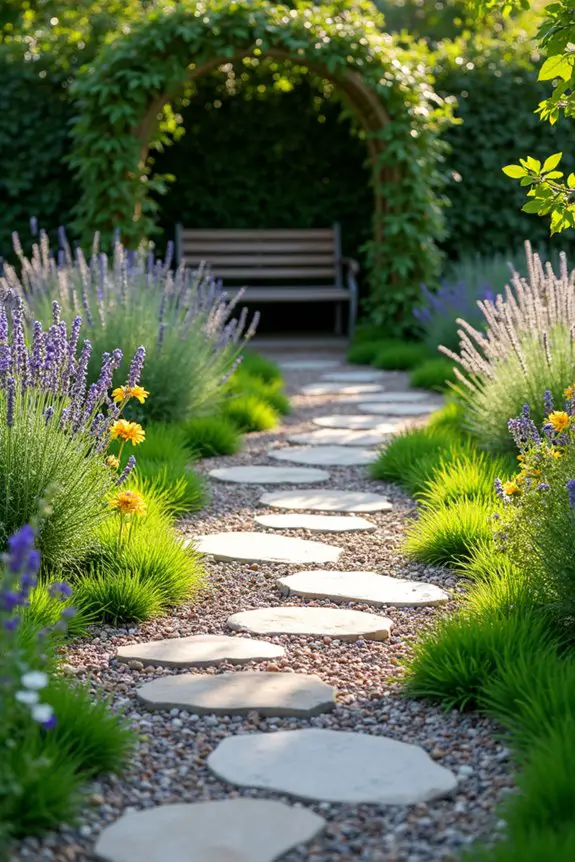
A zigzag stone pathway is such a creative way to add character and charm to your garden. Not only does it offer a unique visual challenge that keeps the eye wandering, but it also helps direct foot traffic in a fun, playful manner. Imagine a path that doesn’t just lead you straight to a destination but dances its way through the landscape, inviting exploration and discovery. Sounds intriguing, doesn’t it?
To get started on your zigzag masterpiece, first, decide where you want the path to go. Maybe it’s leading to a cozy bench nook or winding its way through a flower bed. Visualize the route in your mind, or even better, grab some garden stakes and lay out the zigzag shape right in the soil. This is your chance to get funky, so don’t shy away from being a little adventurous with the angles. Just be warned; if you end up with a pattern that looks like it was designed by a hyperactive toddler, you might want to rethink it before breaking out the stones.
Now, about those stones—this is where you can have some real fun. You can opt for natural stones, pretty pebbles, or even those elegant pavers that make your path look all fancy. Aim for stones that are the same thickness to create a consistent surface to walk on.
Once you’ve gathered your materials, take a moment to lay them out without committing just yet. This way, you can play around with placement and get it just right.
After you’re happy with the layout, start digging. You’ll want to excavate about four inches deep where your stones will sit, so they’re level with the soil around them. Remember to make it a little wider than your stones so you have a margin to work with. Lay down landscaping fabric or mulch at the bottom to help control pesky weeds that like to pop up and ruin your lovely design.
Then it’s time to lay down the stones! Begin at one end, placing each stone in the historically zigzag pattern that you so expertly plotted out earlier. If one of your stones resembles a pancake rather than a proper stone, no worries—just flip it over, and you’ll be on your way. This part may take some adjustment, so don’t hesitate to shuffle them around until you’re satisfied.
Once your stones are snugly in place, fill the gaps with sand or small gravel. This won’t only hold the stones tightly in position, but it adds a nice finishing touch. Plus, it’s an excellent excuse to pat yourself on the back for a job well done when you see how good it all comes together.
Feeling the urge to spice things up? You could enhance your zigzag path with low-growing plants on either side. Think of soft, colorful flowers or aromatic herbs that would look stunning and provide delightful scents when you stroll along your new path.
And then? Admire your handiwork while sipping a cool drink, basking in the glow of your creativity. You’ve turned a simple journey through your garden into an artistic adventure. Who knew adding a zigzag stone pathway could be such a thrill? It’s the little things in life that make big differences, after all.
Essential Maintenance Advice
Taking care of your garden borders is like giving your plants a high-five—they thrive when you show them some love.
Start by pulling pesky weeds regularly; they’re like uninvited guests at a party. Keep your borders neat by redefining the edges every few months, which makes that garden border ideas shine.
Pulling weeds is essential; they’re the uninvited guests ruining your garden party. Keep those borders sharp and thriving!
Water your plants deeply but less frequently; it’s like a good hug, not a quick squeeze. Don’t forget mulch—it suppresses weeds and keeps moisture in, giving your plants a cozy blanket.
Fertilize as needed, but don’t overdo it; too much love can lead to problems. And hey, celebrate your progress. Sometimes, just a little maintenance makes your garden feel like a superstar.

