Did you know that over 35 million Americans have turned their backyards into mini-gardens? If you’re one of them or just curious, you’re in for a treat. There’s no shortage of inventive raised garden bed designs out there, and they can really change how you grow your plants. From quirky pallet beds that scream rustic charm to sleek, modern A-frames that maximize space, it’s a gardener’s playground. So, which design will spark your creativity?
Vertical Planter Arrangements
When you’re looking to add a little pizzazz to your garden, vertical planter arrangements might just be the magic touch you need.
Imagine a modern A-frame structure or a rustic pallet brimming with vibrant plants; it’s not just about saving space, it’s about creating a living piece of art.
Have you ever thought about using colorful succulents or lattice wall integration to showcase your green thumb in style?
1. Modern A-Frame Structure
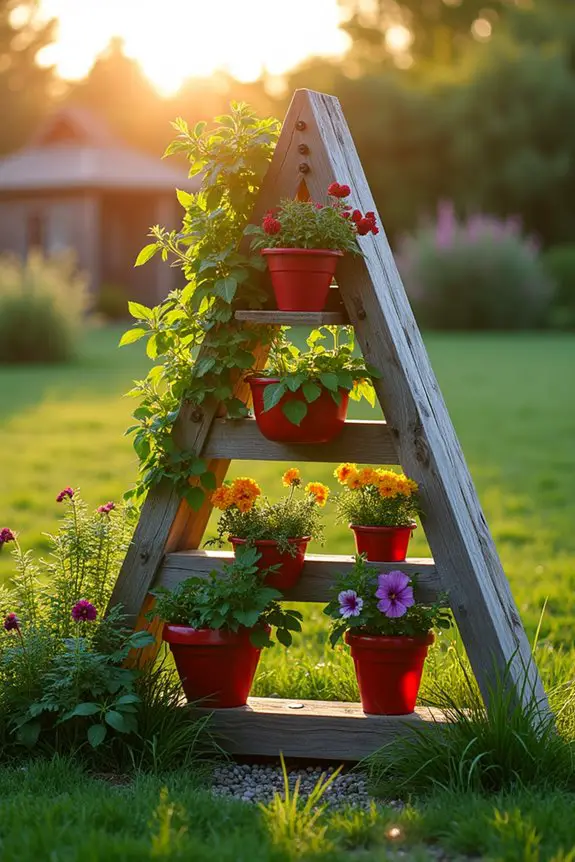
Have you ever looked at your backyard and thought, “Wow, this space could really use some height”? That’s where the modern A-frame structure comes in, and let me tell you, it’s a game changer. Not only does it save space by allowing you to grow vertically, but it also adds a stylish flair to your garden that makes it the envy of the neighborhood.
So, let’s explore how you can create this trendy vertical planter. First off, the beauty of an A-frame is in its simplicity. Picture it: two slanted structures that come together at the top, forming a cozy little structure that’s perfect for hanging pots or small planters. You can use wood, metal, or even that trendy repurposed pallet you’ve been saving.
Now, here’s where the fun begins. Start by cutting your materials to your desired height—think about how tall you want your plants to reach without blocking sunlight. A good height is anywhere from four to six feet. Assemble your A-frame using screws or nails for a sturdy finish; believe me, you don’t want that thing toppling over after a good rain.
Once your frame is standing tall, it’s time to get planting! Attach hooks or shelves at varying heights to create layers. This is where your creativity can go wild—select herbs, flowers, and even strawberries. Imagine plucking a juicy berry right off the vine without bending over. Dreamy, right? Just remember to water each level thoroughly. Trust me, I once forgot to check the top shelf, and let’s just say, my poor plants were less than thrilled about it.
As the plants grow, your A-frame will transform from a simple structure into a lush tapestry of greens and color. You’ll love sitting in your garden as the sun sets, listening to the bees buzz and watching the drama of nature unfold, all thanks to your little vertical garden. Additionally, a durable garden pond liner can enhance the overall aesthetic and health of your outdoor space.
2. Rustic Pallet Construction
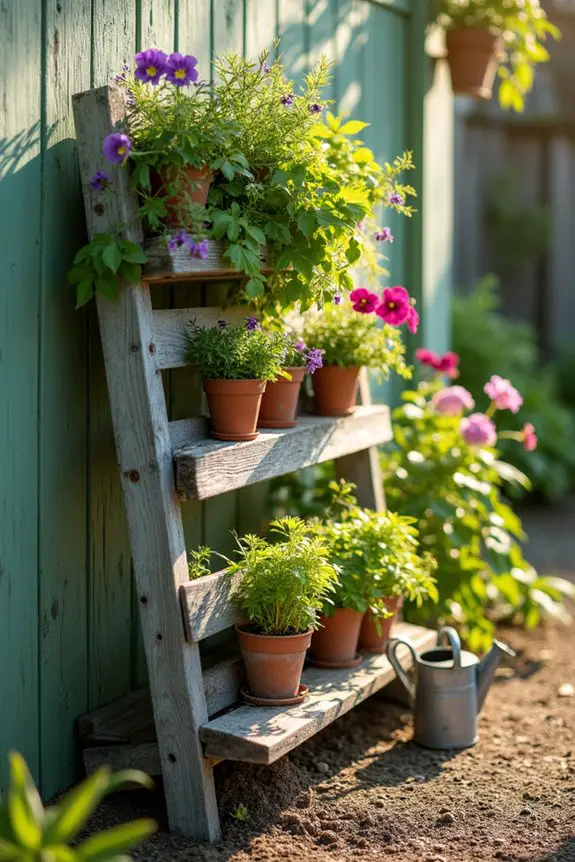
When it comes to creating a rustic vertical planter, few materials are as charming or versatile as pallets. Not only are they easy to find and often free, but they also bring a warm, farmhouse vibe to your garden. To help you with planting, consider using a planting dibber for perfectly spaced seed holes.
Imagine a cozy, inviting space filled with fresh herbs and vibrant flowers, all thanks to a little DIY ingenuity.
Building with pallets is a breeze. Start by grabbing a couple of sturdy pallets—you can usually find them at local stores or on community marketplaces. Make sure they’re in good shape; you don’t want splinters ruining your gardening dreams.
Next, lay one pallet flat to serve as the base. Use the other pallet to create the vertical aspect; you’ll want to prop it up against a wall or on a sturdy fence. This is where the magic happens. Secure it with some brackets or screws, so it doesn’t decide to make a break for it during a storm.
Now, here’s the fun part—filling it up with soil and plants. As you stack soil on the pallets, be sure to tuck in small pots or plant directly into the spaces between the slats. You can plant herbs like rosemary and thyme, or even colorful flowers that spill over the edges like a lovely garden waterfall.
I once tried to plant strawberries, thinking they’d look adorable hanging down. Spoiler alert: they did, but so did a bunch of pesky bugs.
Watering can be a bit of a challenge in the beginning. Make sure you check the soil on all levels; I’d suggest getting a nice can with a long spout. Trust me, the last thing you want is a dry patch in your vibrant vertical garden.
And don’t forget to give your beautiful pallet planter a little TLC. A coat of wood preservative can help it withstand the elements, meaning your garden will be the talk of the neighborhood for seasons to come. Additionally, consider using a three-pronged hand cultivator to aerate the soil effectively and ensure your plants thrive.
3. Colorful Succulent Patterns
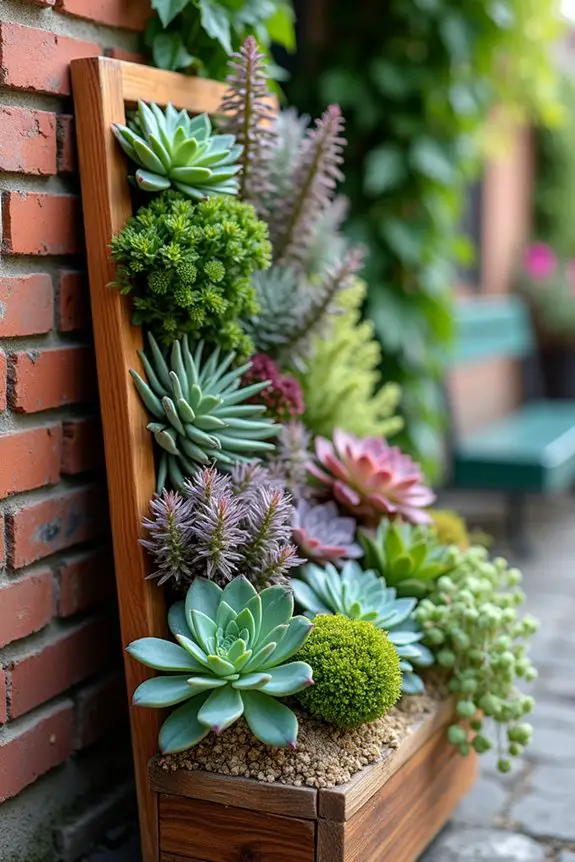
Creating colorful succulent patterns in your vertical planter isn’t just about aesthetics; it’s a way to inject personality and vibrancy into your garden while maximizing space. Picture a cascading display of lush greens, purples, and even pinks, all neatly arranged in a way that catches the eye and draws admiration. And let’s be honest, who doesn’t want to cultivate a mini oasis that looks like a work of art? Plus, having an inviting space like a perfect outdoor garden swing bench can enhance your enjoyment of these beautiful arrangements.
First things first, you’ll want to gather your succulent friends. Select a mix of textures and colors for that vibrant pop—think jade green, deep purple, and hints of soft pink. Succulents like Echeveria, Sedum, and Haworthia aren’t only hardy but can create stunning visual effects when grouped together. Additionally, using garden lime can help to ensure that your soil is properly pH-balanced for optimal succulent growth. When arranging them, consider their growth patterns. Shorter varieties up front, medium in the middle, and taller ones at the back create layers that are as pleasing to the eye as a bouquet.
Next, it’s time to plant. Fill your planter with a well-draining soil mix. If you have potting soil on hand, great! Just add some perlite to the mix for extra drainage. Start placing your succulent babies in the planter, spacing them out to allow for growth. Don’t be shy—overlap the leaves a bit to create a lush, full look.
And if you’re feeling artsy, try creating patterns like stripes or even a gradient of colors. I once attempted a rainbow pattern and ended up with something resembling a colorful salad—delicious but not quite what I’d in mind.
Watering your succulent arrangement can be tricky, especially when it’s vertical. Be mindful—succulents like it dry, so you really don’t want to soak them. A small spray bottle can come in handy here, allowing you to mist them without flooding the soil.
And remember, less is more. Let the soil dry out completely between waterings; your bountiful display will thrive without drowning.
Lastly, don’t forget to enjoy the process. Spend time acknowledging each little plant as you work. Trust me, the quiet satisfaction of nurturing these little gems into a flourishing display is nothing short of delightful.
Plus, when friends and family come over and admire your succulent artistry, that little feeling of pride will be totally worth it. Who knew gardening could be this fun?
4. Lattice Wall Integration
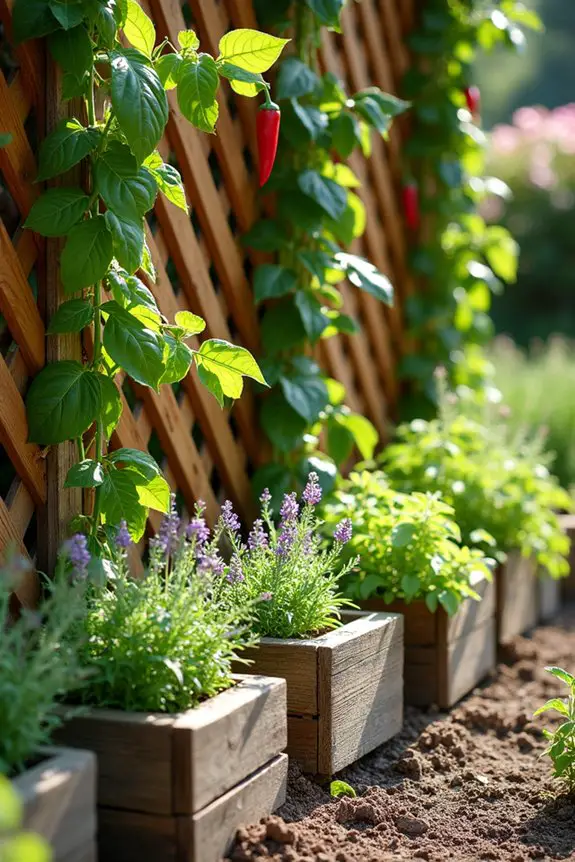
Integrating a lattice wall with your vertical planter arrangements is like giving your plants a stylish backdrop for their leafy performances. Not only does it create a functional support system for climbing plants, but it also adds a rustic charm that breathes life into any space.
Imagine a trellis adorned with lush vines, vibrant blooms, or even cascading herbs. It’s like the best of both worlds—style and function wrapped up in one gorgeous display.
To start, you’ll need a lattice structure. You can buy one, or if you’re feeling adventurous, DIY it using some timber and nails. Who knew woodworking could be part of gardening? Just make sure it’s securely mounted, as you don’t want your beautiful plants taking a tumble.
Then, choose your plants wisely. Climbing varieties like peas, beans, or even vining herbs like basil and mint cling adorably to lattice, giving you not just a feast for the eyes but also for your taste buds.
When it comes to planting, leave enough space between your lattice and the actual planter to allow your plants to grow freely. A tip—train your plants as they grow. Gently guide their stems towards the lattice, and before you know it, they’ll naturally embrace it, creating an enchanting greenery that softens the hard edges of the structure.
Think of it as giving your plants a little hand to succeed in their climbing adventure.
Don’t forget about the watering and sunlight needs of your climbing plants. Make sure they’re getting enough light to thrive against that lattice, but be cautious of any direct scorching sun that could stress them out. The right balance will make your wall of green look effortlessly vibrant, and trust me—nothing feels quite as satisfying as watching your leafy friends take to the skies.
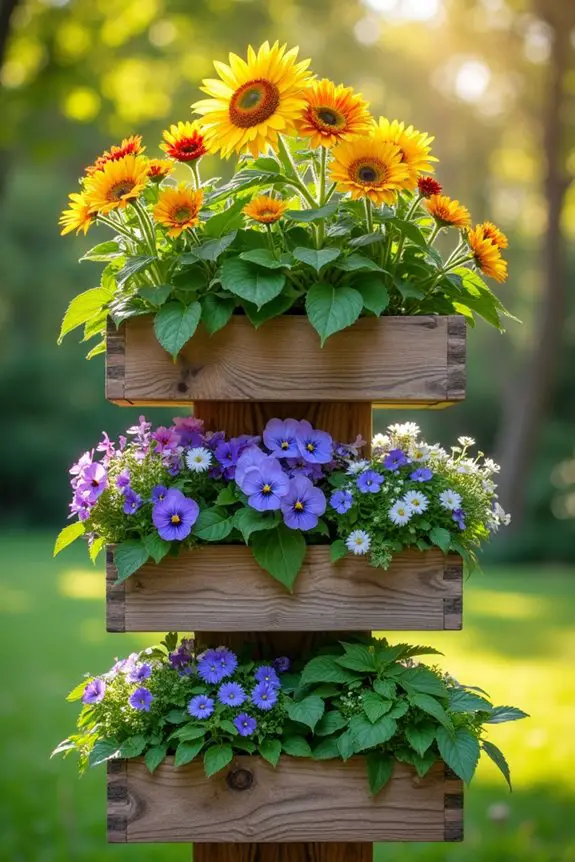
5. Geometric Shapes and Patterns
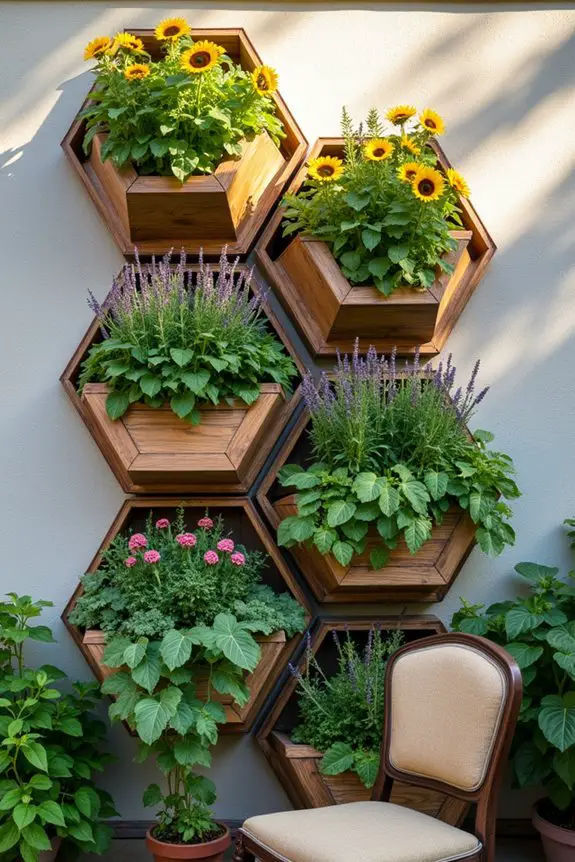
When it comes to vertical gardens, think outside the box—literally. Incorporating geometric shapes and patterns into your planter arrangements not only adds visual interest but also brings a modern, artistic flair to your gardening space. Imagine a vibrant, three-dimensional display that draws the eye, makes your plants pop, and even plays tricks on the mind. It’s like giving your plants a stage where they can truly shine, while you sit back and sip your iced tea, admiring the view.
To get started, consider using different shapes like triangles, squares, and even hexagons. You can find pre-made planter boxes or design your own. I once fashioned some hexagon-shaped planters out of leftover wood from a crafting project (who knew my “DIY skills” would come in handy?). This kind of approach adds layers and depth to your garden, making it not just a spot for plants but a genuine focal point.
You can arrange them in a way that creates a step-like pattern or organize them randomly for a more whimsical vibe—just let your creativity flow.
When selecting plants, think about height and texture. Tall varieties like sunflowers or climbing zucchinis can tower over shorter herbs or flowers, creating fascinating contrasts. Mixing plants with different leaf shapes and colors adds even more visual intrigue. As you plant, make sure to stagger them so that each one gets enough sunlight. It’s like giving your plants their moment in the spotlight—who doesn’t want to feel like a star?
Don’t be afraid to experiment. Take a step back after planting and see if the arrangement feels right. If something looks off, trust your gut. It’s all part of the gardening adventure, right? Plus, a little tweaking here and there could lead to a masterpiece you’re proud to show off.
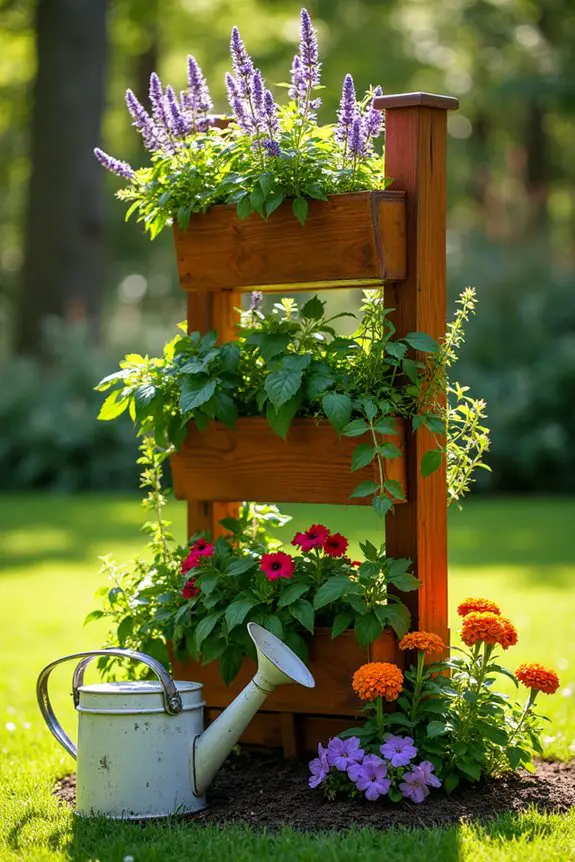
6. Tiered Wooden Frames
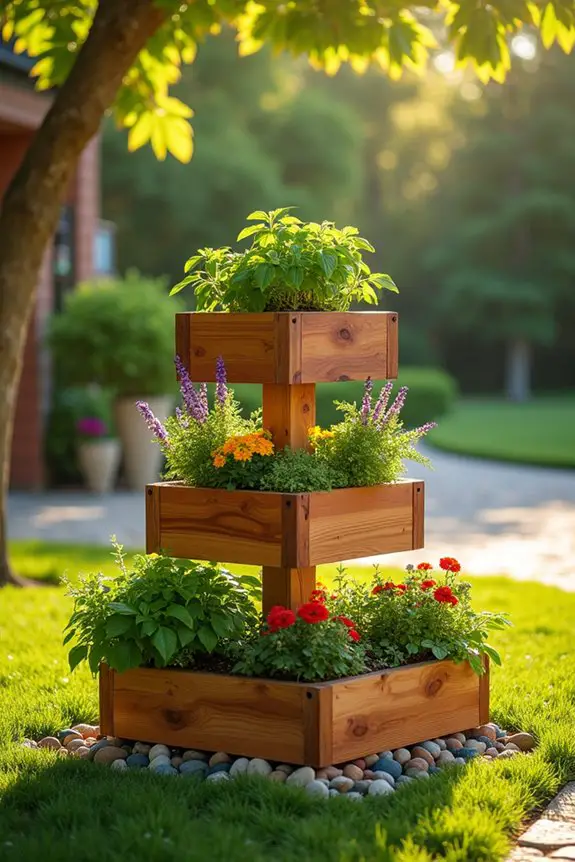
If you’re looking to maximize your gardening space while making a stylish statement, tiered wooden frames are the way to go. They’re not just functional, stacking beautifully across vertical space, but they also create a visual narrative in your garden. Each tier can showcase a different type of plant, inviting the eye to explore the delightful display from top to bottom.
Now, let’s get down to the nitty-gritty. Building a tiered planter isn’t as intimidating as it may sound. Start by gathering your materials. You’ll need some wooden boards (the good ol’ pressure-treated kind works great), nails or screws, and wood stain if you want to add a touch of flair. Trust me, I learned the hard way that a well-stained planter is much more appealing than a splintery, raw wood version. Nobody wants to call a doctor over a gardening accident, right?
Next, map out your design. You can choose how many tiers you want—three or four is usually a nice number. Aim for a design where each level can hold a variety of plants while still being easy to reach. You want to be able to plant without feeling like you need a rock-climbing certification.
Once you’ve got your vision, cut the wood accordingly and assemble your frame. It’s pretty straightforward, and although I might’ve fumbled with my first attempt, I can assure you, patience is key and every angle counts.
After your frame is assembled, it’s time to put on some soil and plant. Consider each plant’s sunlight needs; you wouldn’t want to put a shade-lover on the top tier baking blissfully under the sun. Or if you’re anything like me, you might accidentally create a plant sauna— and no one wants tomatoes that are too hot to handle.
Layer your soil and plants with care, choosing an array of colors and heights that play off each other nicely.
Once you’re finished planting, stand back and admire your handiwork. It may inspire an indoor “gardening pride” moment where you silently congratulate yourself.
Just remember, these tiered planters aren’t just showpieces; they also serve as a perfect haven for your herbs and veggies, adding fresh flavors to your dishes right from your own backyard. So give it a go and let those wooden frames take your gardening game to new heights.
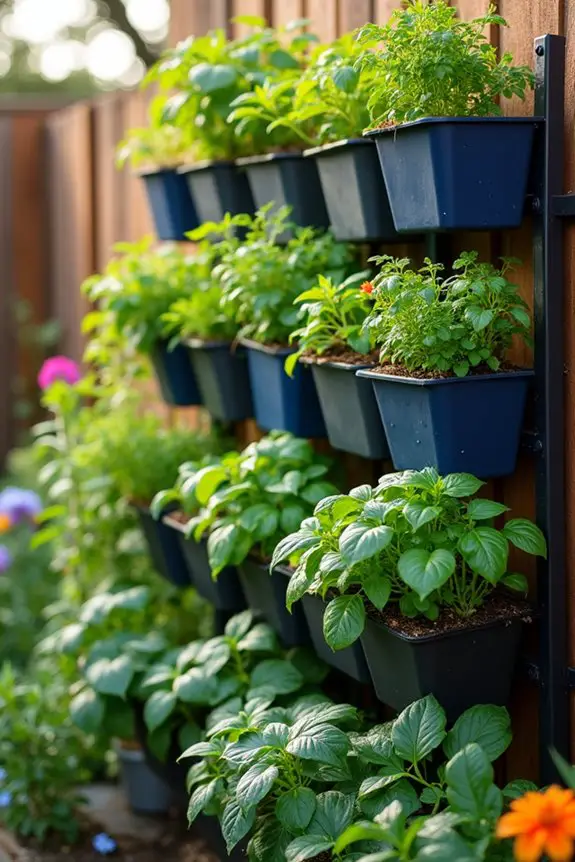
7. Hanging Herb Gardens
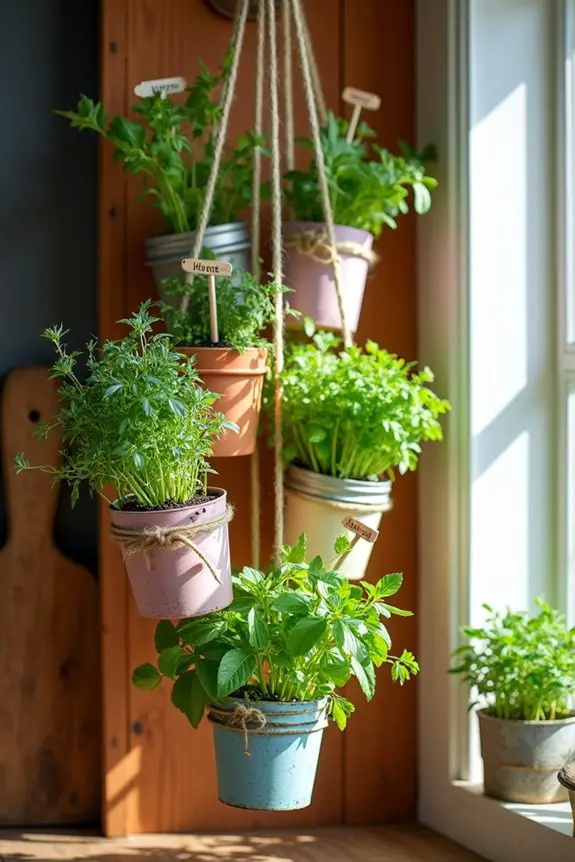
If you’re short on space but long on ambition, hanging herb gardens are a game-changer. They don’t just save precious floor real estate—they add a green flair to your kitchen or patio that can brighten up any dull wall. Plus, having fresh herbs at your fingertips is like giving your cooking a VIP upgrade. Imagine snipping basil or thyme right when you need it; it’s almost like being in your own culinary movie scene.
So, how do you get started? First, gather some materials. You’ll want sturdy containers—think small pots, mason jars, or even repurposed tin cans (yes, it’s totally cool to upcycle). Make sure they’ve drainage holes because soggy roots are a recipe for disaster. Grab some heavy-duty rope or chain for hanging; it’s gotta support your herb garden without falling flat… and trust me, you don’t want your herbs making a daring escape.
Next up, the assembly. If you’re feeling crafty, hook those pots onto an old wooden pallet for a rustic look. Attach your containers using the rope or chain, spacing them out to give each herb some breathing room. Just remember, like I learned the hard way, not all herbs have the same sunlight needs. A cilantro on the top row could end up sunburned faster than you can say pesto!
Once your arrangement is hung up and looking fabulous—seriously, it’s going to be a showstopper—it’s time to fill the pots with potting soil. Plant your herb seeds or young plants, giving each one a gentle pat into the soil. And don’t forget to label them. I once planted mint next to my basil and let’s just say the garden gossip got a little confusing.
After a few weeks of watering and loving your little garden, stand back and soak in the fresh aroma whenever you pass by. Those extra green touches won’t just brighten your space; they’ll also inspire culinary adventures.
8. Cedar Wood Elegance
If you’re looking to add a touch of elegance to your garden while maximizing space, cedar wood vertical planters are just what you need. Not only are they durable and weather-resistant, but they also bring a rustic charm that instantly elevates your outdoor area. Imagine the beauty of lush greenery rising elegantly from a beautifully crafted cedar frame; it’s like inviting nature to your next garden party.
To get started, invest in a good-quality cedar wood vertical planter. You can find these pre-made at garden centers, or if you’re feeling a bit handy, you could even build one yourself. All you’ll need are cedar boards, screws, a saw, and some basic tools. If you choose the DIY route, don’t worry if the cuts aren’t perfect; nature tends to be forgiving, and a little character never hurt anyone.
Once you’ve got your planter set up, it’s time to think about what to plant. Opt for a variety of herbs, veggies, or flowers. Just make sure you choose plants that grow well together and have similar sunlight and water needs.
When I first started my own vertical planter, I mixed ornamental flowers with tomatoes, and let’s just say the tomatoes got a little overshadowed—who knew flowers could be so needy?
After you’ve decided on your plants, fill those sections with quality potting soil, leaving enough space for each plant’s roots to spread. Gently tuck your plants into the soil and give them a good drink of water.
Pro tip: use a watering can with a spout for this, as it’s easier to get into the nooks without causing a mudslide on the surrounding areas—a lesson I learned the messy way.
Finally, don’t forget about regular maintenance. Cedar planters can dry out a bit faster than traditional beds, so check the moisture levels often. I recommend a weekly check-in—just like a check-up at the doctor.
Keep an eye on pests and trim any plants that start to look a bit unruly. This way, your vertical garden will maintain that chic look you were going for, not an overgrown jungle.
9. Edible Flower Bed Layout
If you’ve ever wanted to turn your garden into a feast for both the eyes and the palate, an edible flower bed layout for your vertical planter might just be your golden ticket. Not only do these beauties add a pop of color and a touch of whimsy, but they also provide delightful flavors and textures to your dishes. Imagine plucking flowers right from your garden to garnish a salad or sweeten a dessert; it’s like nature’s confetti!
Start by carefully selecting edible flowers that thrive in your climate and mesh well with your herbs and veggies. Think about classics like nasturtiums that pepper your plate with a bit of spice, or pansies, which have a sweet, delicate taste—perfect for adding flair to summer cocktails. As you plant, try to mix taller flowers like sunflowers on the top tiers of your vertical planter and distribute shorter blooms like violas below—it creates an organic cascade of color that’s as pretty as it’s functional.
When it comes to soil, remember that quality really counts. Fill each section with rich, organic potting mix that promotes drainage. Many people—myself included—forget this vital step and end up staring in disbelief at sorrowful, soggy flowers. To prevent your garden from becoming a muddy mess, opt for well-draining soil and make sure each section has holes for excess water.
Once your flowers are nestled in, water them gently, ensuring they’re settled into their new home but not drowning. Personally, I’ve had moments when zeal overtook me and I watered like I was a fire hydrant, only to find my carefully laid garden turned into a small pond—what a sight that was. A gentle watering can is your best friend here; it lets you control the flow like a pro.
Now for the fun part—maintenance. Make it a habit to check in on your flower bed regularly; these delicate blooms can quickly become thirsty. I set a weekly “flower date” with myself to inspect, prune, and harvest. Keeping your edible flowers trimmed encourages new growth and prevents any of them from becoming too leggy.
It’s sort of like giving them a fashionable haircut, and trust me, they’ll thank you later by blooming even more beautifully.
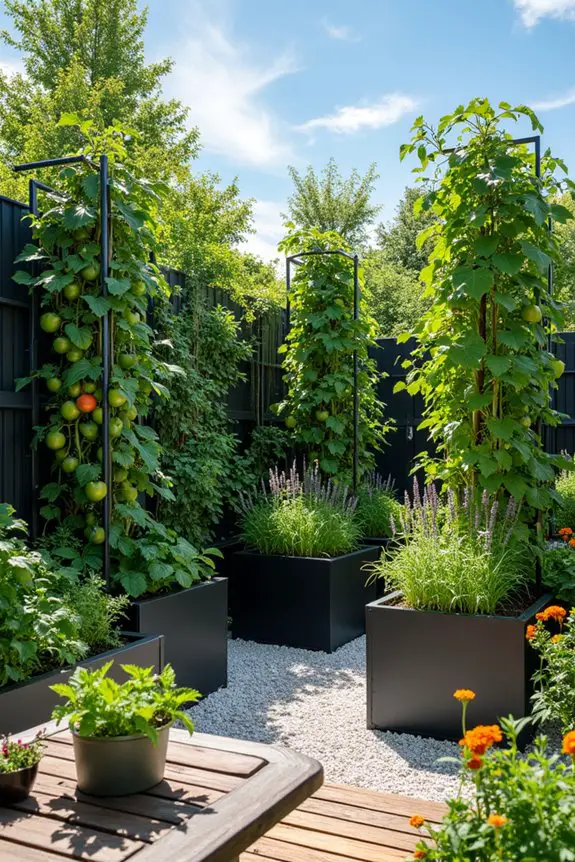
10. Contemporary Steel Features
When it comes to creating a stunning garden that’s as chic as it’s functional, incorporating contemporary steel features into your vertical planter arrangements is a fantastic choice. Not only do these elements exude a modern vibe, but they also provide sturdy support for your plants while making a bold design statement. Envision those sleek, rust-resistant steel frames elegantly holding up vibrant greenery—it’s a breathtaking scene.
Now, let’s get into the nitty-gritty of making this work for you. First, consider the arrangement of your planter. A zigzag or tiered design can create visual interest and allows for effective sunlight absorption for all your plants. Visualize this: taller plants, like tomatoes or climbing beans, positioned at the back, then gradually shorter ones in front. My first attempt had my basil getting overshadowed by a rogue zucchini plant—what a comedy that was! Don’t make my mistake; plan your heights wisely.
Next, think about choosing pots or containers that harmonize with your steel features. Perhaps you might go for a mix of matte black or deep gray planters to complement the steel, or a pop of color if you prefer a playful look. Personally, I’ve always found that a dash of cobalt blue really makes green foliage pop. It’s all about finding that balance!
Now, let’s talk drainage. It’s easy to overlook this detail, but proper drainage is essential. Many steel planters come equipped with drainage holes, but if yours don’t, you might want to channel your inner DIY guru and add some yourself. Trust me, there’s nothing worse than watching your beloved herbs drown in waterlogged soil. I learned this lesson the hard way—sending my mint into a watery grave.
As you plant, layer your soil strategically. Start with high-quality potting mix at the base for structure, then add some organic compost for nutrients. Think of it like building a cake, where each layer deserves the best ingredients. Don’t forget to give your plants a good water once they’ve settled into their new abodes. And when I say good, I mean just enough to make them feel at home, not like they’re auditioning for a role in a water ballet.
Last but not least, embrace the art of maintenance. With steel planters, you’ll likely need to check for rust or wear, but it’s a small price to pay for beauty. Trust me; a little wipe-down once in a while goes a long way. Take time to observe your plants; if one is looking a bit sad, it might need a move to a sunnier spot. My friend once had a poor, sun-starved potato decide to thrive in the shade—it’s all about finding the right place for your friends, isn’t it?
Implementing contemporary steel features in your vertical garden isn’t just about aesthetics; it’s about creating an efficient, functional space that you can enjoy all season long. Envision hosting a cozy dinner with friends, harvesting fresh herbs or edible flowers from your splendid steel garden—it’s what dreams are made of.
Seasonal Planting Guidelines
As the seasons change, so does the opportunity to fill your raised garden bed with a variety of delicious plants. Think about spring—it’s perfect for planting peas and radishes.
By summer, tomatoes and basil will thrive, bringing those fresh flavors right to your kitchen. Fall calls for hearty greens like kale and Swiss chard. With winter around the corner, you might want to contemplate some cozy herbs or maybe even a winter cover crop.
Prepare your garden for summer’s bounty with tomatoes and basil, then embrace fall’s nutritious greens like kale and Swiss chard.
For the best results, try experimenting with different raised garden beds ideas layout; you never know what might work!
Just keep in mind, timing is everything. Plant those seeds at the right moment, and you’ll have a bounty that’s as rewarding as it’s tasty.

