If you’re thinking about sprucing up your garden, have you considered a trellis? It’s like adding a piece of art that’s functional too. You can support your climbing plants while making your space pop. From charming arched styles to sleek modern frames, there’s a world of designs waiting for you. Trust me, I’ve tried a few that turned out less than fabulous. What’s the secret sauce in choosing the right one? Let’s explore some truly stunning options.
Intricate Wooden Trellis Patterns
When you think about wooden trellis designs, intricate patterns can really take your garden to the next level.
From arched garden styles that add elegance to lattice work techniques that challenge your DIY skills, there are so many options to contemplate.
Have you ever imagined how floral motifs or colorful painted accents could brighten up your outdoor space?
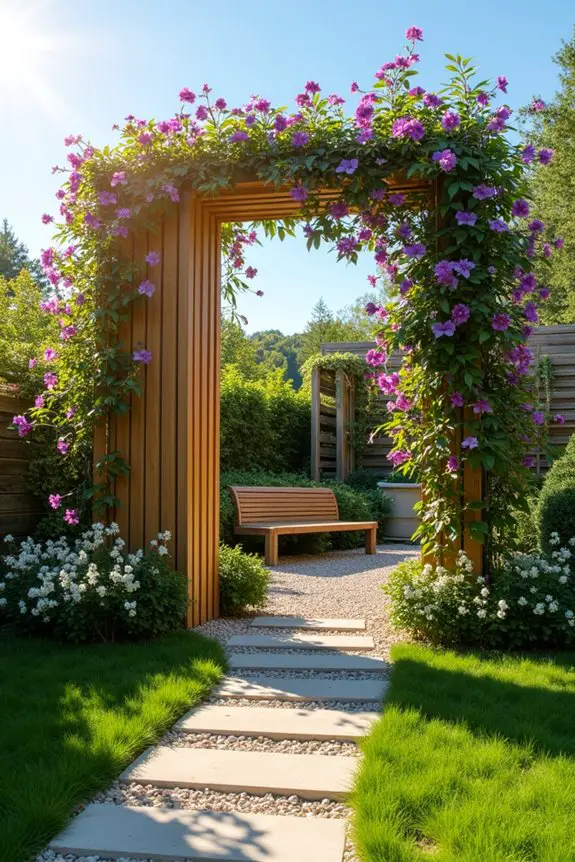
1. Arched Garden Trellis Style
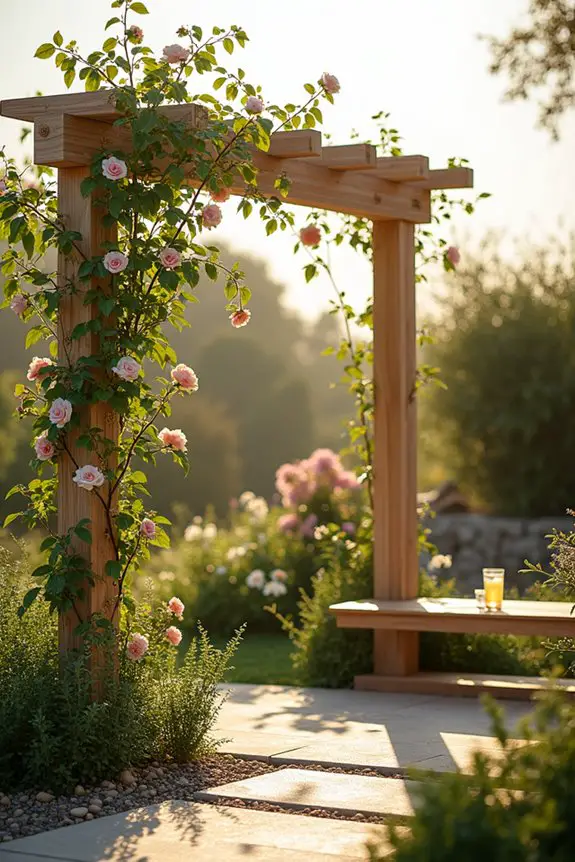
When it comes to garden trellises, the arched design is like the crown jewel. Not only does it provide incredible support for climbing plants, but it also adds a charming, fairy tale vibe to your garden. Imagine strolling through your backyard, the sun shining, and vine-covered arches beckoning you towards a magical secret. Sounds dreamy, right? An archway design is often favored for its elegance and structural integrity.
To create an intricate wooden trellis in that lovely arched style, start with some quality wood. Trust me, you don’t want to build something that might collapse under the weight of your ambitious bean plants. Cedar or redwood are great choices since they can endure the elements and still look fabulous. Seriously, look for wood that speaks to you—it should say, “I will be beautiful in your garden.”
Next, you’ll want to sketch out your design. Don’t worry; it doesn’t have to be a Picasso masterpiece. Just a simple outline showing the gentle curve of the arch will do. Think of it like drawing a happy rainbow—just in wood form.
Now, grab that saw (only if you’re feeling brave) and start cutting your pieces. Remember, safety first; don’t go all lumberjack without eye protection.
Once you’ve got your pieces, assemble them according to your sketch. You can use screws or wood glue—whatever tickles your fancy. Just make sure it’s sturdy. Also, consider adding some plant saucers assorted at the base of your trellis to enhance the overall aesthetic and protection for your plants.
Lastly, decorate! You could leave the wood as is for a more rustic feel, or add a coat of paint or stain to make it pop. I always go for a light color because, let’s face it, I’m a sucker for that fresh look.
And voilà! You have your own arched garden trellis, ready to gloriously support those climbing flowers! Just remember, every time you pass it in the garden, it’s perfectly normal to give a little nod of appreciation for creating such beauty. Happy gardening!
2. Lattice Work Techniques
When it comes to garden trellises, lattice work is like the secret sauce in a delicious recipe. Not only does it provide excellent support for climbing plants, allowing them to wander and flourish, but it also adds texture and a dash of elegance to your garden. Imagine this: vibrant flowers weaving through intricate patterns of wood, transforming your yard into a picturesque escape. Just the thought of it makes me want to dance around my garden.
So, how do you get started with lattice work? First, choose your wood wisely. Pine is great for those of us on a budget, while hardwoods like oak will give your trellis a long-lasting appeal. Don’t forget to make sure the pieces are straight and smooth—splinters aren’t the surprise you want in your garden adventures. A great option to consider is using a garden tower obelisk which can provide both support and style.
Now, grab a piece of graph paper, because we’re about to get mathematical (kind of). Sketch out your pattern. You don’t have to stress about it being perfect; simply look for classic designs like diamonds or squares that will create that lovely intersecting effect. A little mix of shapes can bring character to your trellis, and who doesn’t love a little quirkiness?
Next, cut your wood into the strips needed based on your design. Channel your inner woodworker and be precise, but hey, mistakes happen. If you accidentally end up with a blob instead of a square, just laugh it off and keep going. You’ll realize it adds to the story of your creation!
Once you’ve got your pieces ready, it’s time for assembly. Using wood screws or trusty nails, connect your strips to form the lattice. Think of it like building a mini tower—only way less precarious. If anything feels wobbly, remember that a strong base is key. You don’t want your plants to feel like they’re on a roller coaster.
Finally, finish it off with a protective stain or paint. I love using bright white or pastel shades because they just look lovely peeking out from the greenery. Plus, when my neighbors compliment it, I get to bask in the glory of my not-so-hidden labor of love.
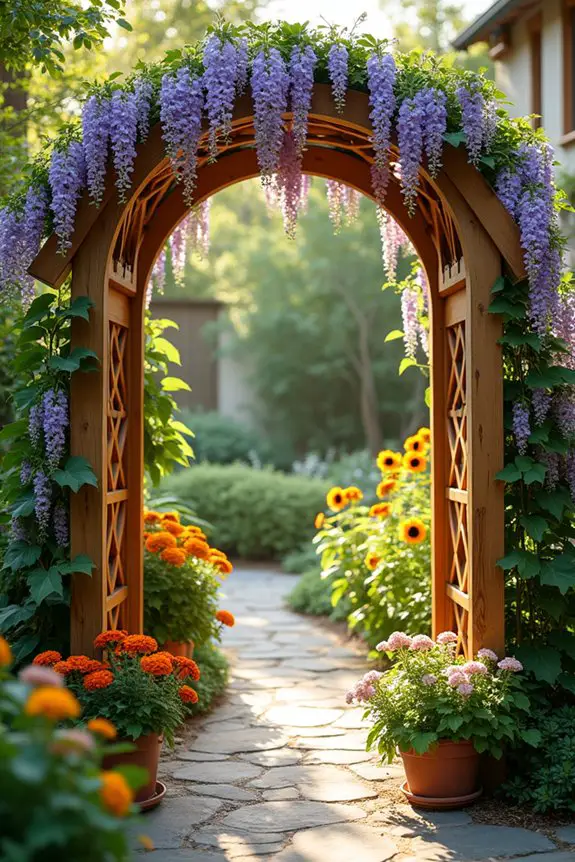
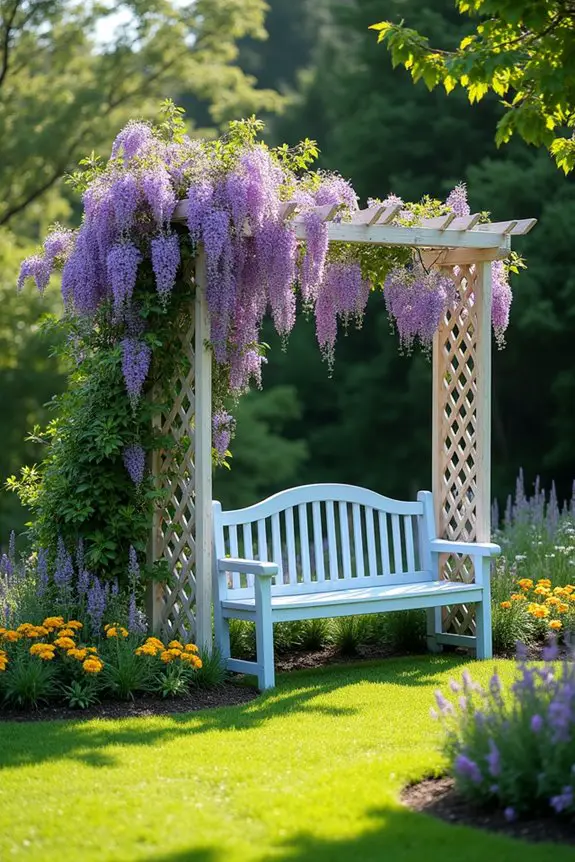
To elevate your garden even more, consider incorporating a stunning wisteria trellis that will provide a breathtaking display as the plants thrive!
3. Floral Motif Trellis Accents

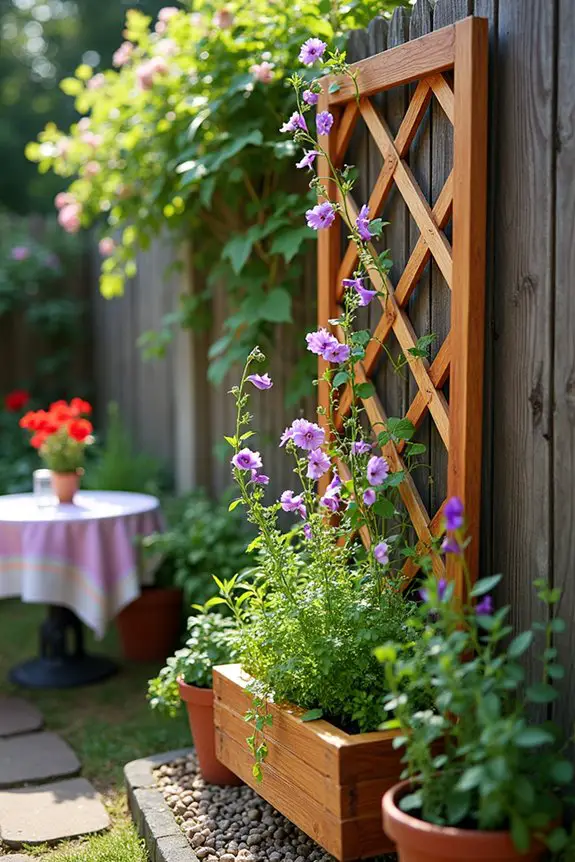
When it comes to garden aesthetics, floral motif trellis accents breathe life into your outdoor space. They combine function with artistry, providing sturdy support for climbing plants while adding a whimsical touch that dances with the eye. Picture roses winding elegantly around intricately carved wood—stunning, right? It can transform an ordinary fence into a glorified work of art.
To get started with these delightful designs, first, choose a floral pattern that inspires you. Do you prefer classic roses, playful daisies, or maybe something more exotic like hibiscus? The choice is yours, and the only limit is your imagination. Grab some inspiration from nature or immerse yourself in Pinterest—your future self will thank you for those dreamy ideas.
Next, use a router to carve your floral motifs into the trellis slats. Yes, this part requires a bit of finesse, so don’t be like me and plunge in without practice. I once thought I was a wood-carving prodigy and ended up with what looked like a sad potato instead of a tulip. So, maybe try on some scraps first because finesse is your friend here.
Once you’ve got your patterns carved, it’s time to assemble. Connect your slats into your trellis frames as before—you know the drill: strong base, sturdy attachment. Consider using wood glue in addition to screws for that extra reinforcement—because who needs weak trellises when your flowers can make a grand entrance?
And when it comes to finishing touches, a wood stain or natural finish can highlight the intricacies of your designs. My personal favorite? A soft natural finish that lets the wood shine while still letting those floral patterns pop. It’s like giving your plants a stylish backdrop for their grand performances out in the garden.
In the end, a floral motif trellis isn’t just a support system for your beloved vines; it’s a piece of art that reflects your personality. Plus, every time I glance at mine, I can’t help but smile, remembering my potato moment. A little creativity can turn your garden into a botanical gallery, one flourish at a time.
Additionally, enhancing your garden with a beautiful wood arch can further elevate your outdoor design and create stunning focal points.
4. Geometric Frame Structures
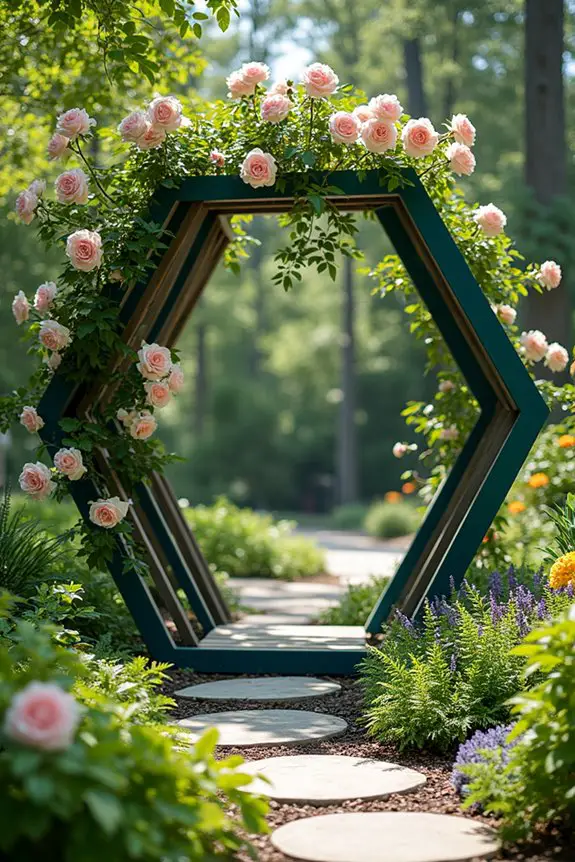
Imagine stepping into your garden and being greeted by the stunning sight of geometric frame structures, their clean lines and intricate patterns creating a modern vibe that perfectly balances functionality with artistic flair.
These trellises not only support your climbing plants but also invite a contemporary aesthetic to your outdoor space. It’s like adding architecture to your garden—without needing to hire an architect.
To explore this design, start by sketching out your geometric concepts. Think squares, triangles, or even hexagons—whatever speaks to your creative side.
Don’t worry if your sketches look like a toddler’s finger painting; just use them as rough guides. Grab a piece of paper, let your imagination roam, and don’t be afraid to mix and match shapes. The goal is to create a pattern that feels structured yet playful.
When you have your design, it’s time to move on to the actual wood. Birch or cedar works great because they’re sturdy but also beautiful. Cut your wood into equal lengths, and remember, measuring twice is key to avoiding that “oops” moment when you realize one side of your trellis is apparently 2 inches shorter than the other.
Trust me; I’ve built a crooked trellis once, and let’s just say my climbing roses were more confused than impressed.
Now comes the fun part: assembling. Create your frame by attaching your cut pieces together—think of this like a giant puzzle where the pieces really need to fit and look good together.
Use strong wood glue and screws to secure everything tightly. If you have a friend handy, grab them for an extra pair of hands—unless you want to try balancing on one leg while holding the other side.
Next, sand down any rough edges. This step is essential, especially if you plan to lean against it or get up close to admire your plants. Nobody wants splinters.
Trust me, I learned that lesson the hard way after getting a full arm workout from a single splinter.
Finally, consider finishing your geometric trellis with exterior paint or sealant. A sleek coat can make those shapes really stand out.
Or keep it natural—whatever matches your garden’s vibe. My last trellis was painted a deep teal, and it feels like a pop of color amidst all the green.
Every time I walk by, I can’t help but grin because, after all that work, it feels good to see that one little spot in my garden thriving.
5. Colorful Painted Trellis Ideas
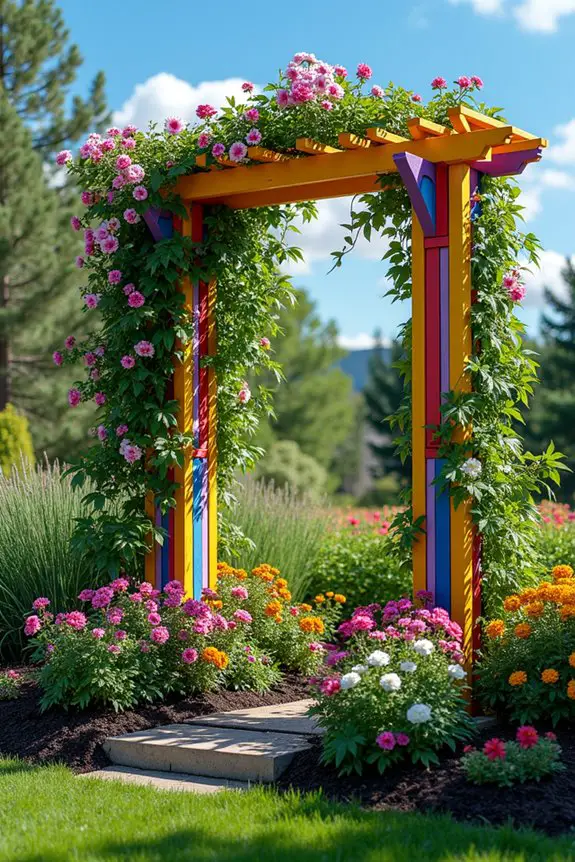
When it comes to adding a splash of personality to your garden, colorful painted trellises are a fantastic choice. Not only do they support your climbing plants, but they also serve as eye-catching art pieces that can transform your outdoor space. Envision vibrant colors peeking through lush greenery—it’s like planting a smile in your garden.
To start, think about the colors that speak to you. Are you drawn to sunny yellows, deep blues, or maybe bold reds? Gather your favorite hues, and don’t hesitate to mix them. Imagine this: a trellis striped with alternating colors, inviting your climbing vines to dance around them. You can even try a gradient effect, blending shades for a softer look. Sounds fun, right?
Next, grab your wood and prep it for painting. If it’s unfinished, give it a light sanding to smooth out any rough bits—no one wants their fingers snagged while admiring a pretty flower. Once it’s ready, lay down a drop cloth to protect your work area, and start applying your base coat. A brush is great for details, but if you’re feeling adventurous, a roller can speed things up. Just be careful; I’ve had paint splatters become fashion statements more than once.
After your base coat dries, it’s decorating time! Use painter’s tape to create sharp lines or funky patterns. You could even go freehand for a whimsical look. Feel free to channel your inner artist—after all, your garden is a canvas. Paint a few extra layers if needed, and once everything is dried and looking fabulous, seal it with a clear coat to protect against the elements.
Finally, step back and admire your work—go on, give yourself a moment. It can be incredibly satisfying to see a drab piece of wood transform into a vibrant structure alive with colors. Just remember, every time a flower reaches for the sky, it’s also reaching for your creativity. Who knew a little bit of paint could lead to so much happiness in your garden?
6. Rustic Reclaimed Wood Trellis
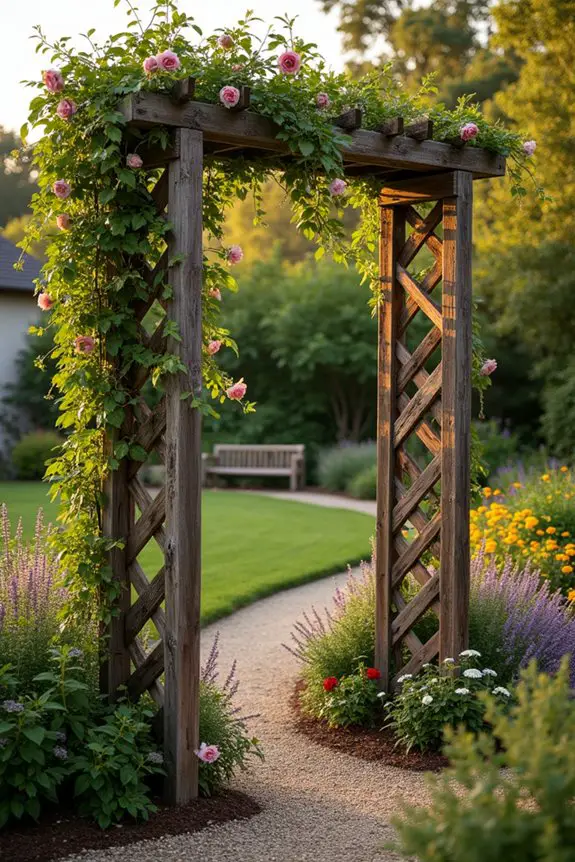
When you think about enhancing your garden space, a rustic reclaimed wood trellis can be such a beautiful addition. Not only does it function as sturdy support for your climbing plants, but it also brings a warm, welcoming vibe that instantly makes your garden feel more inviting. Imagine strolling through your yard, surrounded by the charm of weathered wood—it’s like stepping into a cozy retreat right outside your door.
To get started, look for salvaged wood that tells a story. Old fence panels, barn wood, or even pallets can work wonders. I once found a pile of reclaimed wood from a friend’s renovation project, and let me tell you, the unique textures and colors were pure gold.
Before diving into building, lay out your design. Do you want something tall and grand, or a more modest structure that blends with your garden? Sketch it out if you need; it helps bring your ideas to life.
Once you have your design in mind, it’s time to cut your wood to size. A circular saw can be your best friend here, but don’t forget to make those safety goggles your new fashion accessory. Trust me, splinters and sawdust don’t scream stylish.
After cutting, assemble the pieces with nails or screws—whichever you prefer, but I’ve a soft spot for screws. They hold everything together like a firm handshake, plus, you can always take things apart if needed.
Next, embrace the imperfections. The beauty of reclaimed wood is its character. If there are knots or rough patches, leave them be. It gives your trellis personality and makes it feel more authentic.
Once assembled, consider a light finish to protect your creation from the elements. A clear wood sealer does wonders, and it won’t take away from the natural look.
Finally, step back and give yourself a little pat on the back—okay, a big one. The rustic touch you’ve added won’t only support your climbing plants but also breathe life into your garden space. Each blossom that entwines around your trellis will serve as a reminder of your creativity and resourcefulness. Who knew that with a bit of reclaimed wood, you could create such a stunning garden accessory?
7. Trellis With Climbing Plants
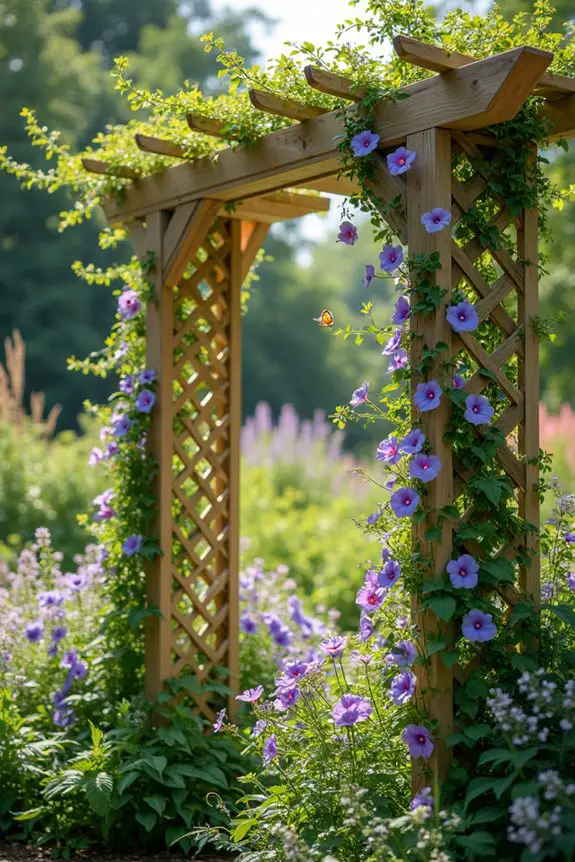
When you think about sprucing up your garden, incorporating climbing plants onto a trellis can take your outdoor space from blah to beautiful in no time. Not only do these plants add a lush, vibrant life to your garden, but they also create a stunning backdrop with intricate patterns as they weave up and around your wooden trellis. It’s like having a piece of art, but instead of paint, you’re using nature.
Imagine a charming vine, like sweet peas or clematis, spiraling around your trellis, climbing higher into the sky as summer rolls on. The sight of colorful blooms against a detailed wooden framework just brings such joy. Plus, it’s functional, allowing the plants to grow upward instead of sprawling across your garden floor. This means more space for your other plants to flourish and less weeding for you. Sounds like a win-win, right?
When choosing your climbing plants, think about how they’ll interact with your trellis design. For an intricate wooden trellis with a geometric pattern, go for plants with delicate tendrils that can easily wrap around the wood. I once planted a lovely mix of jasmine and morning glory, and just like that, my trellis transformed into a fragrant, colorful wonderland. And let’s be honest, who doesn’t love a garden that smells as good as it looks?
To get started, consider spacing your climbing plants properly when you plant them at the base of the trellis. Too close together, and you’ll have a tangled mess that looks like it belongs in a horror movie. You want your plants to have room to breathe. A good rule of thumb? About 1-2 feet apart should do the trick, depending on their growing habits. This way, they’ve enough space to flourish without fighting for sunlight and nutrients.
As they climb, guide the plants gently onto the trellis if they seem to stray off course. It’s like teaching a kid to ride a bike—sometimes they need a nudge to keep them on the right path. Your goal? To create a pretty wallpaper of leaves and flowers that has everyone admiring your handiwork.
Once everything starts to take shape, sit back and enjoy the view. You’ll see your garden evolve into a thriving oasis, with the trellis showcasing your climbers in a spectacular way. And there’s no better feeling than knowing you played a part in this natural beauty. Who knew that a little wood and some climbing plants could bring so much joy and vibrancy to your outdoor space?
8. Custom Iron Trellis Configurations
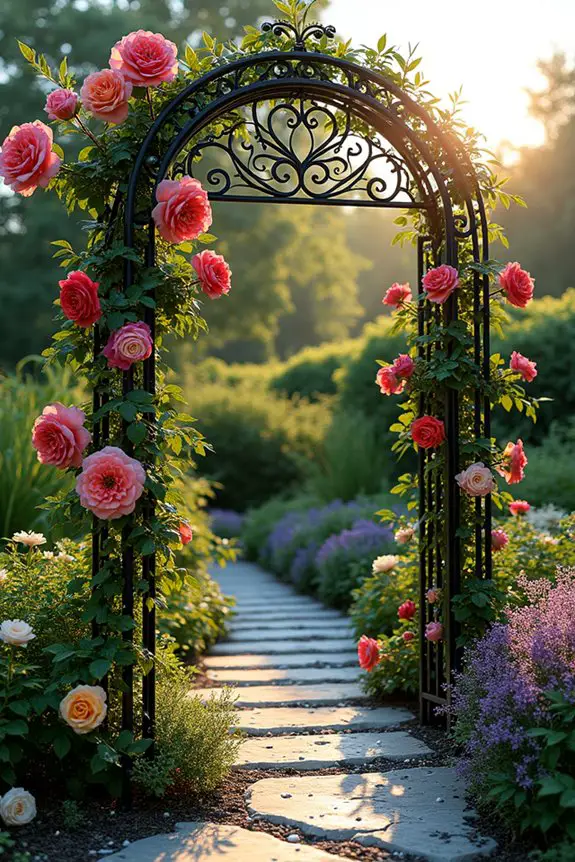
When it comes to garden aesthetics, custom iron trellis configurations are pure magic. Not only do they offer sturdy support for your climbing plants, but they also add a sophisticated flair to your outdoor space. Think of them as the bold jewelry that transforms an everyday outfit into something extraordinary—functional yet striking.
Picture this: a beautifully wrought iron trellis showcasing twinkling lights at night or fanning out with lush greenery during the day. It’s like creating a secret garden where iron meets natural elegance. Plus, you can get really creative with shapes! Want something geometric? Maybe a heart design? The options are endless. Just imagine planting climbing roses or vines with vibrant foliage, and watch them dance across a unique iron backdrop. It’s simply delightful.
Now, here’s a little tip from my own (less-than-perfect) experience. When selecting your iron trellis, be sure to reflect on your plants’ climbing tendencies. Some need minimal guidance, while others act like toddlers in a candy shop—constantly looking for distractions. When I got my first iron trellis, I paired it with a particularly rambunctious passionflower. Let’s just say that plant took more tangents than I did in gym class.
To make sure your configuration works, take a moment to visualize how the plants will climb. Position your trellis in a spot where it will catch the sun but be mindful of the shade cast by any nearby structures. You want those plants to soak up all the goodness they can.
And when it’s time to plant? A tip—mix and match your climbers. Layering different plants with varying colors and textures can create an eye-catching masterpiece.
9. Vertical Planter Trellis Ideas
Vertical planters can really take your garden game to the next level. They’re not just about saving space; they also bring that trendy vibe to your outdoor area. Imagine lush greens growing upwards, transforming a bland wall or fence into a vibrant canvas of life and color. It’s like creating a living work of art right in your backyard.
Now, let’s talk about those intricate wooden trellis patterns. They can be a game changer for your climbing plants. A well-designed trellis not only provides the support your plants need but also offers a charming visual element.
When I first set up my vertical planter trellis, I was excited to watch my sweet peas climb and twist around those wooden slats. And let me tell you, the way they flourished transformed that corner of my garden into a cozy little nook.
Here’s a fun tip: try mixing different types of wood for your trellis. Combining textures can amplify that appealing rustic look. For example, pairing cedar with a lighter pine creates an eye-catching contrast.
And don’t forget about the spacing! Keeping the slats a few inches apart guarantees your plants have room to spread their limbs without getting cramped.
As you plan your vertical garden, think about the plants you want to feature. Vining herbs like thyme and basil can create a unique look while being functional for your kitchen.
Just picture it—fresh herbs at your fingertips and a gorgeous background to boot.
10. Modern Minimalist Trellis Design
When it comes to dressing up your garden, a modern minimalist trellis design can be your secret weapon. Not only does it provide reliable support for climbing plants, but it also adds a sleek, contemporary vibe that can make your space feel more open and organized. Imagine a simple yet stunning frame that allows light to dance through as your plants weave their way around it. Sounds dreamy, right?
To achieve that minimalist look, keep the lines clean and the materials simple. Consider using materials like untreated wood or metal, which can give off a chic, understated charm. I once constructed a trellis using thin, horizontal pieces of wood spaced evenly apart. Let me tell you, watching my climbing roses entwine around those sleek bars was pure joy. It’s like the trellis becomes part of the art, showcasing your plants without stealing the spotlight.
Here’s a tip: think about your plant selection. Plants with delicate foliage, like clematis or jasmine, are perfect for this kind of structure. Their light, airy appearance complements the minimalist aesthetic beautifully.
And if you’re like me and occasionally forget to water, don’t worry—these plants can pack a punch with their vibrant blooms, even if they get a little neglected now and then.
Finally, don’t forget about the finishing touches. A coat of natural wood oil can preserve the beauty of your trellis while keeping things looking fresh.
Plus, it gives you the perfect excuse to spend a sunlit afternoon outdoors, sipping lemonade and pretending to have your life together as you work on your garden. Who doesn’t love that?
Maintenance and Care Advice
Maintaining and caring for your garden trellis might feel like just another chore on your to-do list, but it can actually be a rewarding part of your gardening journey.
Think of it this way: a well-maintained trellis isn’t just a stake in the ground; it’s a canvas for your vibrant climbing plants.
A well-cared-for trellis transforms your garden, serving as an artistic backdrop for flourishing climbing plants.
Regularly check for rust or rot, especially if your trellis is wooden. A quick scrub here and there can work wonders.
Also, don’t forget to prune those ambitious vines. After all, they’re not the only ones that need a trim.
Keep an eye out for pests; a few bugs here and there could ruin your lovely garden trellis ideas.
Honestly, who knew upkeep could be this engaging?

