Ever wonder if garden edging can really change the vibe of your outdoor space? It absolutely can. Picture those tired, ragged borders gone, replaced by stunning designs that bring everything together. From rustic timber to sleek metal, the options are endless. And let’s be honest, who doesn’t love a little charm to spice things up? Stick around to discover ten unique ideas that’ll make your garden not just neat, but also a feast for the eyes.
Unique Edging Concepts
When you’re looking to spice up your garden, unique edging concepts can really make a difference.
Curved stone pathways can lead the eye in delightful ways, while recycled timber borders bring a rustic, eco-friendly vibe.
Ever thought about woven bamboo? It’s like giving your garden a warm, inviting hug, and who doesn’t want that?
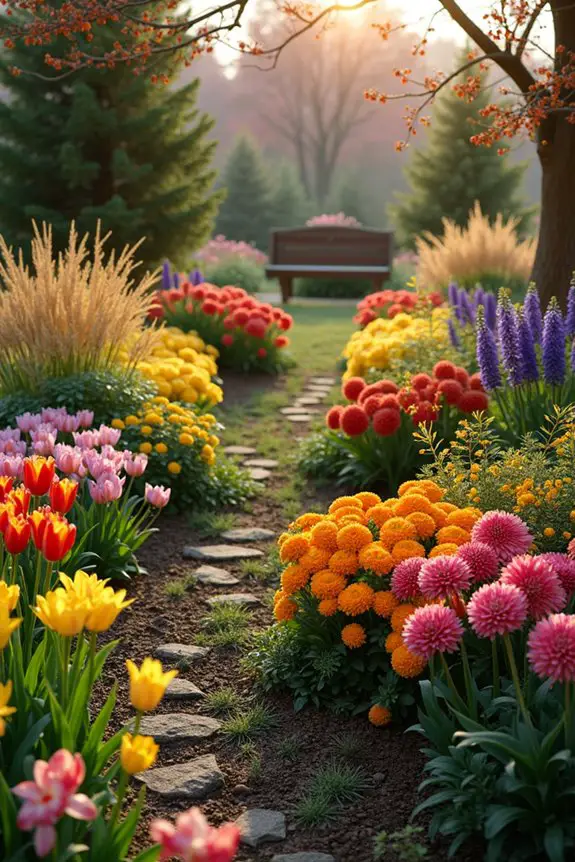
1. Curved Stone Pathway Layout
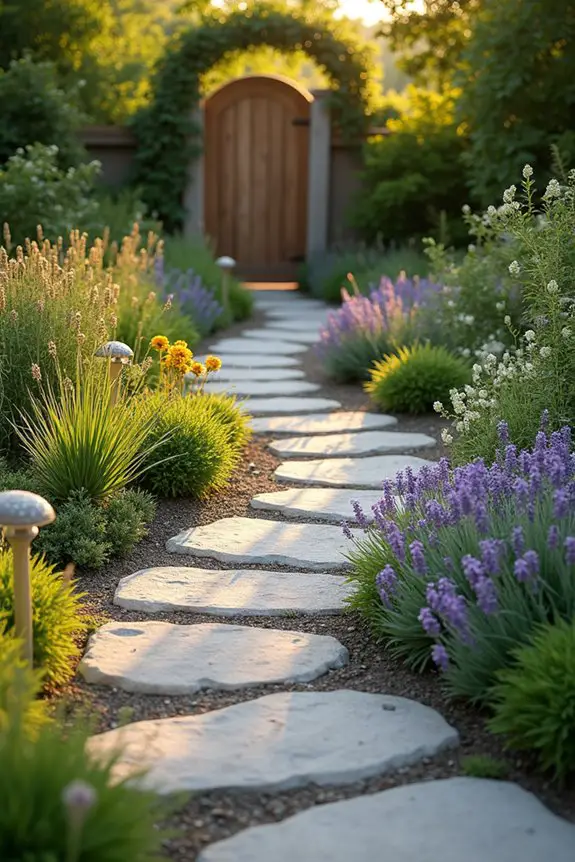
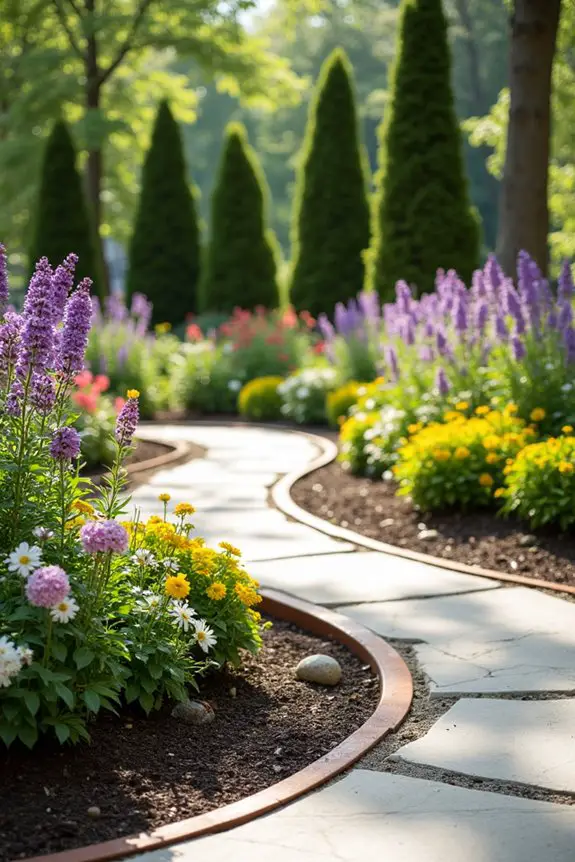
Creating a curved stone pathway is like giving your garden a warm hug; it invites visitors in and gives them a sense of wonder about what lies ahead. This layout doesn’t just serve a practical purpose—it adds an enchanting vibe to your outdoor space, making it feel more spacious and alive. Plus, who doesn’t love the visual comfort of soft lines that guide you gently from one section of your garden to another? Additionally, consider adding solar mushroom lights along the path to enhance the magical atmosphere in the evening.
To start your journey towards a beautiful curved stone pathway, you’ll want to gather some materials. Think smooth, rounded stones, or even bricks that have a bit of a natural edge. Of course, if you’re anything like me and have accidentally mistaken landscape fabric for a picnic blanket (don’t ask), prepare to get a little dirty while you bring your vision to life. Grab a shovel, a measuring tape, and a level—oh, and some gloves, because no one likes scuffed hands.
First things first, lay out your path. Use a garden hose to create a smooth, flowing line where you want your pathway to be. Trust me, this is way better than chalk or string, which can turn into an epic tug-of-war if the wind decides to join your project. Once you have your desired curvature, mark the edges with some spray paint or stakes. Just be cautious, unless you want a neon pink pathway—fine for a rave, questionable for a garden.
Now, dig a shallow trench about 4 to 6 inches deep, depending on the size of your stones. Remember, you’re not digging a grave for a pet lizard here; you just want a cozy space for your stones to rest. If you want to be extra fancy (and, let’s face it, who doesn’t?), add a layer of sand or gravel at the bottom for drainage. This will keep your pathway from turning into a muddy slip-and-slide after every rainstorm—because falling on your rear while carrying your gardening tools isn’t the look you’re going for.
Next, start placing your stones in the trench. The key here is to follow that lovely curve you mapped out earlier. Play around with sizing and orientation until it feels just right. You might want to step back every now and then; give your eyes a chance to admire your work. Trust me, the satisfaction of seeing it come together is like hitting a home run in gardening.
Once the stones are placed, fill in the gaps with some soil or gravel. This will secure your stones in place and make everything look more polished. Oh, and don’t forget to level the stones as you go. No one wants to trip over a rogue rock that decided to pop up like an unwelcome surprise during a garden stroll.
Lastly, think about adding some greenery along the edges of your pathway. Think wildflowers, or perhaps some low-growing plants that will spill beautifully over the sides. It’s like frosting on your garden cake and can elevate the entire feel of the space. To ensure your pathway swings open effortlessly, don’t forget about the importance of choosing a reliable garden gate latch that complements your design.
In the end, a curved stone pathway can turn an ordinary garden into a whimsical escape. It invites you to wander, explore, and maybe even get lost just a little. Because, honestly, aren’t those the best moments in life?
2. Recycled Timber Border Edging
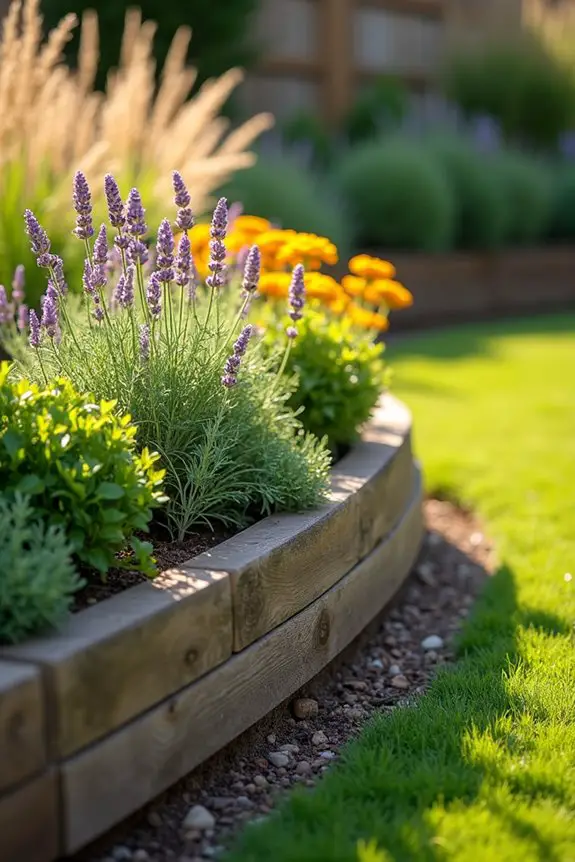
There’s something undeniably charming about using recycled timber for garden edging. Not only does it give your garden a rustic and warm vibe, but it’s also an environmentally friendly choice. It whispers tales of adventures and past lives, originally part of a stunning deck or perhaps a cozy old barn.
Plus, it’s highly functional—creating clear boundaries between your flower beds and lawn while still allowing that earthy authenticity to shine through.
So, how do you go about crafting this unique edging concept? First, you’ll need to source your timber. This could mean heading to your local salvage yard, where you’ll find pieces waiting to be reborn, or maybe you’ve got some old wood lurking in your garage.
Whichever route you choose, make sure your timber is sturdy enough to withstand the elements. I once tried using old pallets, only to discover they were more splintered than stable. Spoiler alert: it didn’t end well.
Once you’ve gathered your boards, the next step is to decide how deep you want your edging to go. You’ll want to dig a trench that’s about 4 to 6 inches deep and wide enough to accommodate the width of your timber. Think of it as creating a little home for those boards, like snuggling them in a cozy blanket.
As you’re digging, be sure to keep your lines as straight (or curved) as you desire. A level will come in handy here, especially if you’re channeling vibes of professional landscaping, not “whoops, that’s a little wonky” gardening.
Now it’s time to place the timber into your trench. You can go for a simple straight line, or get creative with a zigzag pattern—the choice is yours.
But let me tell you, figuring out the ideal configuration is more of a brain teaser than it might sound. I once thought I’d be adventurous and created a spiral. Let’s say it ended up looking like a rollercoaster ride instead of a garden edge.
As you position the timber, it’s a great idea to use stakes to hold everything in place, especially if your soil tends to be rebellious. You want your garden edge to be locked in and strong, resisting nature’s whims.
Fill in around the timber with soil to stabilize it, and give it a gentle pat down to help it settle like a sleepy puppy in your yard.
Finishing touches are essential—and fun. You can leave the wood as is for that aged, rustic look, or coat it with an eco-friendly wood finish or sealant to protect it from the elements. Additionally, consider using seaweed extract as a nourishing element to boost plant health and vitality in your garden.
Trust me, nobody wants to deal with rotting edges after all that hard work. Play around with plants—maybe a trailing vine to cascade over one side or some vibrant flowers to punctuate the timber.
This is your time for creativity, and you can transform that recycled timber into the star of your garden show.
3. Geometric Tile Borders
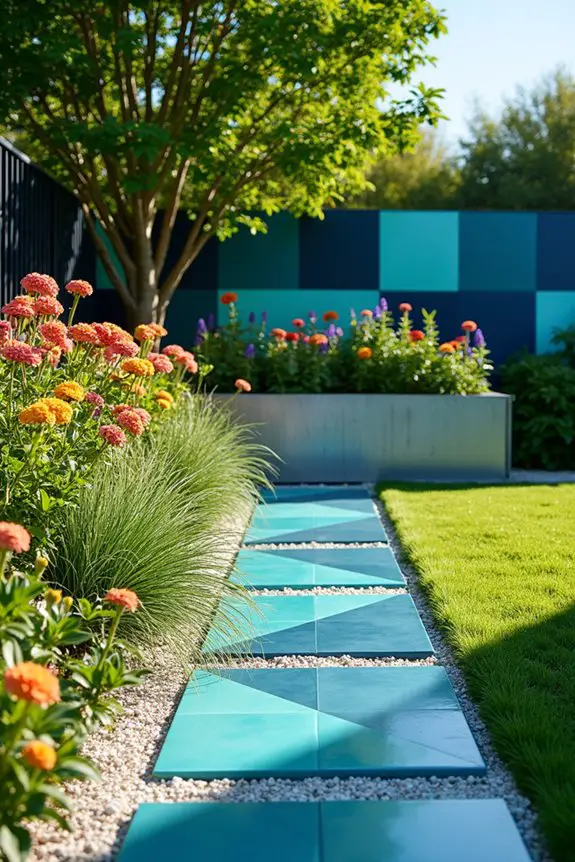
When you’re looking to add a modern twist to your garden, geometric tile borders might just be the enchanting design you need. They don’t just serve a practical purpose, maintaining sharp boundaries between your flowers and lawn; they also elevate your outdoor space with a chic, contemporary flair. Imagine walking through your garden and being greeted by bold patterns and vibrant colors—it’s like having a piece of art right in your yard.
So, how do you go about turning this cool concept into reality? First things first, pick your tiles. You can choose from a wide range of materials—ceramic, stone, or even glass—since the goal here is to find something that makes your heart skip a beat. I once fancied some intricate patterned tiles that reminded me of a funky 70s vibe, but let’s just say my neighbor gave them a double take. The trick is to find tiles that speak to you and match the overall style of your garden.
Next, you’ll want to lay the foundation for your tiles. Start by digging a trench, but this time we’re talking about something a bit shallower—around 2 to 4 inches deep. The width of the trench should align with the size of your tiles, allowing them to settle neatly side by side.
And I’ve to confess, when I did this step, I ended up with a trench that looked more like a crooked river. So, pro tip: grab a garden hose or a chalk line to help you mark straight edges and keep everything looking sharp.
Once your trench looks more like a runway and less like a hash-slinging artist’s tummy ache, it’s time to lay down the tiles. This part is almost like putting together a jigsaw puzzle—but with more mud and fewer missing pieces. Lay the tiles in your chosen design, whether that’s a classic straight line or a bold checkerboard.
Just remember to leave a small gap between each tile for some sand or gravel, as this will help with drainage and prevent the tiles from shifting over time.
After laying down the tiles, take a moment to step back and admire your work (even if it’s just the first row). And if you’re feeling fancy, why not add some contrasting sand or gravel in the gaps? It’s like accessorizing an outfit—just the right touch to bring the whole look together.
I went with a pale sand once and let me tell you, it was like my garden had a makeover, all fresh and ready for the runway. Just don’t get too carried away and accidentally cover everything in sand—trust me; it can happen.
Lastly, finish up with a good clean. Sweep away any excess sand or debris to make sure those tiles shine. You want your garden border to be eye-catching, not a mystery of what’s lurking in the dirt.
With the right geometric tile borders, your outdoor space will certainly grab attention, inviting compliments from friends and perhaps a little envy from neighbors. Moreover, adding beautiful edging makes it easier to maintain your galvanized raised garden beds and keeps them looking pristine. So, roll up your sleeves and get to it—you’re just a few steps away from a fresh garden look that blends style with function. Happy gardening!
4. Woven Bamboo Edging Design
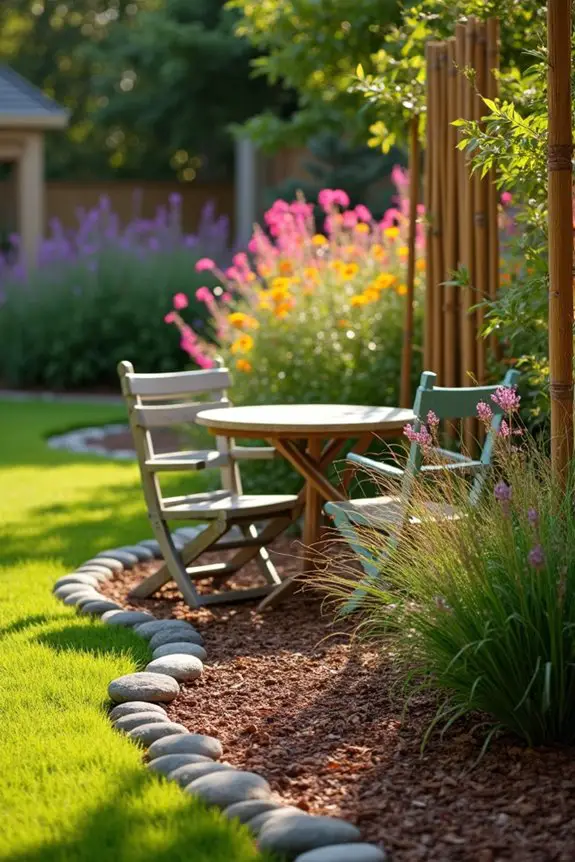
When it comes to adding a touch of rustic charm to your garden, nothing quite compares to a woven bamboo edging design. Not only does it create a warm, inviting atmosphere, but it also serves a practical purpose by clearly delineating your garden beds, keeping the lawn at bay while allowing nature to flourish.
Picture yourself strolling along the pathway, surrounded by greenery, and noticing how the soft lines of bamboo lend your space a peaceful, serene vibe—it’s like being enveloped in a gentle hug from Mother Nature herself.
To set off on your bamboo edging journey, you’ll first need to gather the right materials. Look for long, sturdy bamboo poles, ideally about 4-5 feet in length. These will be your edging heroes, providing both strength and flexibility. You can either head to your local garden center (they might give you a quirky look when you roll in a shopping cart full of bamboo) or order them online.
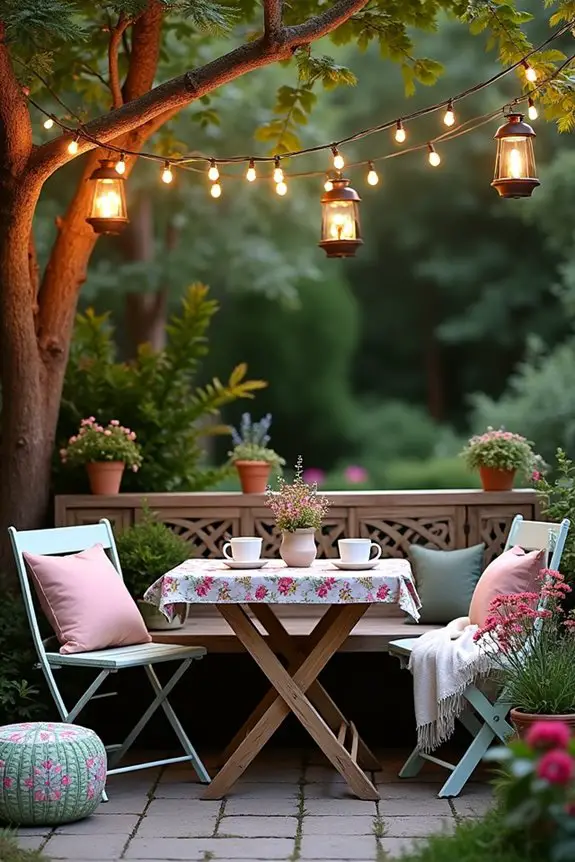
Bonus point: if you find bamboo in various shades, you can create a delightful gradient effect that adds an extra flair to your garden. A wooden garden table set can perfectly complement this natural charm, offering the ideal spot for leisurely afternoons.
Next up, it’s time to prepare the ground. Grab a shovel and outline the area where you’d like to place the bamboo by marking a faint line in the soil. Just picture yourself like an artist, sketching out a masterpiece in your garden.
Once you’ve marked the perimeter, dig a trench about 4-6 inches deep. Trust me, I learned this step the hard way when I thought hacking at the soil with just a trowel would do—my trench ended up more like a series of unfortunate puddles.
It really pays to have a good depth, especially if you want those bamboo stakes to stand tall and proud.
Now it’s time to install your bamboo poles. As you position them in the trench, consider the spacing; about 1-2 feet apart usually works well. You can angle them slightly inward for a more whimsical look or keep them vertical for a cleaner aesthetic.
I’ve tried both methods, and let me tell you, the slightly tilted bamboo tends to look like it’s trying to dance. Once they’re in place, add a little backfill soil to secure them, and give them a gentle patdown—think of it like tucking in a snoozing baby.
To give your bamboo edging a finished look, consider adding a layer of mulch or garden stones at the base. Not only does this help with drainage, but it also prevents weeds from sneaking up and ruining your serene haven.
I once forgot to mulch and was met with an unexpected jungle—let’s just say I’d a run-in with a particularly feisty dandelion. It wasn’t pretty.
And there you have it—a uniquely charming, woven bamboo edging design that ties your garden together beautifully.
Plus, every time you wander through your greenery, you’ll feel a swell of pride, knowing that you crafted something truly special. Just keep those bamboo poles trimmed as needed, and your garden will maintain its inviting vibe for all to enjoy.
5. Natural Log Border Design
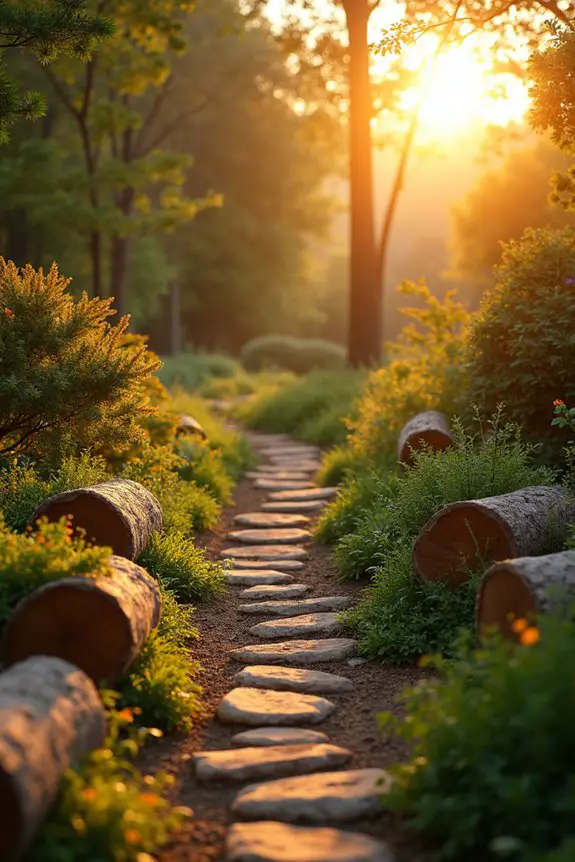
When it comes to unique garden borders, the natural log border design stands out beautifully, marrying aesthetics with practicality. This edging not only defines your garden space with a rustic, woodland charm, but it also adds a robust structure that keeps your plants cozy while keeping weeds at bay. It’s like wrapping your garden in a warm hug from the forest, creating a serene retreat right in your backyard. Who wouldn’t want a slice of nature’s tranquility?
To get started with your natural log border, you’ll need to gather your materials. Look for logs that are roughly 2-4 feet in length, and about 6-12 inches in diameter. You might stumble upon some fallen branches in your yard or take a jaunt through a nearby woods—^carefully, of course. Just remember, a seasoned log mightn’t only look better but could also withstand the test of time and weather. And trust me, there’s something supremely satisfying about giving nature a second life instead of heading straight to the store.
Once you’ve gathered your logs, it’s time to decide on the layout. Picture it like choosing a seating arrangement for a dinner party—do you want a straight line or something more playful? I prefer a gentle curve that mimics the natural lines of the land. To mark the perimeter, you can use a garden hose or a rope, which gives you a visual guide. If you’re feeling adventurous, pretend you’re an artist and let the garden flow around like a brushstroke.
Now onto the installation—this part is where things can get a bit muddy, literally. Dig a trench about 3-4 inches deep along the outline you’ve marked. Ideally, you want the logs to be partially buried for stability. I once dove in without digging a proper trench and ended up wrestling my logs like they were heavyweight champions in a messy backyard brawl. It wasn’t my proudest moment. Aim for your logs to stick out just a couple of inches above the ground for that rustic effect, keeping your garden stylish and practical.
Next, place your first log into the trench, ensuring it lies flat and level. For those corners or curves, you can cut logs at angles to fit perfectly. If you’ve got a saw handy and are feeling a bit ‘Tim Taylor’-esque, go for it. Use stakes to help secure each log, driving them into the ground on the inside. This will keep your border steady and prevent it from shifting over time.
Once all your logs are in place, it’s time to give them a bit of love. Smooth out the soil around the borders, fill in any gaps, and perhaps throw in some mulch or decorative stones at the base. It adds a polished finish while helping with drainage. This step is essential—I once ignored it, and my log border quickly became a rickety fence instead of the proud guardian of my plants.
Now, with your natural log border complete, sit back, admire your handiwork, and relish the earthy vibe it brings to your garden oasis. It’s time to invite nature into your life, one log at a time.
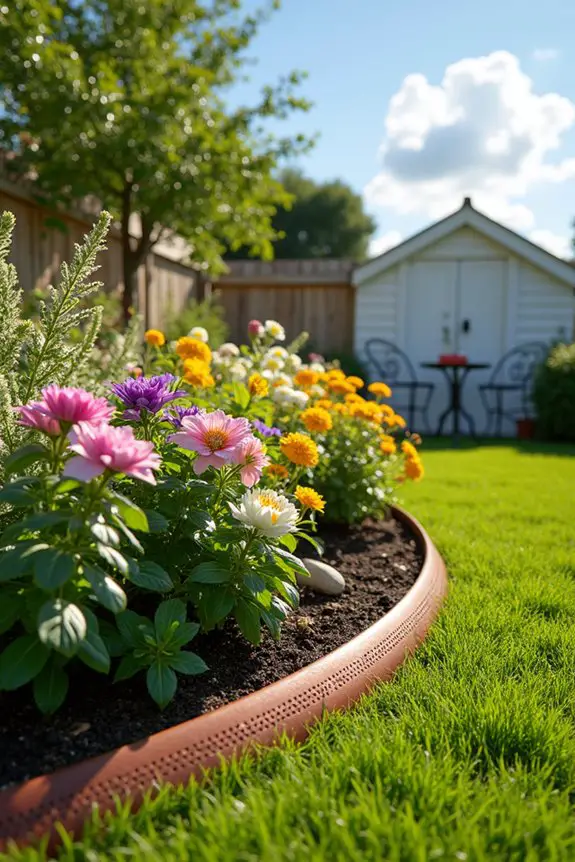
6. Circular Flower Bed Edging
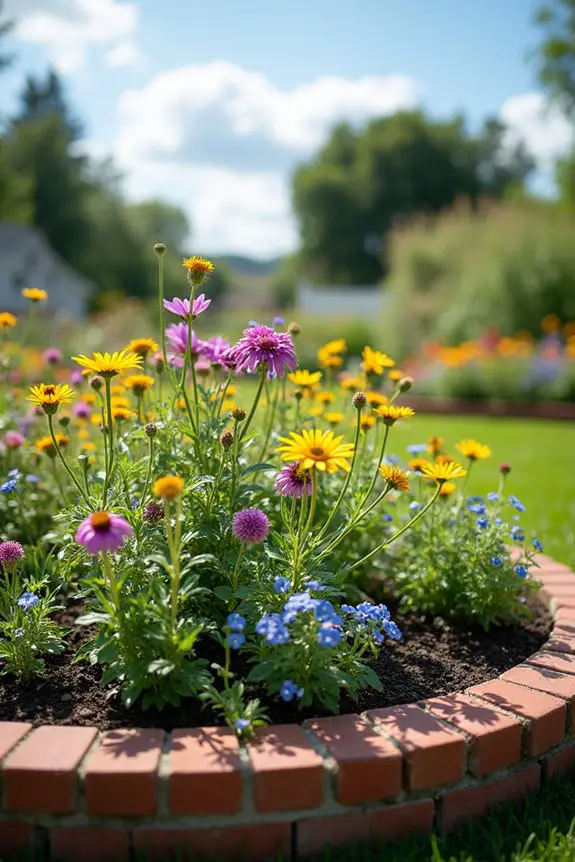
When it comes to adding a touch of whimsy to your garden, seek no further than circular flower bed edging. Not only does this design create a soft, inviting vibe, but it also serves a practical purpose by clearly defining your flower beds. The round shape can add a sense of flow, guiding the eye as it dances around the curves—a delightful way to bring a little enchantment into your green space. Who wouldn’t want their garden to feel like a cozy nook, welcoming and full of life?
To kick off your circular flower bed edging project, gather some simple materials. You’ll need some durable edging materials like brick, stone, or even decorative metal borders—whatever tickles your fancy. Just as I’ll never forget the time I tried to create a flower bed with gummy bears (they didn’t hold up well), you want your choices to be strong and sturdy.
Before you start digging, visualize where you want your circular bed to sit. You can use a garden hose or rope to outline the shape. Maybe even get creative and pretend you’re creating a little arena for your flowers—after all, flowers deserve a stage too.
Once you have your shape laid out, it’s time to dig! Grab your trusty spade and dig a trench about 6-12 inches wide and 3-4 inches deep around your outline. I once thought I could just place my edging on top of the grass. Let me tell you, it looked like a flower bed trying to ride a rollercoaster—it just didn’t work.
Digging a trench will keep your edges nice and neat, with the plants having their own space to thrive without interference from grass or weeds.
Now, carefully place your chosen edging material into the trench. For brick or stone, it’s a good idea to tap each piece gently into place for a snug fit. If you’ve chosen something flexible, like a metal border, gently bend it to match the curve of your flower bed. But be careful—too much muscle could mean it snaps like a bad romantic comedy cliché.
Take a moment to step back and admire how it’s all coming together. It’s like seeing your favorite characters merge for a perfect plot twist.
After all your edging is in place, it’s time to fill your flower bed with soil and plants of your choice. Consider the height and color of various flowers; some like to jump into the spotlight, while others appreciate a little bit of shade.
When I planted my first round flower bed, I went all out and planted a mix of wildflowers—they were like the garden’s party guests who just wouldn’t leave. Just don’t forget to water them regularly—your flowers are like little kids; they thrive on attention and warmth.
Finally, once your plants are nestled in and happy, stand back and enjoy your handiwork. Circular flower bed edging not only brings charm to your garden but also beckons you to take leisurely strolls amongst your plants.
Maybe you’ll find yourself sipping iced tea under the blooming roses, basking in the little oasis you’ve created. What better reward could there be for digging into a little backyard adventure?
7. Elevated Gravel Bed Edging
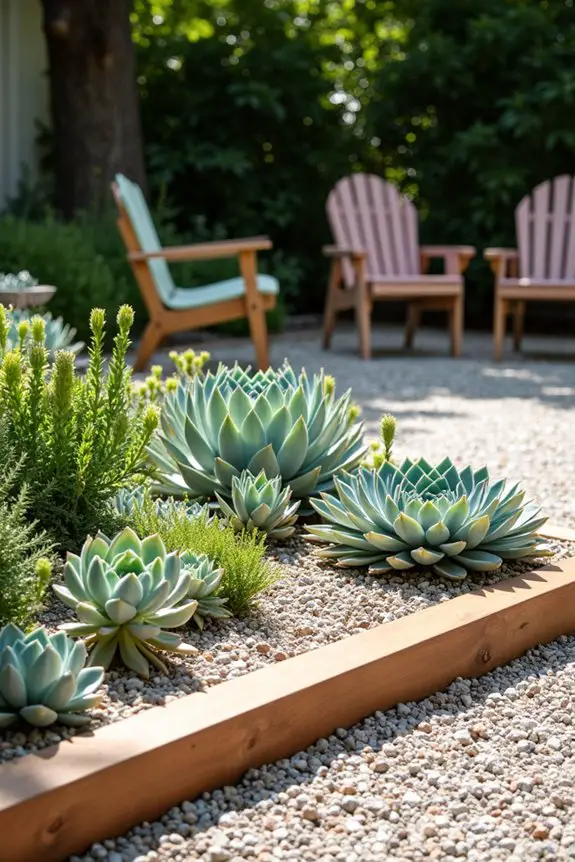
Elevated gravel bed edging offers a revitalizing twist to traditional garden designs, marrying functionality with a modern aesthetic. This unique edging concept not only enhances the visual appeal of your garden but also helps with drainage and keeps pesky weeds at bay. Imagine visiting a chic cafe with a stylish patio—this is the vibe elevated gravel bed edging brings to your outdoor space.
To get started, you don’t need a treasure chest full of unusual materials. Just a few bags of gravel, some sturdy wood or stone for the edging, and maybe even a splash of creativity will do the trick.
First, decide where you want your elevated gravel bed to sit. This could be next to a path, around a flower bed, or even surrounding your favorite shrubs. Use stakes and string to mark this area, or if you’re like me, just toss some old garden chairs around until you find the right look. Yep, I’ve been known to test out arrangements just by temporarily placing furniture… it adds a quirky touch, right?
Next, it’s digging time again, but not as deep as before. You want to create a shallow trench about 2-3 inches deep where your edging will go. As you dig, keep an eye out for those sneaky roots of nearby plants. I learned the hard way that pulling roots out can turn into a wrestling match, and those roots always seem to come out as stubborn as a toddler refusing to take a nap.
Once your trench is ready, it’s time to place your edging material. This could be treated timber, stone slabs, or even recycled bricks that resonate with your taste. Put the pieces snugly in the trench, ensuring they’re level—paved roads have got nothing on how smooth you want this to look. Take a step back. Admire it. Picture yourself hosting a garden party under the stars, with this edge giving your space a polished finish.
Now for the fun part—adding the gravel. Load up your wheelbarrow and dump the gravel in the center of your bed. Then, grab a rake and spread it evenly, filling in any empty spots, and giving it that nice elevated appearance.
I’ve to caution you—don’t overdo it with the gravel. I once aimed for “mountain” status and ended up creating a gravel volcano that required a volunteer force to flatten! Keep it simple and let nature do the talking.
Finally, think about what else you’d like to incorporate. Some succulent plants or even small decorative rocks can add character and charm. Picture it: a sprinkle of color among the gravel, making the whole space pop as if it’s waving hello. Just remember to water your plants regularly. That’s something I remind myself of daily, often while I’m frantically trying to remember which plant needs sun and which prefers shade. Who knew gardening could feel like studying for a pop quiz?
Elevated gravel bed edging is all about creating a stylish boundary while ensuring your plants thrive. With a little effort and a splash of creativity, you can transform your garden into a haven that balances fun and functionality.
8. Freeform Pebble Edge Arrangement
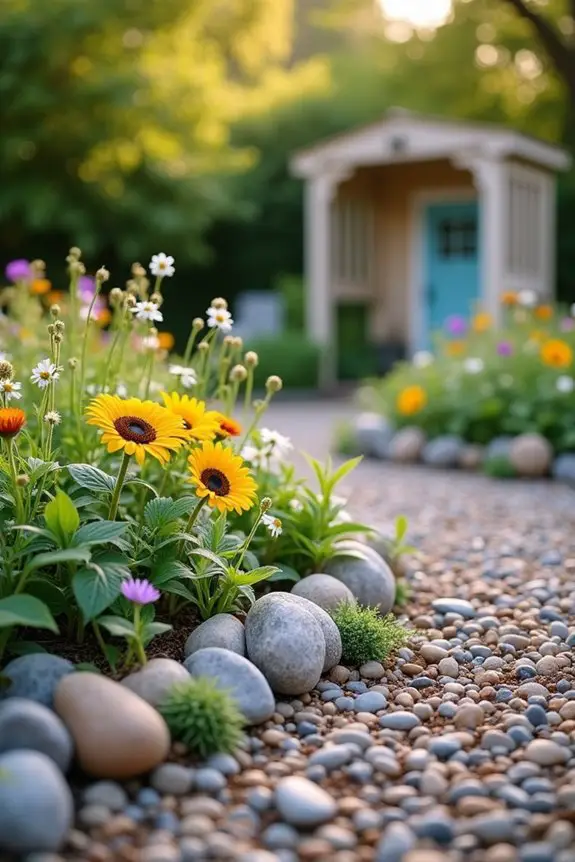
When it comes to creating a unique garden edge, a freeform pebble edge arrangement is a stellar choice. Not only does it provide the kind of natural, laid-back vibe that turns any outdoor space into a relaxing retreat, but it also offers awesome benefits like improved drainage and an earthy aesthetic. Imagine this: a garden that feels like a cozy getaway, where each pebble tells a story as it dances along the edge of vibrant blooms.
So, how do you channel your inner artist when it comes to designing this rustic edge? First, gather your supplies—think smooth pebbles in varying sizes. You want to select a mix that pleases your eye (and maybe brings a smile to your face). Grab a few bags from your local garden center, and if you’re feeling adventurous, explore your neighborhood for interesting stones—who knew that rock collecting could be so rewarding?
Just be cautious not to raid anyone’s landscaping without permission; local homeowners tend to get suspicious about mysteriously missing stones.
Now, pick a location for your pebble edge. This could wrap around a flower bed, define the path to your garden shed, or even border a small patio. Next, create a shape that flows naturally with your garden’s existing contours. Forget straight lines—think curves, like a gentle river.
I once initiated an ambitious straight line adventure and learned that the curvy path brings a calmer, more organic feel. Plus, it saves you from feeling like a geometry teacher trying to cram in perfect angles.
Once you have your shape marked out, it’s digging time again, but with a twist. Instead of digging a trench, you’ll create a shallow depression about 1-2 inches deep along your marked line. Don’t fret—it’s more about defining the space rather than reinventing the wheel.
And if you stumble upon stubborn roots, just let them be. They add character, like the quirky friend who shows up to every party.
Now, here comes the fun part—laying down the pebbles! Starting at one end, gently place your pebbles in the depression, allowing them to rest snugly against one another. Mix sizes for that organic, natural look, and let your creativity reign.
Just remember, this isn’t an art project; it’s more of a Zen experience. Sometimes I find myself lost in arranging, forgetting how many pebbles I’ve used, and we all know that feeling of suddenly realizing you’re knee-deep in a rock pile.
Keep stepping back to look at your arrangement, making sure it flows and feels balanced. Adjust any stones that look out of place or don’t quite belong. Once you’re satisfied, step back one final time and admire your handiwork.
If nature had a runway, your pebble design would strut its stuff.
And finally, think about dressing up your pebbles a bit more. You could let small plants peek through the stones, or throw in a few carefully chosen driftwood pieces for that rustic beach vibe—if only a seaside getaway could be this easy.
Creating a freeform pebble edge arrangement isn’t just about aesthetics; it’s about crafting a space where nature can breathe, and you can unwind. Plus, you’ll have the added bonus of being the proud creator of what just might be the most charming garden edge on the block.
9. Tiered Brick Edging Design
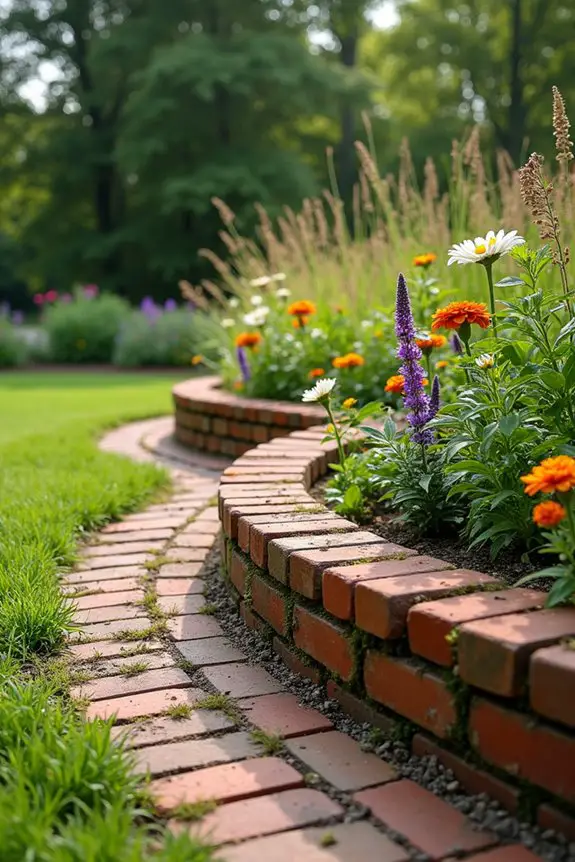
When you think of garden edging, tiered brick designs mightn’t be the first thing that comes to mind. However, they beautifully blend functionality with style, offering not just a border for your flower beds, but a striking feature that elevates the entire garden.
Just picture it: layers of bricks rising gently, surrounded by lush greens and vibrant flowers, providing a sense of order while still allowing nature to shine. It’s the perfect balance of structure and softness that could turn even the most ordinary garden into an enchanting escape.
Now, let’s plunge into creating your very own tiered brick edging. First things first, gather your materials. You’ll need bricks—think reclaimed or new, depending on your style. The beauty of bricks is they come in all sorts of colors, so pick ones that complement your plants and the overall vibe of your garden.
Modern? Classic? Playful? The choice is yours. Additionally, gather some landscaping fabric, a shovel, a level (trust me, you’ll want this), and some sand or gravel for leveling.
Next, determine where you want your tiered edge to flourish. Sketch it out; it doesn’t have to be a masterpiece—just a rough outline. A gentle curve is often more inviting than a sharp line, and it mimics the flow of your garden beautifully.
Once you’re happy with your design, it’s time to dig. Grab that shovel and create a shallow trench along your outline, about 4-6 inches deep. This is where the bricks will rest, so make sure it’s even. If you hit any roots, just like with the pebbles, let them be. They add character, and after all, who doesn’t love a bit of intrigue?
With the trench ready, lay down that landscaping fabric to help deter weeds. Now, here comes the fun part—setting your bricks! Start with the first layer, placing your bricks side by side in the trench. Use the level to confirm they’re even.
If you’re feeling a bit fancy, stagger the bricks as you go to create a more visually appealing look. It’s like building a tiny brick wall, one layer at a time. Go slow here—patience pays off.
Once your base layer is in place, add another tier. This time, you’ll want to offset the bricks above the lower layer. This creates that tiered effect. Before you know it, you’ll have a beautiful brick edge that looks like it’s always been a part of your garden.
Just don’t forget to fill in any gaps with sand or gravel for stability—after all, we want this beauty to last.
As you step back to admire your handiwork, you might just find yourself feeling a sense of accomplishment—like you’ve revealed a new level in your gardening game.
Who knew that a simple brick design could make you feel like a garden architect? And remember, the best part about tiered brick edging is that you can always adjust and add more layers as your garden grows.
10. Sinuous Metal Edge Detail
When it comes to garden edging, a sinuous metal edge can really take things up a notch! This design strikes a lovely balance between modern aesthetics and practical functionality. Imagine sleek, smooth lines that curve gracefully around your flower beds, providing a sophisticated yet organic feel. It’s like the garden’s way of wearing a tailored suit, unpretentious but making a statement. Not to mention, that gentle sway can guide your eye through the space, creating a sense of movement that pulls everything together.
Now, let’s chat about how to bring this eye-catching idea to life. First up, gather your materials. Look for metal edging strips, which come in various finishes like steel, aluminum, or even corten steel for a rusty look that adds character. I personally love the corten steel option—while it may look like it’s been through an industrial revolution, it develops such a beautiful patina over time.
You’ll also need a hammer, stakes for anchoring, a measuring tape, and a spade—yes, that trusty little shovel is back. If you can manage to snag a friend for this project, even better; you’ll have someone to share in the triumphs of your designs, and the occasional laugh when things don’t quite go as planned.
Once you have everything, it’s time to plan! Lay out the metal strips along the edges you want to define, bending them into gentle curves that feel natural. Want to go straight for a sleek look? That’s cool, too—just remember, curves create that soft vibe. Measure carefully. You wouldn’t want any surprises like an unexpected jagged edge, trust me, I learned this the hard way during my first attempt.
Next, dig a trench about 4-5 inches deep to hold the strips in place. It doesn’t have to be a deep excavation site—just enough to give that metal edge some grounding.
Now comes the fun part, which is also the slightly confusing part: securing the edging. Position your metal strips in the trench, making sure they’re straight and at the desired height. Use those stakes to anchor them, hammering gently to avoid any work-related injuries—because let’s face it, most of us aren’t cut out for construction work. If you have a slight curve and you find the metal resisting a bit, don’t fret; just bend it as you go. You’ll get the hang of it.
After securing the strips, fill in the trench with soil and pack it down well. Keep pushing the dirt against the metal to guarantee it stays flush with the ground—no one needs tripping hazards in their beautiful garden. Finally, give it a water to help settle everything.
There you go, you’re ready to sit back and admire that gorgeous sinuous edge that complements your plants perfectly. And who knows? You might just find yourself sipping a cool drink and basking in the glory of your handiwork, telling everyone you know that those lovely curves were all your doing. Who wouldn’t want to brag a little about their stunning garden edges?
Budget-friendly Materials Selection
Choosing the right materials for garden edging can feel overwhelming, but it doesn’t have to drain your wallet. You can get creative and explore budget-friendly options for your garden edging ideas.
Think about using reclaimed wood or bricks you might’ve lying around; sometimes, a little scrappy charm is just what you need. Sure, you could splurge on fancy stones, but aren’t those thrift store finds just calling your name?
Even simple landscape fabric can help keep things tidy without breaking the bank. Don’t forget about that trusty plastic edging—it’s affordable and easy to work with.