Did you know that nearly 30% of homeowners are now opting for rock gardens over traditional lawns? It’s a trend that’s hard to resist, especially when you consider the unique charm they bring to outdoor spaces. Imagine layering stones, mixing vibrant succulents, and crafting pathways that invite curiosity. Intrigued yet? Let’s explore some inspiring ideas to transform your outdoor oasis, and trust me, you won’t want to miss these creative twists.
Creative Rock Placements
When you’re placing rocks in your garden, think about how they can bring your vision to life.
Imagine using natural stone arrangements alongside vibrant succulents to create a feast for the eyes, or weaving textured stone pathways that guide your guests through your serene space.
Every rock has a story, just waiting for you to write it.
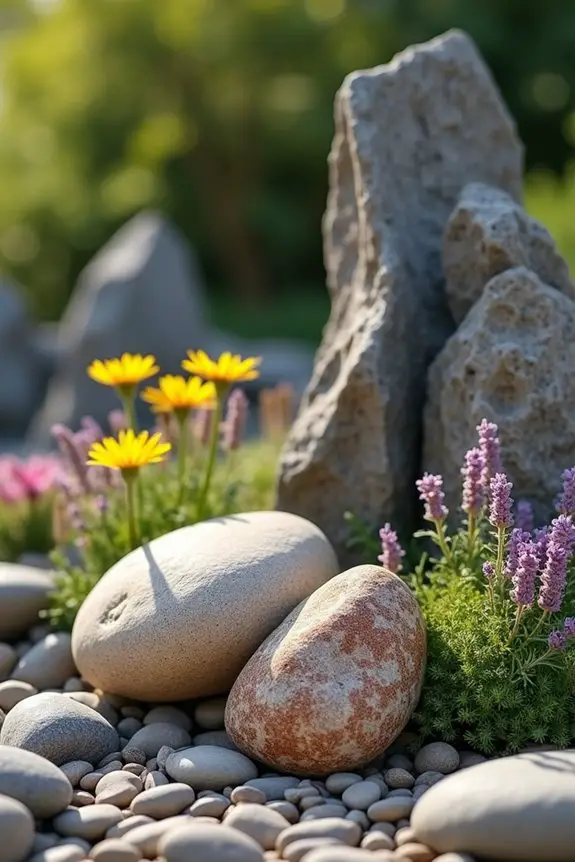
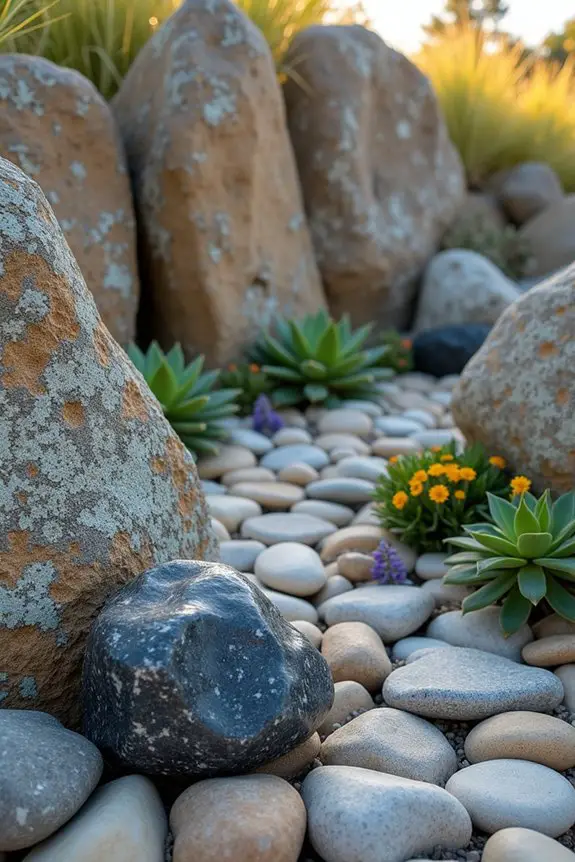
1. Natural Stone Arrangements
When it comes to designing a rock garden, thinking outside the box—or in this case, outside the stone—can take your space to a whole new level. Natural stone arrangements not only serve a functional purpose, like creating paths or retaining soil, but they also add a touch of rustic beauty that can make your garden feel truly magical. Imagine strolling through a whimsical landscape where each rock tells a story, coaxing you to explore further.
First, let’s talk about layering. It’s like making a delicious lasagna, but instead of pasta, you’re layering rocks. Start with larger boulders at the bottom; they provide a solid foundation, just like a good tomato sauce. Then, stack smaller stones in between to create visual interest. You want to build heights and depths in a way that catches the eye—think of it as creating a mini mountain range.
Next, play with texture. Choose stones with unique shapes or colors—smooth river stones paired with rough-edged flagstones create a lovely contrast. It’s like wearing a crisp white shirt with a funky patterned tie; it just works, doesn’t it?
Don’t be afraid to use some plants in your arrangement. Plants can soften the edges of the stones and provide pops of color. Nestle hardy succulents or delicate alpine flowers between rocks, as if they just decided to set up camp in your garden. It’s a relaxed vibe that says, “Hey, we’re all friends here, let’s hang out!”
Finally, consider the pathways. You can create winding trails with stones, guiding visitors through your rock garden like a treasure map—who doesn’t love a good adventure? Just make sure there’s enough space between the stones for little feet or a wandering pup to navigate safely. Adding a beautiful water feature can enhance the tranquil atmosphere of your rock garden, making it an even more inviting space for exploration and relaxation. Garden water feature can truly transform your serene landscape.
2. Colorful Succulent Combinations
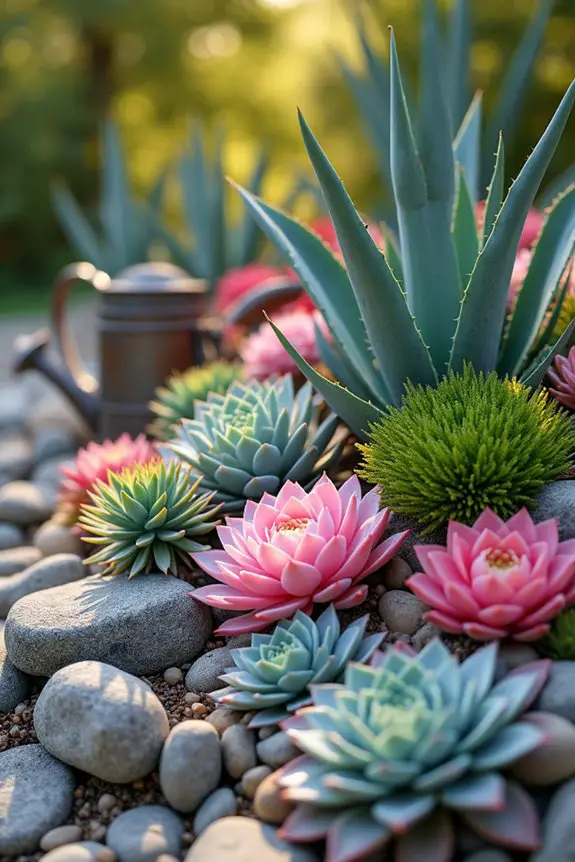
If you want to add a vibrant touch to your rock garden, colorful succulents are the way to go. Not only do they provide bursts of color that can brighten even the dreariest day, but they also bring low-maintenance joy—these little plants are often tough cookies that can thrive in rocky, dry environments, especially when you mix them with vermiculite soil additive.
So, why not introduce a rainbow of textures and hues into your landscape? Start by selecting a variety of succulents. Think of them as the toppings on your pizza—some will be sweet, while others are a bit tangy. You could choose plump Echeverias in shades of pink, green, and lavender, then sprinkle in some spiky Agave or Beckett’s Black—just be careful where you touch.
Layering succulents can create a fun little party in your rock garden, where each plant is an invitee showing off its unique style. When arranging them, think of height and contrast. Larger succulents like Aloe can stand tall among flatter varieties like Sedum or Sempervivum. This gives your garden dimension and keeps the eye wandering from one delightful detail to the next.
Trust me, your friends will be asking how you achieved such an enchanting vibe—just don’t let them know you didn’t even have to water them every day. Don’t forget about the color combinations. Try grouping succulents with complementary colors: blues next to coral, or deep greens against soft yellows. It’s like creating your very own sunset within the stone—you can’t help but feel relaxed just looking at it.
And seriously, if you’re unsure, go big or go home. There’s no such thing as too much color in a rock garden. Lastly, consider placing some of these colorful gems in those nooks and crannies between your stones. It’s like tucking in a secret ingredient in your favorite dish—they surprise you when you discover them.
You’ll love the playful vibe it creates, and the garden will feel like a cozy retreat, just waiting for you to sit back with a cup of coffee and enjoy the view. Remember, rock gardening is an adventure, so embrace the unexpected and have fun with it. Not to mention, a decorative metal watering can can add a charming touch to keep your succulents thriving.
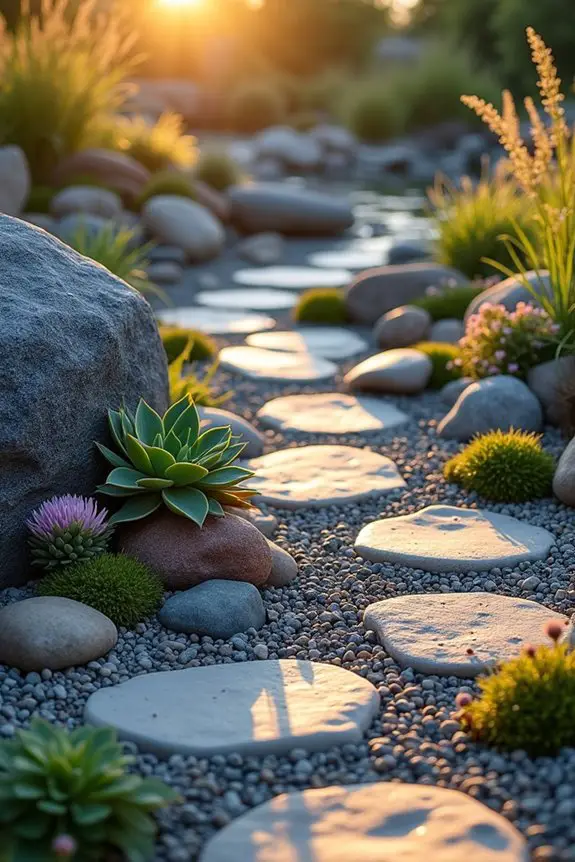
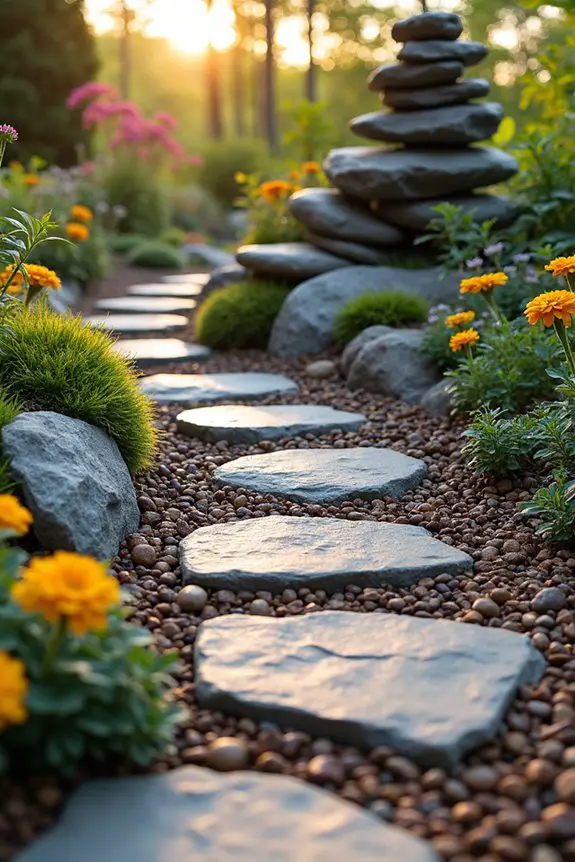
3. Textured Stone Pathways

Creating textured stone pathways in your rock garden is like laying down a charming path to a little magic world. Not only do they guide your feet where they need to go, but they also elevate the overall aesthetic of your garden. Imagine those beautiful clusters of colorful succulents peeking through a visually interesting pathway—it’s a feast for the eyes, and honestly, who wouldn’t want to stroll through that?
To start, think about the types of stones you want to use. You could opt for smooth river stones, sharp-edged flagstones, or even rustic slate. Each of these stones brings its own personality, just like characters in a movie. For a cozy, rustic vibe, mix different sizes of stones—think of it as a patchwork quilt for your feet. The variation keeps your eyes dancing from one part of the path to another, making each step feel like a new adventure.
Lay those stones in a way that feels organic. Instead of a perfectly straight line, go for a meandering path that leads the eye through your garden as if you’re on a treasure hunt, discovering hidden gems of color along the way. You can space them out a bit, leaving pockets of soil for more of your succulent friends to flourish. Those little bumps and curves? They’re irresistible.
When placing the stones, consider how they feel underfoot too. You want a pathway that’s inviting, not an obstacle course! Make sure to edge the stones with gravel or sand to give it a finished look and keep them stable. A bit of stability can prevent unfortunate spills—believe me, nobody wants a tumble while admiring their plants.
And here’s a pro tip for you: if you want to add a little sparkle, consider tucking in some small pebbles or even glass gems around the stones. When the sunlight hits them just right, it will give your pathway a magical glow—like fairy lights provided by Mother Nature.
In the end, your textured stone pathway isn’t just a functional feature, but a storytelling element in your garden. Each stone can represent a chapter, leading you through the twists and turns of your personal horticultural journey.
4. Symbiotic Plant-Rock Relationships

When it comes to creating a rock garden, the relationship between plants and rocks can be a match made in gardening heaven. Imagine vibrant plants nestled between the weathered stones, adding a splash of color and life to those hard surfaces. It’s like giving the rocks a cozy little hug from the greenery, and they both benefit from this beautiful partnership. To support even more garden visitors, consider adding a ladybug house to encourage beneficial insects.
To kick off your symbiotic journey, start by thinking about rock placement. Choose a variety of rocks that differ in size, shape, and texture, and arrange them in groups or clusters—akin to setting up a family reunion. For instance, larger boulders can serve as focal points, while smaller stones can fill in the gaps, creating a natural look that feels effortless. Think of each rock as a sturdy friend that’s there to support your plants while also showcasing their beauty.
Next, pick plants that thrive in rocky terrains. Succulents, alpine plants, and creeping groundcovers are perfect candidates. These little guys love a good challenge and often flourish in rocky soil. When planting, position them so that they spill out over the edges of the rocks. It’s like they’re trying to escape and explore the world around them—who wouldn’t love a little free spirit in their garden?
Consider the growth patterns, too. Some plants will stretch upward like they’re reaching for the sun, while others might hug the ground tightly, giving your garden a dynamic visual. And don’t forget to mix up the foliage varieties; different colors and shapes create a mosaic that draws the eye. You want your garden to look as chaotic as your sock drawer, but in a good way, of course.
Oh, and if you want to add an extra layer of wow, think about tucking in some moss or small creeping plants between the stones. It’s like a secret garden that only you know about—a soft, green carpet for your rocks. Remember, this isn’t just about the plants’ survival, but about creating a cozy habitat where they can thrive together. Additionally, having the right hori hori garden knife can help you effectively manage plantings and rock placements for optimal aesthetics.
In the end, the symbiotic relationship between your plants and rocks can redefine your garden’s personality. When they work together, you create a harmonious space that invites anyone who visits to stop, admire, and maybe even wish they could have a rock and plant friendship of their own.
5. Zen Garden Aesthetics
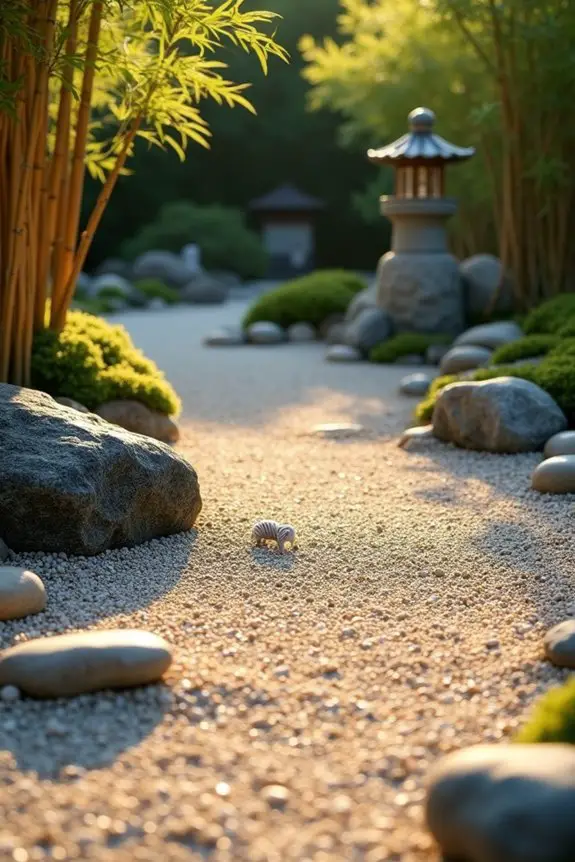
Creating a zen garden is like crafting a peaceful retreat right in your backyard. It blends the simplicity of rock placements with the calming beauty of nature, offering a perfect spot for meditation or simply unwinding after a busy day. Imagine this: smooth stones arranged thoughtfully among raked sand or gravel, inviting you to pause, breathe, and reflect. It’s a vibe that speaks to tranquility and balance.
Let’s get to the fun part—how to arrange those rocks. Start by gathering an assortment of rocks in varying shapes. You want some flat ones to act like serene stepping stones, and then throw in a few larger boulders for that sense of grounding. Place these boulders off-center; it’s like giving your garden a delightful little balance but with a twist. Remember, nature isn’t always perfectly symmetrical, and neither should your zen space be.
Now, consider giving those rocks a sense of purpose. Use them strategically as focal points. For example, set a large rock as a centerpiece and surround it with smaller stones that guide the eye toward it. This creates a natural zen path, leading visitors (or just you, on a lazy afternoon) to pause and enjoy their surroundings. It’s like your very own garden treasure map without the pirates and gold—just relaxation.
And here’s a fun tip: don’t forget about the negative spaces. It might sound fancy, but it really just refers to the areas in between those rocks. These spaces can be filled with soft moss or fine gravel raked into tranquil patterns. Think of raked gravel as the canvas and your rocks as the brushstrokes—create gentle waves or spirals that whisper, “Relax, you’re home.”
If you’re feeling extra creative, try incorporating a few Japanese lanterns or a small water feature, but keep it simple. The goal is to enhance the calmness, not to turn your zen haven into a theme park. Aim for that serene atmosphere where the spirit of peace flows freely.
In the end, your zen garden should reflect not only beauty but also a sense of calm and contentment. As you create your space, remember to enjoy the process. After all, who doesn’t love a good rock arrangement? Just think of it as adult playtime with a side of nature therapy. So grab those rocks, channel your inner zen master, and let your garden shine with tranquility.
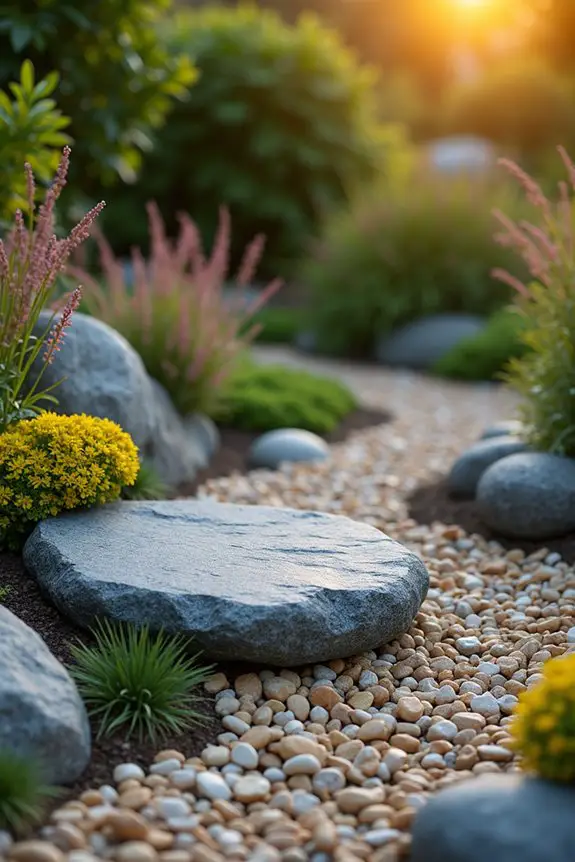
6. Layered Rock Textures
Creating layered rock textures in your garden is a delightful way to play with depth and interest. It’s like giving your outdoor space a fashion makeover, where each layer tells its own story, mixing height with varied stone types to keep the eyes wandering.
This layered approach not only looks visually stunning but also contributes to the overall functionality—think drainage and erosion control.
So, how do you get started? First things first, gather rocks of various sizes—big, small, flat, and round. It’s like pulling together your favorite outfits from different seasons; the more variety, the better.
Now, imagine creating levels like a miniature mountain range. Start with your larger stones as a base, laying them flat to form the foundation. This creates a sturdy base while adding definition to the whole space.
Next up, bring in the smaller rocks! Nestle them in and around the larger stones. This is where you get to play with texture. Use rounded stones to fill gaps or flat stones to create stepping paths. Think about how a well-styled plate looks. You wouldn’t put all the same ingredients in one pile, right? Layer those rocks for contrast.
As you arrange those stones, try to create a natural flow. You want your layers to complement each other in height and shape. Ideally, your eye should feel drawn naturally from one layer to the next, like walking through a gentle hilltop garden.
And here’s a tip: don’t be afraid to leave some spaces open. Those gaps can be great for plants to peek through, adding alive freshness and a touch of whimsy.
And what about colors? Incorporate different hues of rocks. Clusters of grays, browns, and even a splash of green from moss can create a rich tapestry of textures. It’s like having a color palette right outside your door—all you need is a little coordination.
Lastly, don’t stress about perfection. Nature isn’t neat, and neither should your layered rock garden be. Embrace the messy beauty; after all, it’s all about creating harmony and fun, right?
What’s important is that you enjoy the process and maybe even have a ceremonial rock dance after. Your garden will be a textural haven that not only looks great but feels inviting too—an ideal spot to unwind or sip your favorite drink while channeling your inner garden artist. Remember, it’s all about expressing yourself through those lovely layered rocks.
7. Sculptural Stone Features
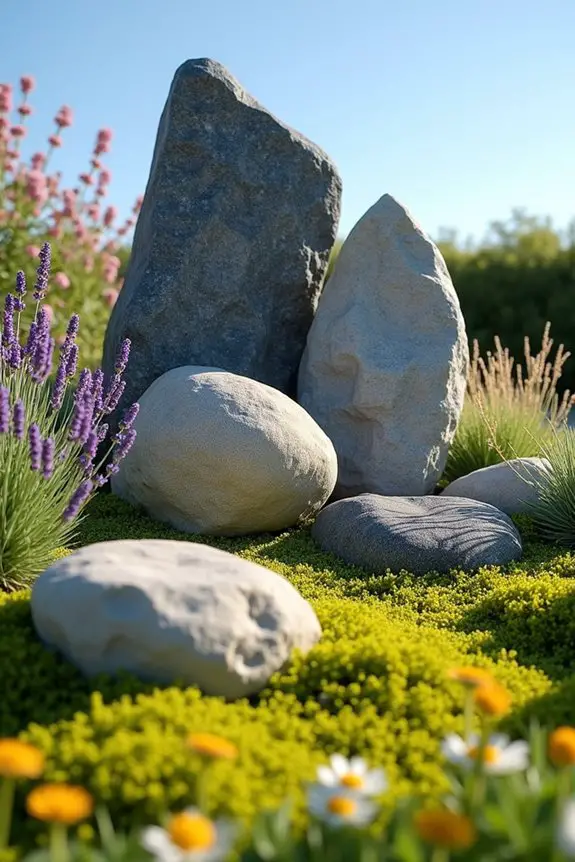
Have you ever strolled through a garden and felt like you’ve stumbled upon a charming art exhibit? That’s the magic of sculptural stone features. Arranging stones in unique, eye-catching ways can turn an ordinary patch of land into a fascinating scene. Not only do these features add visual appeal, but they also serve as enchanting focal points that invite curiosity and spark conversation—perfect for the social gardener!
To get started, think about the shapes and sizes of the stones you have. Round, rectangular, or even jagged pieces can all be turned into something artistic. Imagine this: a tall, standing stone flanked by smaller, flatter ones on either side. Maybe it looks like a proud sentinel watching over your garden. By combining different stones, you create a conversation piece that looks as if it happened naturally, even though you planned every inch of it.
Now, let’s talk placement. When creating a sculptural feature, don’t just plop a rock down and call it a day. Step back, observe, and visualize the flow of your garden space. A good rule of thumb? Consider the “three-dimensional triangle” approach. You can arrange stones in groups of three, varying the heights and sizes, creating a balanced vibe that draws the eye.
Remember that harmony is key here—too many similar sizes won’t have the same effect. As you place each stone, keep in mind the surrounding plants. A rugged stone can help accentuate a delicate flower, creating a stunning contrast. Don’t forget, negative space can be just as important as the rocks themselves; leaving some areas open allows your sculptures to breathe, so to speak.
Finally, think about how shadows and light will play across your feature throughout the day. It’s like orchestrating a symphony of sunlight!
Feeling creative? Why not personalize your stone features with your own flair? You could even paint or etch subtle designs onto the stones. A touch of your personality gives your garden that special finish, something that screams, “You are genuinely here!” And if you mess up? Don’t fret—art is subjective, and what might seem like a blunder today could turn into your favorite eccentric feature tomorrow.
In a nutshell, sculptural stone features not only enhance the style of your garden but create a narrative and visual journey. So, grab some stones, let your creativity flow, and remember: it’s about having fun. Happy gardening!
8. Bold Vertical Stone Arrangements
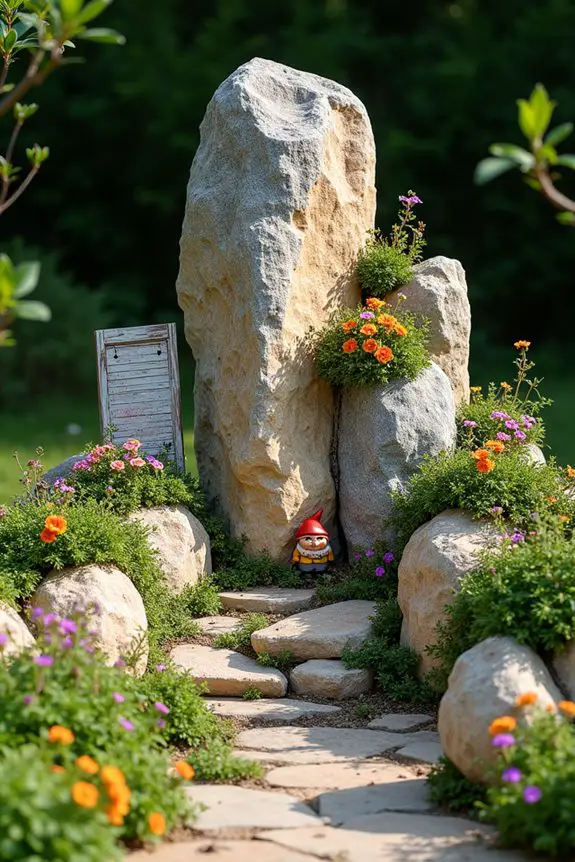
When it comes to rock gardens, vertical stone arrangements are like adding the cherry on top of an already delightful sundae. They draw the eye upward and can create a sense of drama and sophistication in your garden, inviting visitors to look closer and appreciate the unique textures of each stone.
Plus, they work wonders for small spaces—who says you can’t have a grand display in the tiniest of backyards?
So, how do you achieve this stunning vertical look? First, you’ll want to select some sturdy stones that can stand tall, literally. Look for those that have more height than width; think about those towering tower-like pieces that would stand proud against the sky.
Starting with your largest stone, set it in the center of your desired area. Don’t just plop it down and run, though. Ground it firmly—your tall stone needs to stand strong, especially if the wind decides to join the party.
Next, think about companion stones. Smaller, flatter rocks can be scattered around your central piece like a supportive entourage. You can position them at various angles or even slightly elevated, creating a cascading waterfall effect with depth. Remember, it’s all about layers; nature doesn’t just do flat, after all.
Imagine yourself at a concert, where the best view is found slightly higher up. You want your garden to captivate like that.
As you’re setting the stones, take a moment to step back and appreciate the look. Is it visually balanced? Does it feel dynamic? Adjusting just a fraction can make a world of difference.
And if it feels like a game of Tetris—well, it kind of is. You’ll be shifting and sliding stones around until it feels just right.
Now, get creative! Consider incorporating some plants around your vertical arrangement. Creeping plants can trail over the stones, softening the look while adding splashes of green.
Or, for a bit more flair, introduce colorful flowers to bring a pop of color against the earthy stones. It’s like dressing your rock structure in a dazzling outfit for the garden runway.
Don’t be afraid to sprinkle a little personality into the mix. Add a quirky, weathered sign or a fun garden gnome lurking behind the stones. It’s your garden, after all.
If you feel like adding a splash of whimsy, go for it. Trust me, the neighbors will talk—mostly in admiration.
9. Artful Stone Positioning
When diving into the art of stone positioning in your rock garden, think of it as a fun puzzle waiting to be solved. It’s more than just tossing rocks around willy-nilly; the way you arrange your stones can transform your space, creating an inviting vibe and adding dimension and balance that make the whole area pop. Plus, it can also improve drainage and provide little microhabitats for tiny garden critters.
To get started, gather a variety of stones in different sizes and shapes—don’t skip the bumpy ones or the smooth, round pebbles. I once had a rock so oddly shaped that I swore it looked like a cow. (I still don’t know how it ended up in my garden, but it makes a great conversation starter.)
Begin by selecting a few key stones that you want to be the stars of your layout. Maybe you have a chunky, flat stone that calls out to be a cozy seat for a fairy. Place that one down first, as your base.
Next, find smaller stones that can complement that base stone. Think of it as creating an ensemble cast where no character is too small to shine. Lay these stones in a staggered pattern around the main one. The goal is to create visual interest, so don’t be afraid to experiment a bit—just like you’d while choosing toppings for a pizza. Maybe add a cute little round boulder next to a jagged piece, then leave space for those pebbles to breathe.
Keep stepping back and admiring your work. If something feels off, don’t hesitate to adjust. It’s a trial-and-error process, kind of like my attempts at baking—sometimes it’s a masterpiece, other times it’s just a crunchy mess. And who knows? You might find that shifting one stone to the left or right gives it that sparkling touch you were searching for all along.
Now, let’s not forget to bring in some plants, too. Nestling a few sprigs of cheerful ground cover around your perfectly placed stones can really tie the whole scene together.
It’s like getting the perfect outfit for a night out: the stones are your chic outfit, while the plants are those killer shoes that really complete the look. With a little patience and creativity, you can craft a rock garden that not only looks stunning but feels like a cozy retreat for you and your guests.
10. Natural Harmony in Rock Arrangements
When it comes to rock arrangements in your garden, creating natural harmony is key. This idea works wonders, both for functionality and for crafting an inviting atmosphere. Picture it like a beautifully orchestrated symphony—each stone plays its own note, yet together they create something truly magical. Plus, arranging stones in a natural way can help with drainage and promote healthy plant growth. It’s a win-win!
One way to begin your creative placements is to think about how stones would appear in nature. Imagine a riverbed or a rocky hillside: stones bunch together in some places while others are scattered about. Grab a few larger stones as your focal points, then surround them with medium-sized boulders and smaller pebbles like a gentle wave lapping against the shore. I once nicknamed a weirdly shaped rock “Snaggletooth” because, let’s face it, it looked like something out of a cartoon.
Placing it near a smooth stone was perfect; it doubled as a buddy that gave a sense of balance.
Now, here’s a fun tip—play with height. You want to avoid a flat scene. Layer your stones with taller ones in the back and progressively shorter ones as you move forward, creating a lovely view no matter where you’re standing. It’s like stacking cupcakes: the tallest ones are always at the back, right? And speaking of cupcakes, if you have any extra stones that look like they belong in a dessert-themed garden (hello, round and smooth), toss those in for a whimsical touch.
And don’t forget about those sneaky little gaps. They can be your best friends. Leave some space between larger stones to fill with plants—maybe succulent beauties or cheerful wildflowers. This approach not only softens hard surfaces but also breaks up the rigidity of stones.
Who knew that a tiny daisy could add so much charm? Setting them in those empty nooks makes the whole scene feel like it’s in harmony with nature, inviting little critters to poke around.
Finally, don’t stress about perfection. Your rock garden doesn’t have to look like a postcard; it just needs to feel right to you. Just like my cooking experiments—sometimes it turns out fine, and other times… let’s just say there are more takeout menus in my drawer now than I care to admit.
Plant Selection Strategies
Choosing the right plants for your rock garden can feel a bit like trying to find the perfect ingredients for a dish you want to impress your friends with—overwhelming, right?
First, think about your space. Do you want low-growing succulents that whisper, “I’m chill,” or colorful perennials that shout, “Look at me!”?
Don’t forget about sunlight needs. Think spicy suns vs. shade-loving herbs.
Mix textures and colors for a feast for the eyes—like adding a sprinkle of salt.
And let’s be real, if you’re a little forgetful, opt for low-maintenance plants in your rock garden ideas. They’re like the easy recipes you keep in your back pocket.
Keep it playful, and remember: gardening should be fun, not a chore.

