So, you want to create a garden that feels like it’s been around for ages, huh? Designing a perennial garden can be kind of overwhelming, like trying to bake a soufflé when you’ve only ever made toast. But trust me, with the right ideas, you can whip up a stunning outdoor space. Let’s explore some classic design concepts that’ll make your garden a feast for the eyes; you might just reveal the secret to transforming your yard into a timeless masterpiece. Curious yet?
Key Design Concepts
When you’re planning your perennial garden, think about the layout—it’s like setting the table before a feast. Curvilinear flower beds can create a soothing flow, while a vertical tiered planting scheme not only adds drama but gives your back a break from all the bending.
1. Curvilinear Flower Bed Arrangement
When it comes to garden design, curvilinear flower bed arrangements offer a delightful blend of beauty and practicality. Picture those gently sweeping curves that guide the eye around your garden, evoking a sense of calmness and grace. Not only do they stand out visually, but they also create a more inviting atmosphere, making you want to stroll right in and enjoy the blooms.
To start crafting your own curvilinear flower bed, grab a garden hose or some string. Lay it down on the ground to sketch out your desired shape. Now, this is where the fun begins! You’re free to create soft, waving lines that mimic the natural flow of the landscape. #ArtisticLicense. Just remember, it helps to have a little flexibility. If you find yourself curving too much like a pretzel, fear not! Adjust until it feels just right.
Once you’re satisfied with your shape, mark it out with flour or some spray paint – basically, your garden’s version of a runway! Next up, dig out your flower bed. This is where I always find I’m a little overzealous. Digging turns into an impromptu workout, leaving me sweaty, with that wonderful sense of accomplishment. Who knew I was going to the gym today?
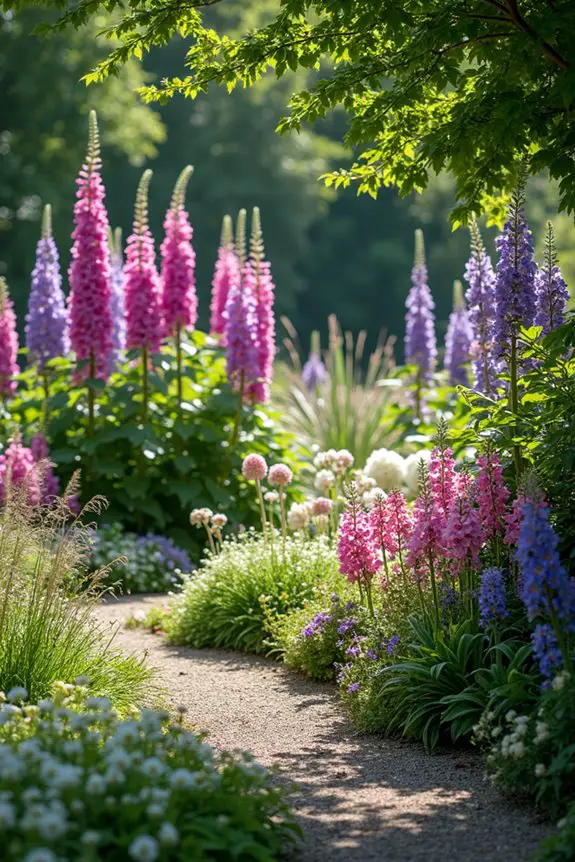
Now, time for planting! Choose your favorite perennials that bloom at different times, adding layers of color throughout the seasons. Think of it as creating a mixed tape of flowers—blues, reds, yellows—all dancing together. Group taller plants towards the back of the bed and shorter ones in the front to enhance that layered effect.
And guess what? If you happen to over-plant like I often do, just give them a friendly little trim later—it’ll be our little secret.
For a finishing touch, think about adding some rocks or decorative edgers following your curvy lines. Not only do they provide a structure, but they also bring a rustic touch that warms your heart every time you glance at it. Just a little note, if you end up accidentally losing your shoes in the soil while planting, embrace the moment—a little dirt never hurt anyone, right?
In the end, curvilinear flower beds aren’t just a trend; they’re a feeling. They pull you in, inviting you to slow down and appreciate all the little beauties sprouting from the earth. So, let those curves flow, and enjoy the journey of making your garden a sanctuary!
2. Vertical Tiered Planting Scheme
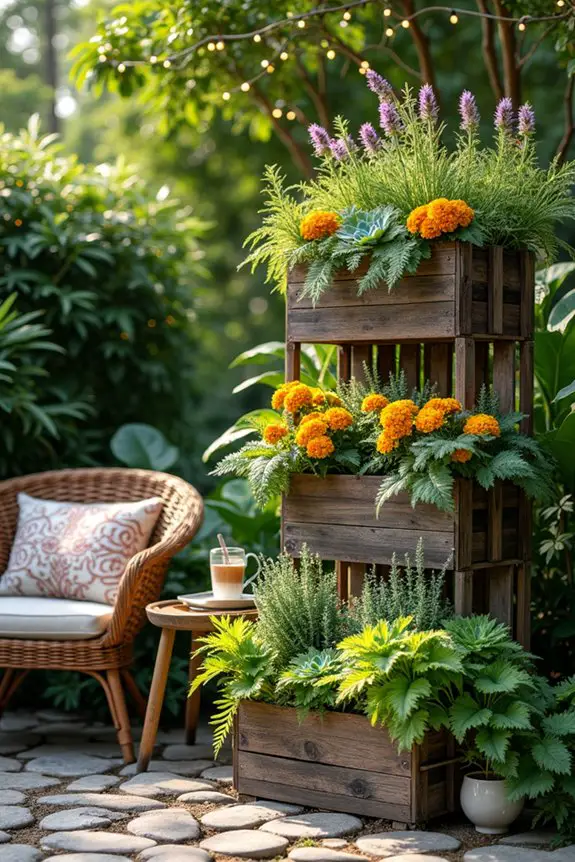
When it comes to creating a charming garden, the vertical tiered planting scheme is a delightful game-changer. Imagine stepping into your garden and being greeted by a cascade of colors and textures that draws your eye upward. Not only does this design save space—perfect for those smaller yards or patios—it also adds depth and dimension, transforming flat spaces into stunning landscapes. It’s like creating a delicious multi-layer cake, where each layer teases the senses with something different.
To get started, assess the area where you want to implement this idea. Are you working with a narrow walkway? Or perhaps a cozy corner in your backyard? You want to pick a spot where those lovely layers can stand tall and shine. Think about using an assortment of pots or planters stacked on different levels. Use old wooden crates, repurposed shelves, or even a tiered plant stand if you have one lying around. The key is to create varying heights; it’s what adds that visual interest we’re after.
Now, before the planting party begins, consider the plants you want to include. Think about mixing perennials, herbs, and even some trailing plants that drape gracefully over the edges. You want to start with the biggest plants at the bottom and work your way up to the petite petals at the top. Imagine the wave of colors you’ll create as the foliage takes flight in every direction.
You might be tempted to go overboard—that’s totally me—but remember, balance is key. Just like in cooking, you don’t want to overpower the delicate flavors with too much spice.
As you start placing your plants into their designated spots, remember to think about how they’ll interact with one another. Will that bright yellow flower clash with the calming blue? Or will the two of them share a happy harmony? Think about sun exposure and watering needs too. Grouping plants with similar requirements makes maintenance a breeze, allowing you to soak up those sunny days instead of stressing over who needs more water. Additionally, organizing your seed storage box compartments will help ensure that you have everything you need readily available for successful planting.
And hey, speaking from experience, if you discover that you’ve unintentionally created a “jungle” because of your enthusiastic planting approach—don’t despair. Take a moment to step back, assess the situation, and don’t be afraid to rearrange a few things. It’s like re-choreographing a dance routine until it feels right—sometimes you just have to find your groove.
Lastly, finish off your vertical masterpiece with some decorative elements. Think about adding fairy lights, wind chimes, or stones to create not just beauty but a warm, inviting atmosphere.
Just imagine sitting in your garden with a cup of tea, surrounded by your masterpiece—could there be a better way to unwind? Remember, vertical tiered planting isn’t just about aesthetics; it’s about building a sanctuary, a little slice of joy that reflects you. Enjoy the process, and don’t forget to embrace any little mishaps along the way; they often lead to the best stories.
3. Geometric Pathway Integration
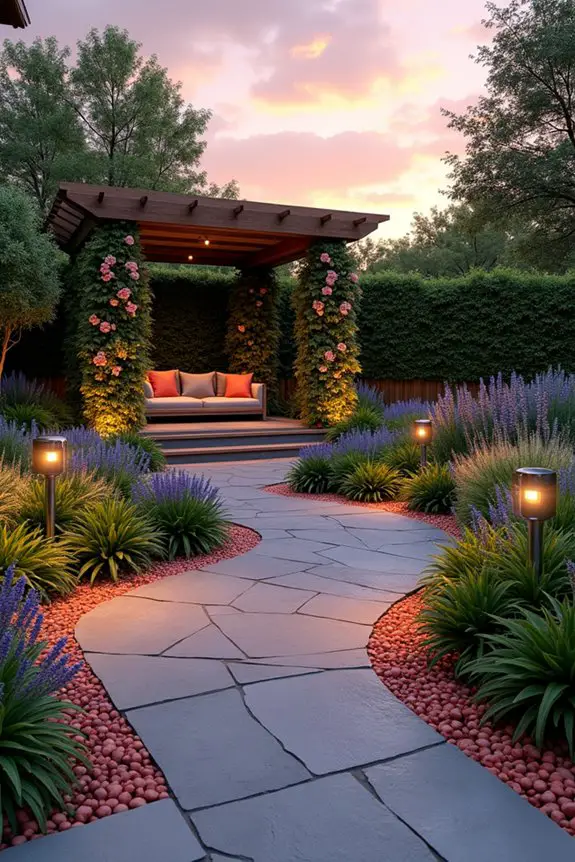
When it comes to designing a garden, incorporating geometric pathways can truly elevate the space. Imagine strolling through your yard or patio, with crisp, clean lines leading you from one delightful nook to another. Not only do these pathways serve a practical purpose—helping you navigate your garden easily—but they also add a modern touch, giving your oasis a fresh and organized feel.
So, what’s the first step in creating these geometric pathways? Start by sketching out a rough layout. Grab a piece of paper and let your imagination flow. Think about how you want to guide visitors through your space. Do you want straight lines that lead to a focal point, or maybe a more winding path that encourages exploration? The beauty lies in how you design it—there’s no right or wrong way, just your way.
Once you have a plan in mind, it’s time to pick your materials. You could opt for paving stones, gravel, or even wood chips to create your pathways. Each choice brings its own vibe; for instance, stones lend a robust and timeless feel, while gravel offers a more casual and relaxed stroll. Just remember, whatever you pick should complement your garden style. Are you aiming for modern minimalism or rustic charm? You want the path to blend seamlessly into the greater tapestry of your outdoor space.
Now, here comes the fun part—laying down your materials. Depending on your choice, you might need to dig a little or just border your path with some edging. If you’re doing stones, make sure they’re level and snug against each other.
But let me tell you, I once tried to create a stone pathway without measuring, and let’s just say, I ended up with a rather lopsided mess. Lesson learned: precise measurements are essential, especially in the beginning.
While you’re laying your path, don’t forget to think about lighting. Adding solar lights or lanterns along your pathway can create a magical ambiance come evening, and these solar stake path lights not only enhance safety but also add a decorative touch. It’s like inviting guests to a dinner party but with glow instead of food. Plus, it guides the way so you won’t trip over the cat in the dark—trust me on that! Also, consider using yellow sticky traps to manage pesky insects that may disrupt your garden’s beauty.
4. Asymmetrical Plant Cluster Arrangement
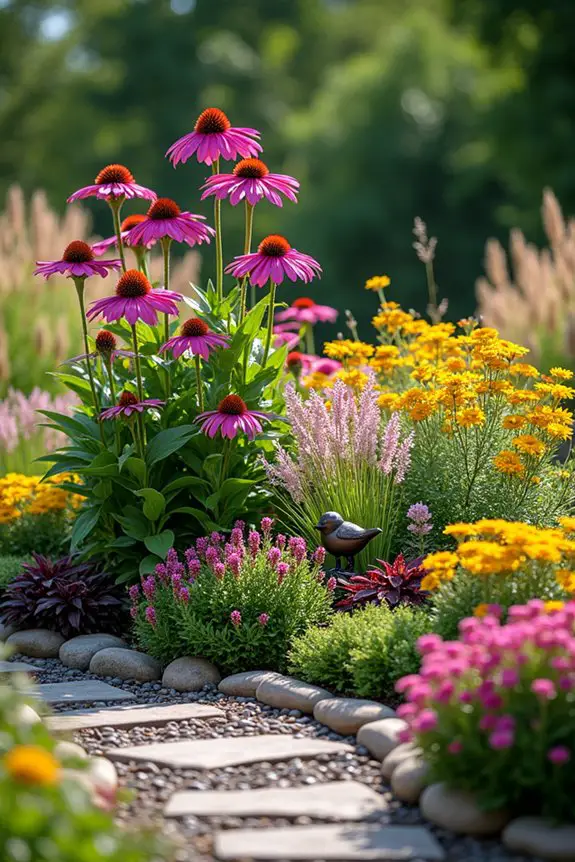
Asymmetrical plant cluster arrangements can be a game-changer for your garden design. Why? They create a sense of natural beauty and relaxed elegance, breaking away from rigid patterns that can feel a bit too formal. Visualize this: groups of plants of varying heights and textures come together, almost as if they’ve just decided to huddle together for a cozy chat. Intrigued? Let’s break down how to master this stylish approach.
First things first, think about the types of plants you want to use. Consider a mix of perennials, annuals, and ornamental grasses. Maybe you’ll go for the bold hues of echinacea alongside the feathery elegance of astilbe. Imagine the visual feast—different colors and textures creating a tapestry of foliage. Incorporating fabric aeration pots can also enhance your plant growth by promoting healthier root systems.
Start by placing the taller plants toward the back or center of your cluster, adding in some mid-height perennials in front, and then sprinkle in the shorter ground covers or flowers around the edges. It’s like assembling your dream team in the garden!
Now, here’s where it gets a little tricky—fighting that urge to make everything perfectly aligned. Asymmetry thrives on variety and charm, so embrace the chaos! You could choose to group plants in clusters of three, five, or even seven for that organic look.
But let’s be real for a second—my first attempt at this had the plants standing so straight and in-line that they looked like they were at attention in a military parade. Definitely not the intention. So, loosen up and let the plants breathe.
When planning your clusters, keep your plants’ sunlight and water requirements in mind. After all, you wouldn’t want to pair that sun-loving lavender with shade-loving ferns. Imagine the confusion—they would be like the two friends who never agree on the music at a party. Choose plants that can harmonize with each other’s needs, and your garden will thrive in beautiful harmony, too. To achieve neat edges around your arrangement, consider using hedge shears for shaping to create an elegant finish.
Once your plants are placed, step back and admire your work. Take a moment to see how they play off each other—do some colors pop against the greens, or do certain textures create lovely contrasts? Adjust if needed, and don’t be shy about moving things around until you’re satisfied. Funeral-like plant graves are a real thing; I’ve had my fair share of awkwardly relocated flowers just snoozing in spots that didn’t quite fit when the mood changed.
Lastly, consider adding ornamental features like rocks or garden sculptures to your cluster. This will draw the eye and add depth, creating mini focal points within your arrangement. Think of them as the sprinkles on a cupcake—or, quite frankly, the cupcakes on a cupcake stand because who doesn’t love more cupcakes?
In short, asymmetrical plant cluster arrangements can give your garden an inviting and vibrant atmosphere. So don your gardening gloves, grab those trowels, and unfurl your creative spirit—your perfect plant clusters are waiting to meet you!
5. Circular Patio Integration Design
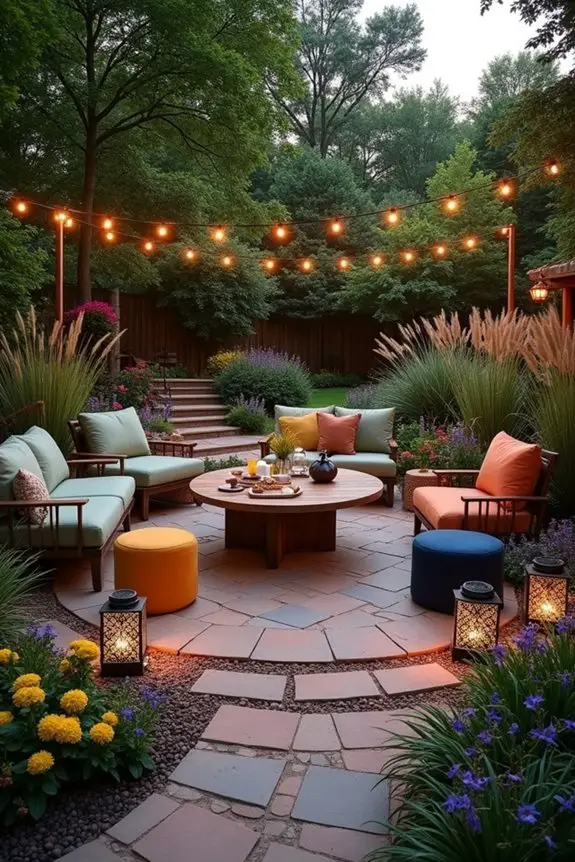
When you think about integrating a circular patio into your garden design, picture a cozy nook where friends and family can gather, share laughter, and enjoy the beauty of nature. A circular patio not only serves a functional purpose, providing a great spot for seating and socializing, but it also creates a flow that encourages movement and exploration in your garden space.
Imagine the visual appeal of a lovely round area, inviting you to unwind while nestled among vibrant blooms and lush greenery.
Now, let’s explore how to nail this design. Start by choosing a central point for your circular patio. This could be a fire pit, a charming table with chairs, or even a focal sculpture that adds personality. Whichever option you choose, it should draw your eye and feel like the heart of your outdoor gathering spot.
The patio itself can be made from paving stones, gravel, or even colorful tiles—just make sure it complements your overall garden style. You don’t want a modern patio standing out like a sore thumb in a cozy, rustic setting.
Next, define the edges of the circle. Perhaps you’ll opt for a curved path lined with perennials or ornamental grasses, leading guests gently to the patio while guiding their gaze through the landscape.
Visualize how this pathway can bloom into life with plants of varied heights, softening the edges of your circular retreat. You’re creating an atmosphere, a vibe that screams comfort and connection, where everyone feels like they belong.
Lighting is another key concept for your circular patio design. Think twinkling fairy lights strung overhead, or solar lanterns that come alive as daylight fades.
I’ve experienced many late evening gatherings where the right lighting transformed the space into a magical haven. It’s all about mood, right? Good lighting turns your patio from just a spot to hang out into an enchanting setting worthy of a gathering of your nearest and dearest.
Lastly, don’t forget about seating. You might consider mixing styles—some comfy lounge chairs, a rustic bench, or even cute poufs that can be moved around easily.
Just imagine everyone circling up, enjoying snacks and drinks, the good kind of chaos that happens when friends come together. And let’s be honest, it’s hard to resist a good spread of snacks, right? The more welcoming your seating arrangements, the more memories you’ll create around your circular patio.
6. Meandering Stream Feature Integration
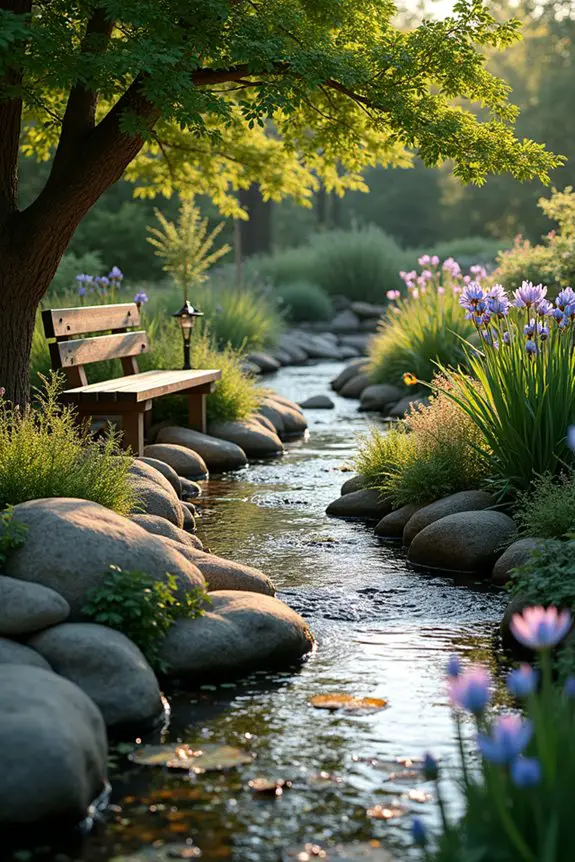
When you think about adding a meandering stream feature to your garden, imagine the soothing sound of water gently flowing, a serene path that beckons you to explore, and the sense of tranquility that washes over you as you pause to take it all in. This kind of design not only invites nature’s beauty closer to your home, but it also creates a unique focal point that draws the eye and the heart, encouraging moments of reflection and connection with the great outdoors.
First things first, decide on the stream’s path. You want it to be winding and natural, much like a lazy river on a sunny day, rather than a straight line that feels more “driveway” than “backyard oasis.” Picture yourself walking alongside it, maybe sipping your morning coffee or daydreaming about your next adventure.
Use stakes and string to outline your envisioned flow, keeping the turns gentle and enticing. A smooth, curvy stream will encourage little ones (and maybe a few curious adults) to follow along its banks—trust me, who can resist the call of water?
Now, let’s talk about materials. Natural stones or river pebbles work wonders here, creating a rustic look that perfectly fits a garden setting. If you’re feeling a bit creative—and if my own DIY attempts haven’t deterred you—try incorporating a range of different-sized stones.
It’s kind of like decorating a cake, right? Layering the textures and colors brings life to your feature, just like frosting does to dessert. And speaking of dessert, if you happen to have a few leftover rocks from your last landscaping project (don’t worry, we’ve all been there), now’s the time to put them to good use.
Don’t forget about plants! Along the banks, opt for moisture-loving perennials like ferns, irises, or even some water lilies if you want to take it up a notch. I once planted a few too many, thinking they’d take care of themselves, and let me tell you—it’s like growing a small jungle. Keep an eye on their growth, and you’ll have a vibrant border that not only beautifies your stream but also invites birds and butterflies to join the party.
Now let’s not skip lighting—an evening stroll beside your stream should feel enchanting, not spooky. Consider adding soft lights down the path or even underwater lights that illuminate the stream itself. Almost like a fairytale, right?
I still remember a cozy summer night when my stream transformed into a glittering pathway, making me feel like I’d stepped into a secret domain. A little illumination goes a long way.
Lastly, sprinkle in some seating. A simple bench or a few strategically placed boulders create spots where you can plop down and enjoy the sounds of nature—or even indulge in a good book.
Trust me, nothing beats listening to the gentle flow of water while you sink into a stack of novels you’ve been meaning to read. Embrace the setup as your personal retreat, your happy place in the garden where worries fade, and inspiration flows just as freely as the water nearby.
7. Raised Bed Planting Strategy
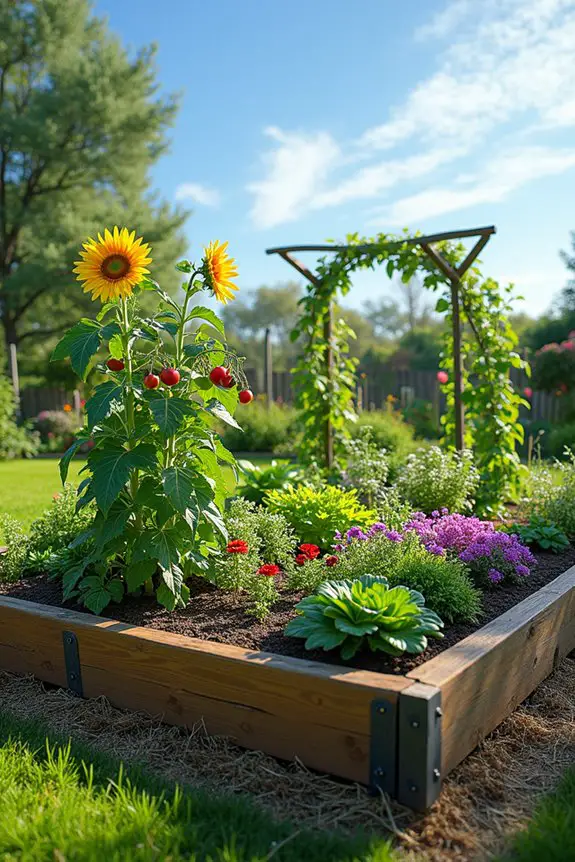
When it comes to gardening, raised bed planting is a game-changer. Not only does it provide structure and organization, but it elevates both your plants and your gardening experience. Imagine the ease of harvesting veggies without bending over too much or the joy of seeing your flowers flourish in well-contained spaces. Plus, there’s something undeniably charming about the neat lines and defined borders of raised beds that can make any garden feel more intentional and inviting.
To start your own raised bed adventure, first, decide on the size and shape. You might want to go for a classic rectangular bed, but don’t hesitate to let your creativity run wild. I once had a round bed that turned every gardening session into a bit of a workout, as I navigated the circular shape – who knew gardening could double as cardio? Aim for a height between 12 to 24 inches. This allows for better drainage and makes it easier on your back. Trust me, after a long day, your spine will thank you.
Next up, consider location. Choose a sunny spot that gets at least 6-8 hours of sunlight each day, as your plants will be full of life and color, soaking it all in. I learned the hard way when I planted in a shady corner and ended up with, well, a bed of disappointment. You want your plants to thrive, not just survive.
Now, let’s talk about materials. You can use untreated wood, bricks, or even recycled materials like old pallets. Just be careful with those pallets; they can add a lovely rustic touch, but you don’t want to invite any hidden chemicals. A sturdy frame will keep your soil in place, and if you line the bottom with cardboard or landscape fabric, it’ll help keep the weeds at bay. The only thing worse than bad soil is pulling weeds like it’s an Olympic sport.
When it’s time to fill your raised bed, go for a high-quality mix of topsoil, compost, and other organic matter. It’s like making the perfect cake batter, right? You need just the right mix to guarantee your plants have all the nutrients they crave. If only it worked like cake and didn’t involve hard work—maybe we could just summon those veggies with a magical wand. But until that happens, putting in a little elbow grease will yield delicious rewards.
Now, don’t forget to choose the right plants for your raised bed. This is where the fun really begins. You can go for a combination of flowers, herbs, and vegetables. Just imagine the joy of snipping fresh basil for your pasta or enjoying tomatoes plucked directly from your own garden. I once tried to cram in too many varieties and ended up with a jungle of plants battling for sunlight. So, give each plant some breathing room and a chance to shine.
Finally, keep your raised bed tidy and well-watered. Mulching helps retain moisture and keeps those pesky weeds from crashing the party. And just between you and me, I’ve learned that checking your plants regularly is the secret ingredient to a thriving garden. They thrive on attention, so indulge them a little.
As you embrace the raised bed planting strategy, you’re not just beautifying your space; you’re creating a sanctuary where you can reconnect with nature, one colorful bloom or crunchy bite at a time.
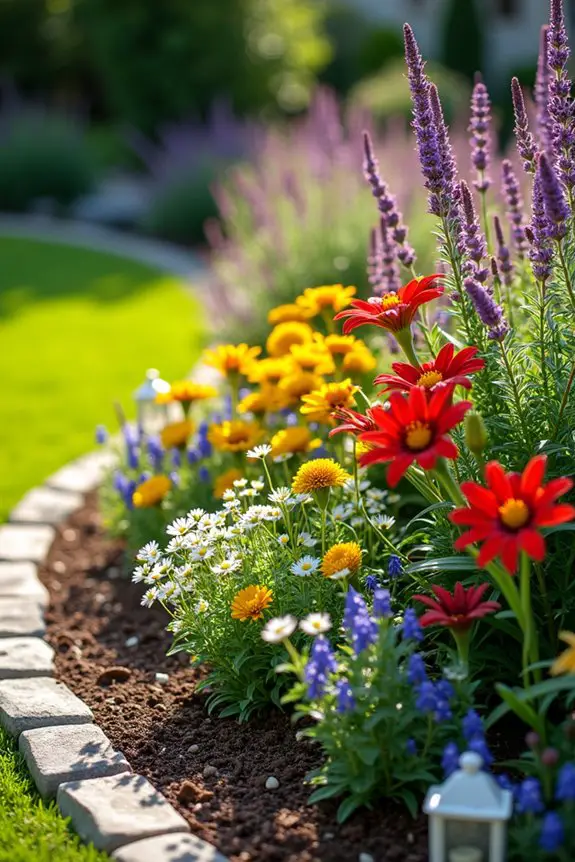
8. Natural Stone Border Edging
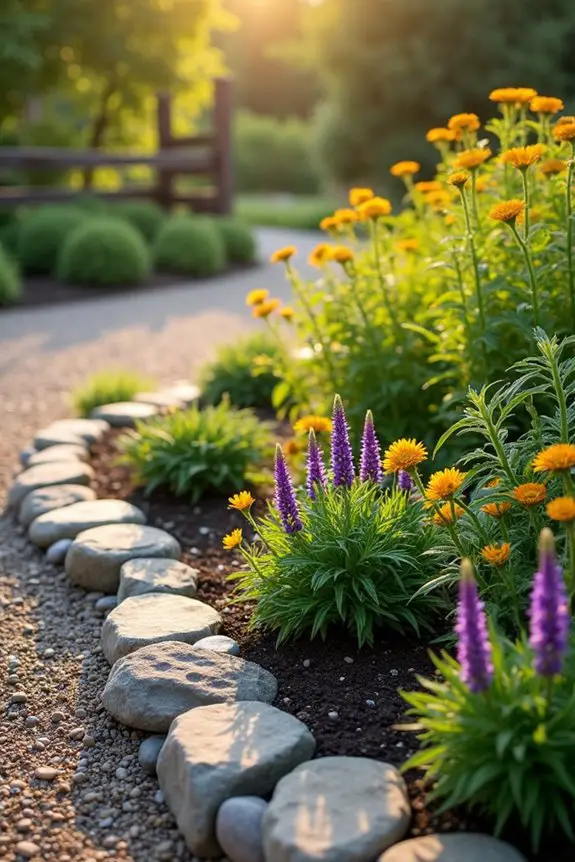
Creating a natural stone border for your garden is a delightful way to combine functionality with beauty. Not only does it give your garden a polished, finished look, but it also helps keep everything in its place—just like a good muffin tin keeps each muffin from spilling over into the next.
Plus, there’s just something about the texture and colors of natural stone that brings a bit of the outdoors right to your backyard. Think rustic charm meets elegance, and you’ll be on the right track.
So, how do you get started with this lovely design concept? First things first—choose your stones. You might want to go for slate, river stones, or even cobblestone. Each has its own character, just like different types of cheeses.
Some are smooth and polished, others are rugged and earthy. Right away, I was drawn to the river stones. There’s something about their rounded edges and the way they gleam in the sunlight that reminds me of peaceful riverbanks. Just be sure to pick stones that fit your vibe and the aesthetic of your garden.
Next, it’ll be time to plan your layout. Visualize how you want the border to flow. Do you want straight lines for a formal look, or are you leaning towards curves to create a more relaxed, organic feel?
I once made the mistake of laying out a super angular design, only to realize later that my garden felt more like a geometric puzzle than a serene escape. Easy, breezy is often the way to go.
After you’ve settled on your design, mark the outline using stakes and a string. This step is like laying out the foundation for a cake—get it right, and everything else falls into place.
Now comes the fun part: digging a trench along your marked line. You’re looking for about 2-3 inches deep, just enough to provide a home for your stones. And let’s be real, if you have an old shovel that’s seen better days, it might just take you longer than you’d like—I’ve had my run-ins with rusted tools that put up more of a fight than I did.
Once your trench is ready, start placing your stones snugly together. If you’re feeling adventurous, mix and match different stone sizes to add visual interest. Kind of like making a veggie stir-fry, where every bit adds to the deliciousness.
But here’s a pro tip: make sure the stones are level as you go. Nothing looks quite as awkward as a stone that’s jutting out like it’s trying to wave hello. Fill in any gaps between the stones with soil to further secure them.
Finally, take a step back and admire your work! A natural stone border won’t only frame your garden beautifully but also create a clear distinction between your garden and the surrounding area.
It’s like putting a frame around a cherished photo—suddenly, everything looks more inviting. You’ll find that it’s a wonderful way to keep your space tidy while adding a touch of nature’s elegance.
And honestly, there’s nothing quite like the satisfaction of stepping back and realizing you’ve created something special. So grab those stones and let your creativity flow!
9. Colorful Perennial Groupings
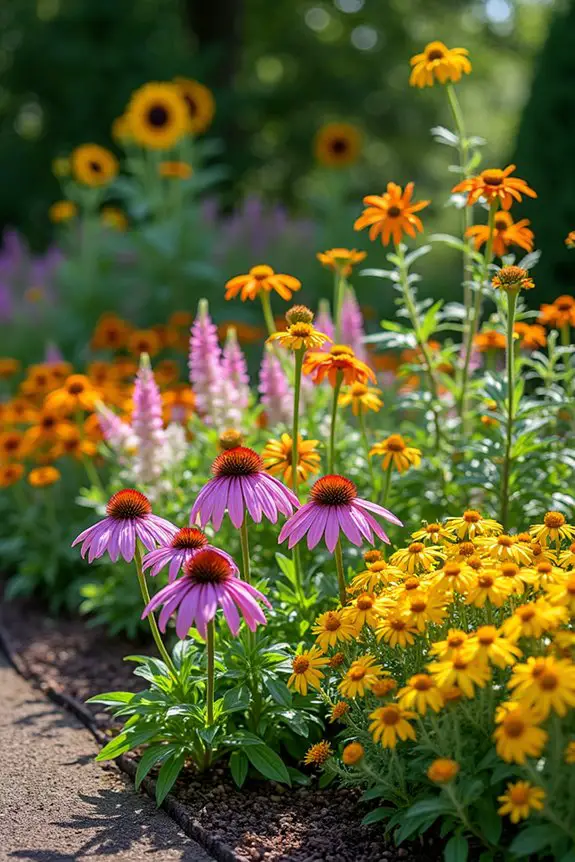
Creating colorful perennial groupings in your garden is like crafting a vibrant painting, one where nature’s textures and hues come together in a beautiful symphony. This design idea not only brings joy and vibrancy to your outdoor space but also guarantees that you have stunning blooms and foliage throughout the seasons. Think of it as crafting a salad—each ingredient adds its own flair, making the dish not only more appealing but also more delicious.
So, where do you start? First, consider color schemes. Do you want a riot of rainbow shades or a more subdued palette? Mixing warm colors like reds, oranges, and yellows creates a cheerful atmosphere, while cooler shades—think blues, purples, and greens—tend to exude calmness. I once tried to create a garden that looked like a beautiful sunset, but instead, it ended up more like a neon nightclub. Trust me, less is often more.
Next, choose your perennials wisely. Some crowd favorites include coneflowers, daylilies, and black-eyed Susans. Got a sunny spot? Go for sunflowers and coreopsis to soak up those rays. For shadier nooks, consider planting hostas and astilbes. And don’t forget about foliage. The leaves can be just as colorful as the flowers, so mixing in some silver or variegated plants can really jazz things up.
I’ll confess—I got so excited during one planting spree that I ended up with a hodgepodge that could only be described as an overzealous approach to gardening.
Once you’ve picked your plants, it’s all about grouping them. A general rule of thumb is to plant in odd numbers; it’s a little trick that helps create more visual interest. For instance, grouping three or five of the same flower type together works wonders. I learned the hard way: my even-numbered groupings always looked like they were awkwardly avoiding eye contact.
Now that you have your plants organized, think about heights too. Taller plants in the back, shorter ones in the front—it’s like forming a little garden choir, where everyone can shine. And remember, some plants can spread out more than others, so allow enough space to avoid an overcrowded concert scenario. The last thing you want is for your flowers to fight for space like siblings squabbling over the last cookie.
Finally, mulch around your groupings. Not only does it keep the weeds at bay, but it also unifies the space and adds a polished finish—kind of like putting frosting on your cake.
With a bit of planning and creativity, you’ll find that your perennial groupings can transform your garden into a colorful escape, one that’s sure to bring you happiness every time you step outside. After all, who wouldn’t want a little slice of floral paradise right in their backyard?
10. Layered Planting Levels
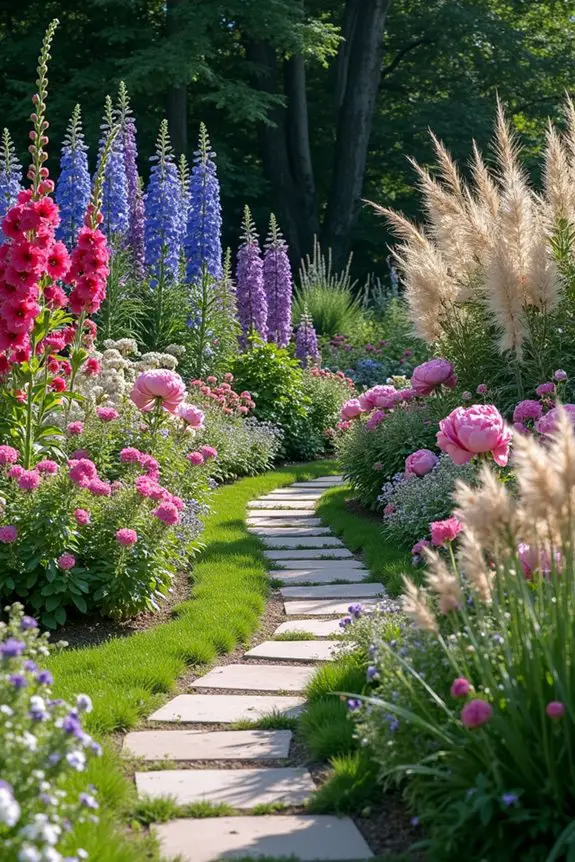
When you think about garden design, have you ever considered creating layers like you’d in a lasagna? Layered planting levels allow you to play with heights, textures, and colors, creating not only a stunning visual but also a functional garden space that’s easy to navigate. Think of it as putting together a three-dimensional puzzle. Each plant finds its rightful place, adding depth and interest to your garden.
To start, envision your garden as a backdrop for a beautiful stage performance. You want your tall plants—like the majestic delphiniums and robust hollyhocks—to stand tall in the back, creating a grand entrance. Then, layer in medium-height plants, such as peonies or purple coneflowers, in front of them. Finally, sprinkle in your shorter plants or groundcovers, like creeping thyme or dwarf phlox, along the edges. This way, each plant gets its moment to shine, just like actors at a Broadway show, instead of everyone jostling for attention in one cramped spot.
When arranging these layers, consider the view from different angles. Do you have a favorite spot in your garden where you love to sit with a cup of tea? Make sure your tallest plants are framed beautifully so that as you sip away, you get a perfect view. My first layered garden looked great from one angle but was a hot mess from the other. I learned that sometimes, a little rearranging can save you from future garden embarrassment.
Another nifty trick is to play around with the plant’s blooming times. By mixing early bloomers, like tulips or daffodils, with late-comers, like asters or goldenrod, you keep the excitement going all season long. It’s kind of like planning a surprise party—each time your friends think they’ve seen it all, BAM! You reveal more surprises.
And trust me, nothing is more disheartening than a garden that looks like it’s been put on pause after the first wave of blooms.
Lastly, don’t shy away from using taller ground covers or ornamental grasses for added texture. They can serve as a lush carpet, softening changes between levels. I remember my first attempt at layering involved some surprisingly scraggly plants that looked more like bad hair days than a polished lawn. That was a low moment, but it taught me that the right ground cover can transform the look of any space.
Seasonal Color Rotation Strategies
Spring, summer, fall, and winter—each season offers a fresh palette just waiting to be painted in your garden.
Embracing seasonal color rotation strategies can transform your space into a year-round beauty. For your perennial garden ideas, think about planting early bloomers like crocuses and daffodils in spring, followed by vibrant summer favorites like coneflowers and daylilies.
As those flowers fade, swap in fall beauties like asters and sedums. You could even sneak in evergreens for winter interest. It’s like a garden makeover every few months.
Don’t worry if things don’t go as planned—if my marigolds could talk, they’d have a few stories to tell. Just keep experimenting; you never know what might surprise you!

