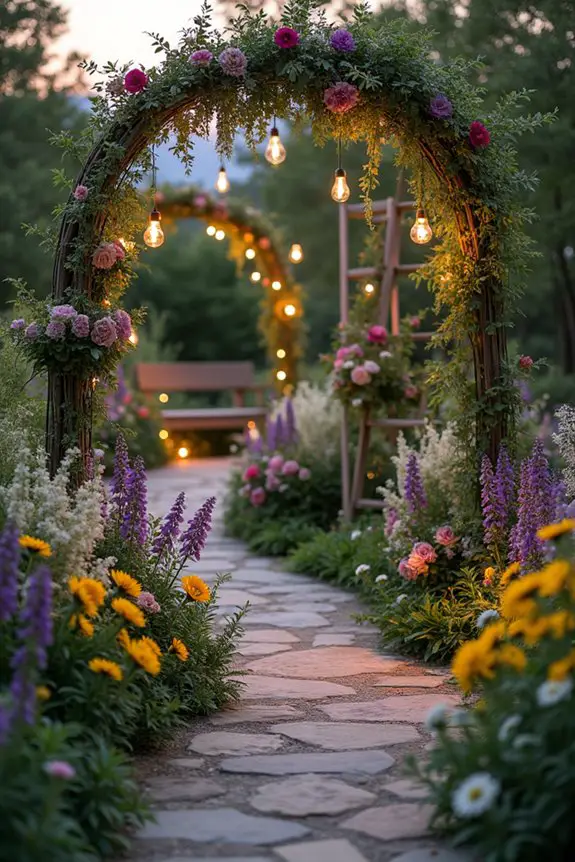
Imagine stepping into a tiny domain, where a moss-covered stone pathway leads you to a charming little fairy house made from an old teacup. It’s all about the details, right? Each mini rock wall could tell a story, and the figurines spark your imagination. So, how do you transform your garden into this enchanting realm? Well, stick around, because I’ve got some whimsical ideas that’ll make you think outside the pot—literally.
Miniature Rock Wall Structures
When you’re building your miniature rock wall structures, think about adding moss-covered stones for a touch of whimsy.
Choosing a fairy-themed color palette can really set the mood—who doesn’t love a splash of soft pastels mixed with earthy tones?
And don’t forget, arranging tiny fairy furniture in just the right way can make your little garden feel like a cozy retreat, not some random pile of rocks.
1. Moss-Covered Stone Details
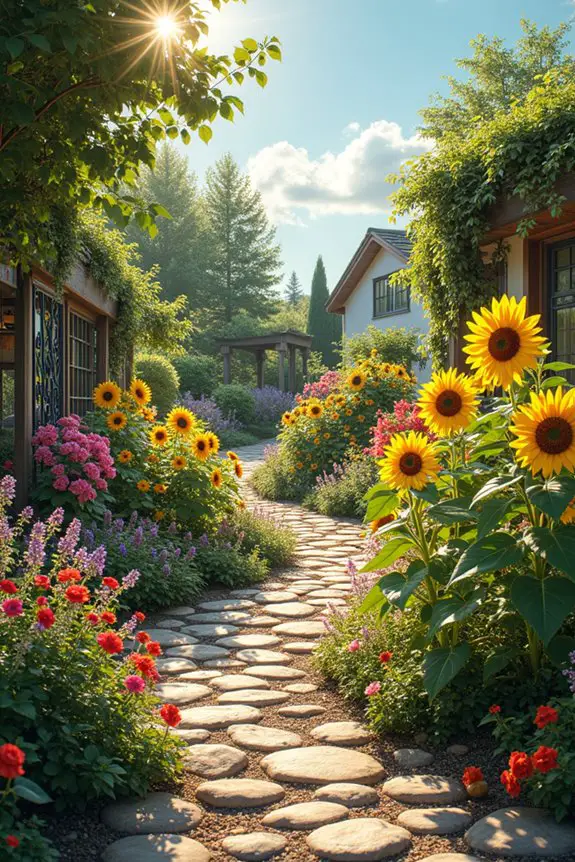
Creating a fairy garden can be such a delightful adventure, don’t you think? One of the best ways to elevate your little mystical domain is by incorporating moss-covered stone details, like a miniature rock wall. Not only do these structures offer a practical edge by defining spaces and providing support for your plants, but they also infuse your garden with a rustic charm that screams woodland magic.
Start by gathering some river rocks or, if you’re feeling particularly ambitious, digging through your garden for those broken pots you know you’ve stashed away. No need to stress if they’re not perfect; the beauty lies in their imperfect shapes. Stack these stones, using the pots at varying angles to create multi-level sections—this way, your garden will have depth, like a scene out of a fairy tale.
Then, to soften those hard lines, why not pop in some lush green moss? It gives a lovely touch, making everything feel cozy and inviting.
When building your rock wall, think about practicality too. You can place the stones lower for borders or use them as stairs, leading garden visitors to different levels of lush greenery. Just imagine little fairies bustling about, deciding which level to explore first.
And while you’re working, don’t worry too much about symmetry—embracing a little chaos can add to that enchanting vibe.
And here’s a tip: every time you take a break, step back and admire your handiwork. You might just see that spirit of whimsy sprouting right before your eyes.
It’s all about creating a space that feels alive, playful, and just a touch magical, allowing your tiny residents to thrive in their own perfectly imperfect kingdom. So, roll up those sleeves, let your creativity take flight, and watch as your fairy garden transforms into a charming escape.
2. Fairy-Themed Color Palette
Creating a fairy-themed color palette with your miniature rock wall structures can truly sculpt the mood of your enchanted garden. Not only does it offer a visual treat, but it also enhances the whimsical atmosphere that fairies thrive in. Think of it as painting a canvas with nature’s own colors, where soft pastels and earthy tones come together to create something magical.
Imagine laying down shades of gentle greens, soft pinks, and calming blues. These colors can be reflected not just in the stones you choose, but also in the plants and accessories that surround your rock wall. A mint green stone can be paired with pale pink flowers, giving off that fresh, inviting vibe that makes you want to kick back and sip some imaginary fairy tea. It’s all about harmony; when colors blend well, the whole garden feels like a dreamscape.
Now, let’s be real—who doesn’t love a good DIY challenge? The fun doesn’t end with simply picking colors. You can even paint some of your stones or use colored gravel to craft pathways, allowing visitors to meander through your colorful fairy domain. Think of it as giving your little garden inhabitants a cozy, curated space where they can feel right at home, all while adding those cheerful touches that just spark joy.
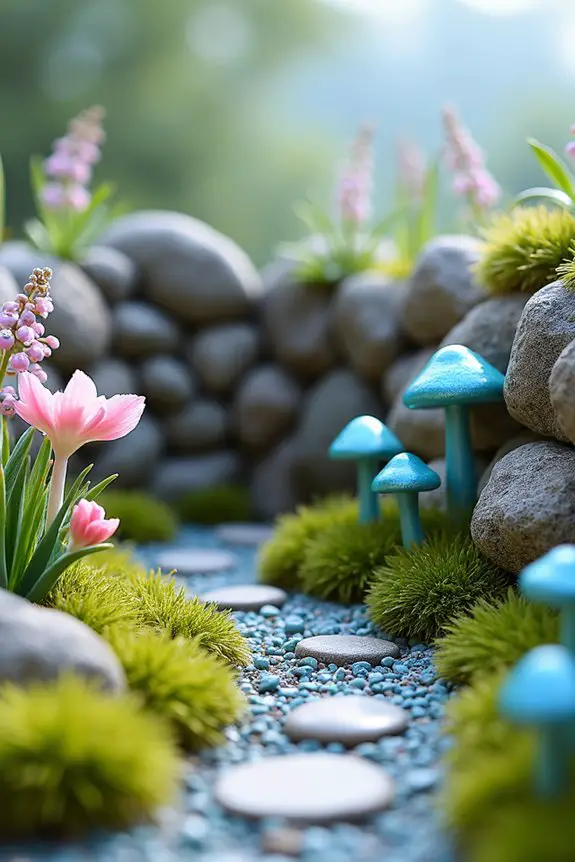
Additionally, having the right tools such as bypass pruning shears can greatly aid in shaping and maintaining your plants, helping you achieve a more polished look in your fairy garden. And if you’re feeling particularly creative, throw in some unexpected pops of color with tiny accessories. Picture it: vivid blue mushrooms next to your earthy brown rocks. That contrast can create a striking focal point, drawing eyes right to your miniature creation and making visitors go, “Wow, what a charming spot.”
3. Nature-Inspired Color Schemes
When setting the stage for your fairy garden, embracing nature-inspired color schemes can create the perfect vibe—think of it as dressing your garden up for a cozy woodland party. By incorporating colors found in nature, like vibrant greens, browns, and soft earth hues, you’ll craft a space that feels harmonious and inviting, encouraging those tiny magical beings to come out and play.
Imagine this: a soft olive green rock wall nestled among delicate ferns and bright yellow flowers. Together, they create a rich tapestry of color that feels alive and inviting. It’s as if you’ve captured a secret slice of nature right in your backyard. Nature doesn’t just look good, it feels good too—no one wants a clashing garden filled with neon pink rocks (unless that’s your jam, no judgment here). Adding a rain barrel solution can also support your vibrant garden by providing a sustainable water source.
For a hands-on approach, reflect the tones of your rock wall in your choice of plants. If you’ve got earthy browns in your stones, consider adding deep purple flowers or even soft white blossoms to elevate the look. Want it to pop? Use sparingly colored stones for your pathways; that gentle contrast can be just what your miniature world needs. Did I mention you can use tiny accessories like shells or pine cones in your color scheme too? They add delightful detail and bring a touch of whimsy to the scene. Additionally, consider using garden netting tunnels to protect your plants from pests while enhancing the aesthetics of your fairy garden.
As you go about selecting your colors, remember that balance is key. Too much of one shade can feel overwhelming, while a sprinkle of complementary hues can create visual interest. Picture your rock wall being the sturdy foundation, while flowers and decor provide the artistry above.
4. Nature-Inspired Artistic Layout
When it comes to designing a fairy garden, incorporating miniature rock wall structures adds both charm and practicality. It creates those magical multi-level sections where tiny fairies can flit about, while also giving you a natural framework for planting your favorite little beauties. Think about it: who wouldn’t want their own enchanting domain filled with delightful nooks and crannies?
Using broken pots and river rocks to build your rock walls is a wonderful way to blend functionality with style. Not only do they serve as sturdy boundaries for your garden beds, but they instantly elevate the aesthetic, making it look like something straight out of a storybook. The rough edges of the stones bring a hint of wildness, while the gentle slopes and steps provide a lovely invitation for exploring. Adding long handled pruning loppers to assist with maintaining your plants can make the upkeep of this enchanting space more enjoyable.
You might find yourself thinking, “I could climb that” (okay, maybe not literally, but you get the idea).
To kickstart your project, first, gather an assortment of pots and rocks—enough to create your desired layout. Place larger stones as your base, and then stack smaller ones or broken pottery pieces in whimsical ways to create your walls and stairs. Don’t stress over perfection; embracing a bit of wonkiness will only enhance that rustic, fairy-tale look.
And remember, filling those gaps with lush greenery or vibrant flowers can create a stunning contrast against the stone that truly brings the whole design to life. Additionally, using garden scissors snips can help you achieve precise cuts and maintenance for your plants, ensuring they thrive in their enchanting environment.
Finally, don’t forget to let your creativity roam free. Plant trailing plants like creeping thyme or moss between the rocks for a softer touch. Add bright little flowers in unexpected spots, or sprinkle in some tiny accessories like acorns and shells to draw the eye around every twist and turn in your miniature landscape.
In the end, you’ll have created an enchanting getaway not just for fairies, but for yourself too—because who doesn’t enjoy taking a moment in a magical little corner of the world?
5. Fairy Furniture Arrangement Ideas
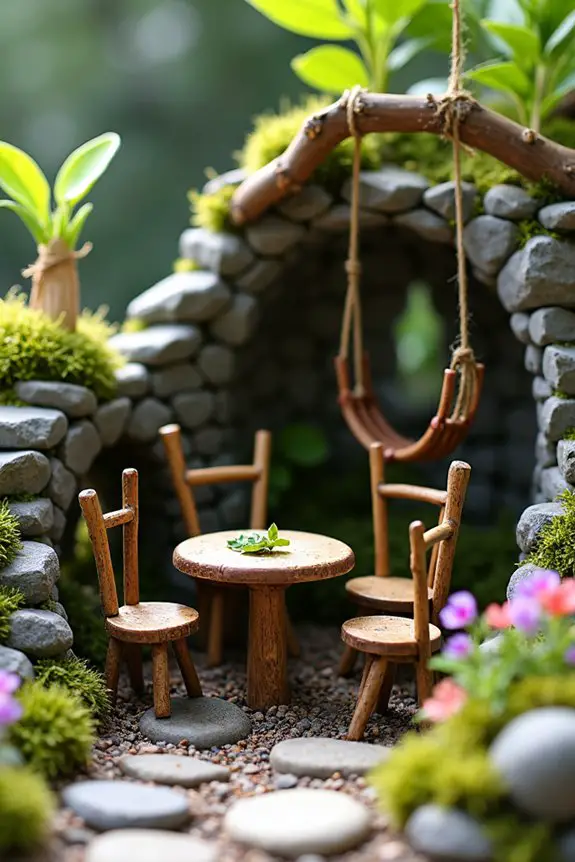
When it comes to crafting the perfect fairy garden, the furniture you choose can truly bring your miniature world to life. Imagine tiny tables and chairs nestled among your rock walls, inviting little fairies for a cozy tea party. Not only does this arrangement add charm and whimsy, but it also gives your fairy friends functional spots to relax and socialize. After all, even fairies need a place to kick back, right?
Now, let’s talk about DIY fairy furniture—it’s easier than you might think! You can create your own enchanting tables and chairs with just a few supplies. Grab some twigs from your yard or popsicle sticks from your last arts and crafts session. Seriously, those sticks can become anything from benches to tiny garden swings based on how wild your imagination runs. Assemble tables by simply gluing twigs together to create a base and a tabletop.
Picture this: you sit down to create a little bistro table. You take a few sturdy twigs, maybe about 4-5 inches long, and form a square base. Then, top it off with a flat piece of wood or a sturdy leaf—thoughtful details go a long way! If it’s a chair you’re crafting, cut shorter pieces and attach them to similar twigs for a rustic look. Remember, the best furniture has character; a wobble here and there just adds to its charm.
Once you’ve built your fairy furniture, place them strategically within your garden’s multi-tiered layout. Enjoy playing with elevations and angles; maybe there’s a delightful spot on a ledge where a fairy can sip tea while enjoying a view over the primrose. Scatter pieces around and observe where the best “hangout spots” develop—fairy landscapes are all about blending fun and functionality.
Finally, don’t shy away from using colorful materials for accessories. How about a tiny cushion made from a leaf or a napkin? The little details will catch your eye and make your setup feel even more inviting. Honestly, if I can whip up a fairy chair that doesn’t fold under pressure (or worse, collapse into an unceremonious heap), so can you.
6. Fairy-Themed Decorative Accents
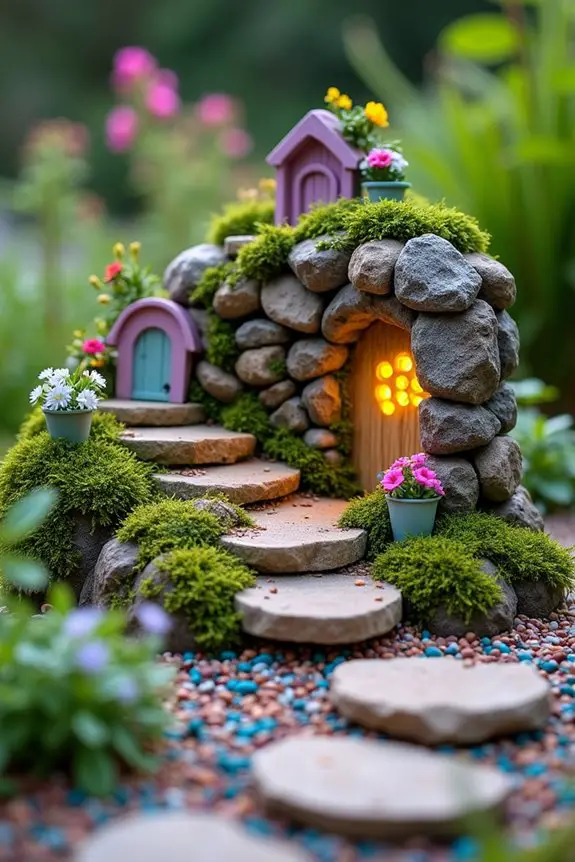
Creating a miniature rock wall with stairs in your fairy garden not only gives it a whimsical touch but also serves a practical purpose. Imagine stepping stones made from river rocks guiding your little fairy friends to different levels of your garden. It’s like giving them a magical hillside to explore!
Plus, these structures add a charming depth and texture that really brings your fairy world to life.
So, how do you build this enchanting feature? First, collect some broken pots and river rocks from your yard or a local garden shop. Don’t worry if you have a few mismatched pieces—those quirky ones often add the most character.
Start by selecting a few larger rocks for the base of your wall. Stack them in a staggered manner to form a lovely, rustic wall—no perfection needed here. Think of it like building a puzzle; just have fun finding the right fit while making sure it doesn’t tumble down like my attempts at baking bread.
Next, it’s time to create those stairs. You can lay down smaller rocks or even pieces of broken pottery to create the steps. Space them nicely so the little fairies can hop from one to the next without losing their balance. It’s all about creating that whimsical vibe; if it looks a little uneven, that just adds to the charm.
Now, let’s get into planting. Fill in the gaps between the rocks and around the stairs with lush green moss or delicate low-maintenance plants. This not only softens the hard surfaces but also makes the space feel cozy—like a fairytale garden out of a storybook.
Imagine tiny fairies peeking out from behind the moss, planning their next adventure!
Don’t forget to accessorize your rock walls with tiny fairy doors or luminous solar-powered houses. These little accents will make your garden sparkle, especially at dusk, when the lights glow and the magic comes to life.
Your fairy garden will no longer just be a gathering of plants and decorations; it’ll tell a story of magical landscapes filled with exploration and dreams. Just like that, you’ll have a spot where both you and your tiny friends can escape for a moment.
Happy gardening!
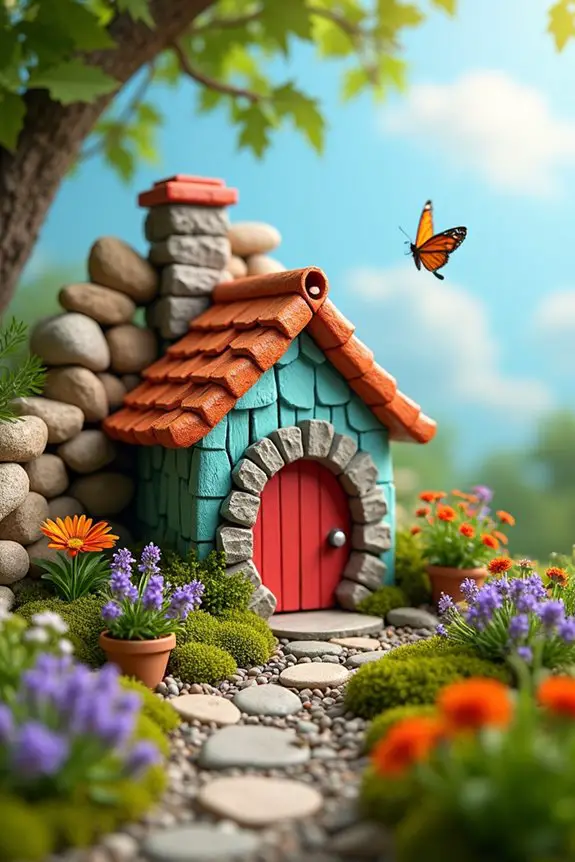
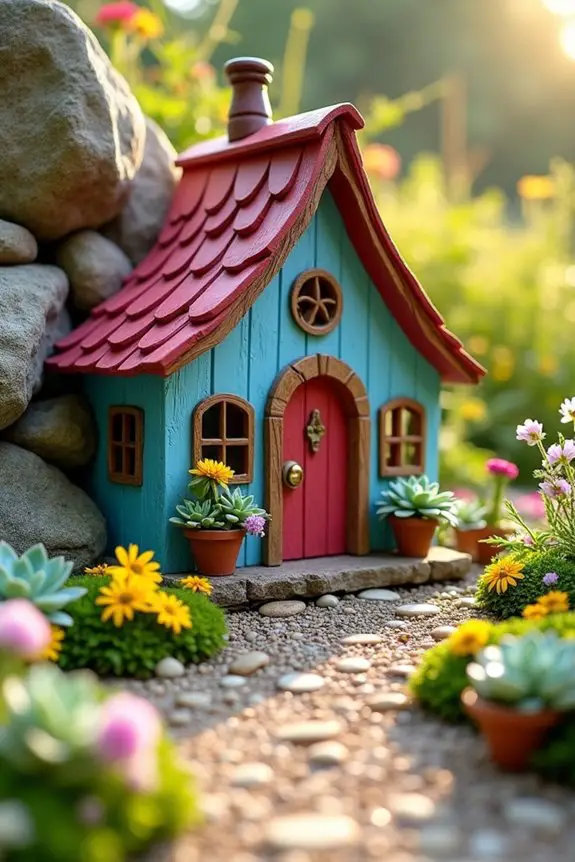
7. Whimsical Fairy House Styles
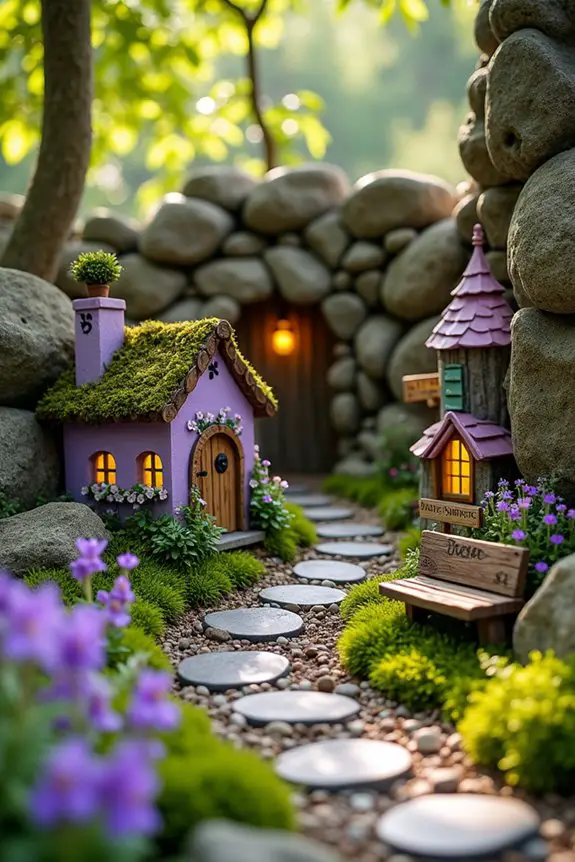
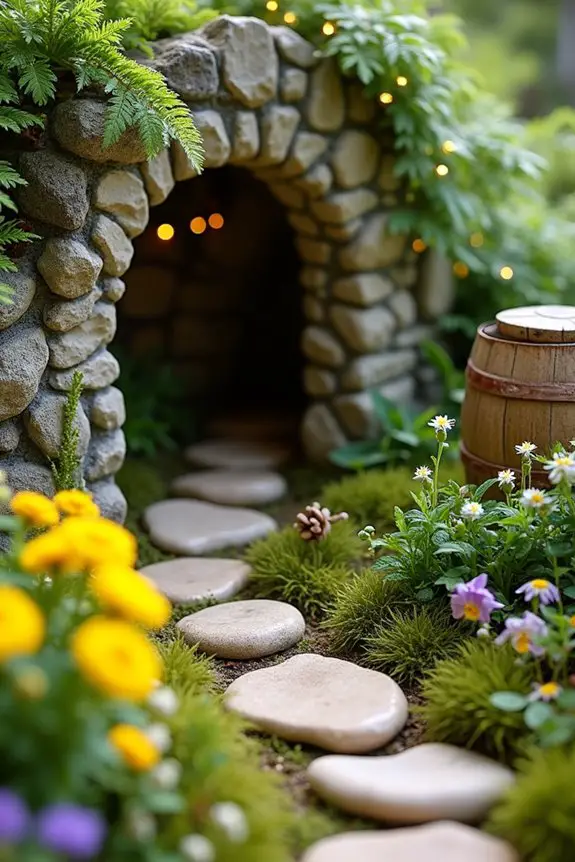
When it comes to whimsical fairy house styles, nothing says ‘magical retreat’ quite like a structure that looks like it’s sprouted right from the ground. Think of gnome homes tucked beneath mushroom caps, or cozy cottages with bark roofs. These mini abodes not only serve as the main attraction but also create a warm, inviting vibe throughout your fairy garden. The way they blend seamlessly with stones, plants, and pathways reminds us that nature and imagination go hand in hand.
To get started, you’ll want to gather some upcycled materials. Old terracotta pots? Perfect. Broken birdhouses? Yes, please. Use these treasures as the foundation of your fairy houses. If you’re feeling crafty, you can even transform a small wooden box into a charming little house, complete with windows carved out with a kitchen knife (though I wouldn’t recommend my knife skills—last time, I ended up with more splinters than I’d like to admit).
Once you’ve figured out the structure, go wild with your design. Paint those fairy homes in vibrant colors, or leave them natural for a rustic touch. Really, there are no rules—think whimsical cottages in pastel hues or sun-kissed wood accents. Consider adding tiny doors that look like they could squeeze open any minute—just imagine the fairies zipping in and out. You might even hang a small sign that says “Fairy Crossing” or “Beware of Gnomes.” Who wouldn’t want to visit a house like that?
Choose a spot near your miniature rock wall or pathways and place your fairy houses strategically. Mixing levels adds depth, so consider tucking a smaller house in the shadow of a larger one or even sinking a couple more into the mossy ground. It’s like creating a small village where every fairy has their own cozy nook protected from dainty disturbances.
And don’t forget to accessorize. Hang tiny lanterns, dot the area with solar-powered fairy houses, or create a tiny garden bench from twigs. Each little detail enhances the magic, turning your fairy garden into a delightful little world. Ensuring that your designs are unique and personal makes them feel even more enchanting.
It’s like giving those fairies their own haven, where they can sip nectar tea and share stories of their adventures. So, tap into your creativity, let your imagination soar, and watch as your whimsical fairy houses transform your garden into a scene out of a delightful fairytale!
8. Colorful Fairy Figurine Placement
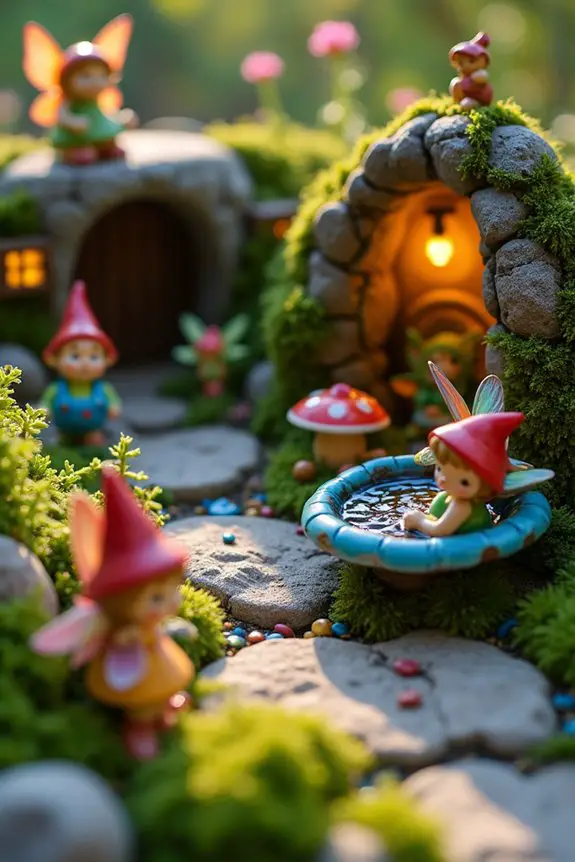
When it comes to crafting a fairy garden that feels alive, colorful fairy figurine placement is a game changer. Not only do these tiny treasures add charm and character, but they also create an inviting atmosphere that invites visitors (both human and fairy!) to explore. Imagine your miniature rock wall as the canvas and the figurines as the strokes of vibrant color that bring everything to life. It’s like adding sprinkles to a cupcake—no one can resist a little extra sweetness.
To start, pick a few figurines that really speak to you. Do you love gnomes? Fairies? Maybe even those lucky little garden trolls? Placing them throughout your garden can create storytelling moments. For instance, tuck a fairy by a mini birdbath, as though she’s just come for a quick sip. Or let a gnome peek out from behind a larger stone, as if he’s pondering his next gardening endeavor.
And don’t worry too much about symmetry. A whimsical vibe is all about the unexpected like Aunt Edna showing up to the family BBQ in a vibrant feather hat—delightfully surprising and more than a bit quirky.
As you place your figurines, think about the scale and distance. You wouldn’t place a giant mushroom next to a tiny fairy—unless you were hinting at an epic fairy story where she’s to climb the towering fungus to rescue a friend. Keep it fun and balanced. Maybe have some figurines securely perched on your miniature rock wall, while others interact with the plants and pathways. It’s all about creating those little scenes that spark joy and intrigue.
And here’s a tip: consider using a theme for your placement. Are your fairies exploring a hidden forest? Have them surrounded by moss and branches. Is it a magical tea party? You can gather them around handmade twig furniture or a mini solar-powered house that shines softly. Each choice amplifies the story you’re telling in your fairy garden.
Finally, if you’re feeling a bit overwhelmed, just remember: there’s no right way to do this. Embrace the chaos of creativity. Trust me, my first fairy garden looked less like a magical retreat and more like a toddler’s art project. But guess what? It was still full of joy.
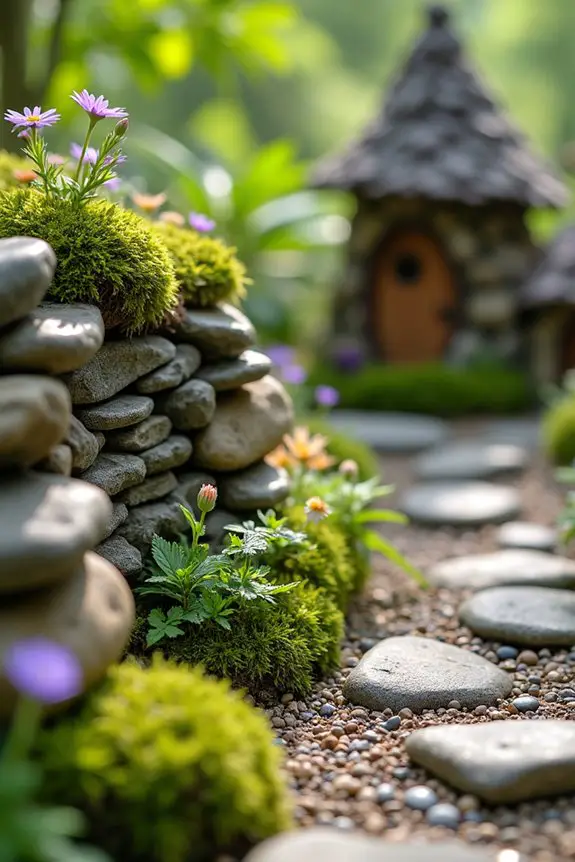
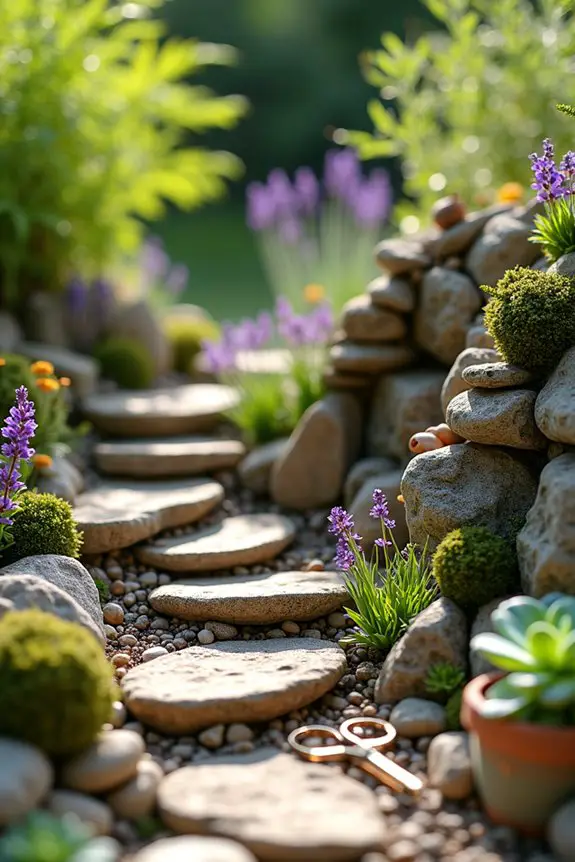
9. Natural Stone Color Variation
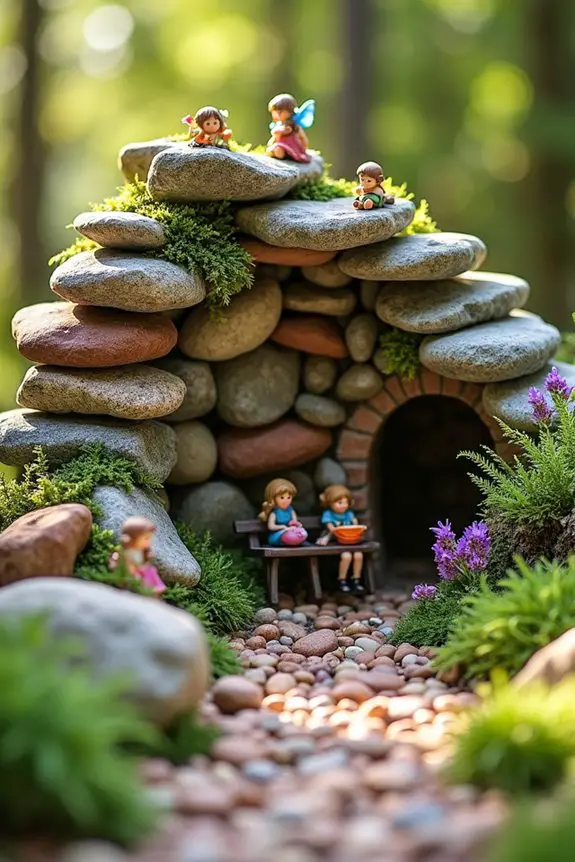
When building a miniature rock wall for your fairy garden, consider the charm of natural stone color variation. Not only does it serve as a sturdy structure to define spaces, but the different hues and textures of the stones create an enchanting backdrop that can bring your tiny world to life.
Start by gathering stones in various shades—think grays, reds, browns, and whites. The differing colors help tell a story, like an ancient wall that has weathered many seasons. As you stack them to create your wall, mix and match, casually blending colors rather than aiming for perfect symmetry. This organic look adds character, much like the way my mismatched socks tell the tale of laundry-day disasters.
Now, let’s talk function. A rock wall isn’t just pretty to look at; it defines areas for your plants, pathways, or even a cozy nook for your colorful figurines. Create levels for your miniature garden by using larger stones as the base and smaller ones as capstones. Not only does this provide visual interest, but it also helps retain soil and moisture for your plants. And let’s be honest, who wouldn’t want their fairies living in a lush and thriving environment?
While you’re at it, try incorporating moss and small plants between the stones. This not only fills gaps but adds that lush woodland vibe that fairy gardens thrive on. If you think about it, it’s like styling your garden’s hair—some fun curls here, a fresh bit of green there.
Just be careful; after my first attempt at styling, I ended up with a classic “messy bun” look that wasn’t quite what I envisioned … but it was still delightful in its own chaotic way.
10. Fairy House Color Composition
When designing a fairy house, the color composition is key to creating a magical atmosphere. A carefully chosen palette not only makes your fairy house pop, but it also brings a sense of harmony and whimsy that draws the eye in. Think about it, you’re not just building any house; you’re constructing a space that fairies will call home—shouldn’t it be enchanting?
Start with your rock wall, as it sets the foundation for your miniature abode. Choose stones in complementary shades, like soft greens and earthy browns, or go bold with vibrant reds and sunny yellows. By mixing colors that match or contrast—like a cherry-red door against muted stone—you create a look that feels both inviting and unique.
It’s kind of like dressing up for a party; you wouldn’t wear something drab when it’s time to shine, right?
Once you’ve got your stone palette nailed down, move on to your fairy house itself. Consider painting it in cheerful hues that reflect nature, such as sky blue or sunset orange. Perhaps add splashes of lavender or mint green to make it feel like it nestled right into a blooming garden.
Don’t forget to coordinate with your rock wall: it’s a dance of color and texture as your fairy home harmonizes with the nearby surroundings. I mean, you don’t want your fairy to feel like they’re living in a color clash—talk about awkward dinner parties.
To enhance the color composition further, incorporate miniature accessories like tiny flowers or bright pots. Arrange them along pathways created with gravel or stones, bringing bursts of color that lead to your cozy fairy dwelling, beckoning fairies like a friendly “come on in.”
It can be a bit like inviting friends over for tea; the friendlier the vibe, the more likely they’re to stick around.
Incorporate Recycled Materials Creatively
While crafting your fairy garden, you might think you need to spend a fortune on fancy decorations and accessories, but you don’t have to. Incorporating recycled materials into your designs gives you fantastic DIY fairy garden ideas at minimal cost.
Imagine using old glass jars as whimsical fairy homes or broken pottery for a cute mini rock wall. You can even make tiny furniture from twigs or popsicle sticks—perfect for your wee inhabitants.
Don’t overlook thrift stores; I once found a mini birdcage that added a unique touch. Not only is upcycling fun and budget-friendly, but it also adds character.
With a little creativity, your fairy garden can thrive on treasures most people toss aside. Who knew saving money could be this magical?