Have you ever looked at your Bloxburg yard and thought it could use a little pizzazz? Maybe it’s time to transform it into a stunning garden oasis. Imagine this: whimsical butterfly-shaped flower beds, or even a cozy herb spiral for those culinary creations. It’s not just about the plants, though – the layout matters too. Curious how to get started or which design might be your favorite? Let’s explore the possibilities together.
Garden Layout Inspirations
Let’s get inspired by some fun garden layouts!
Imagine cozy raised flower beds bursting with color or a vertical wall garden that makes you feel like you’re living in a botanical wonderland.
And don’t forget the charm of curved pathways or a serene zen garden that beckons you to take a moment for yourself—after all, who doesn’t need a little slice of tranquility in their day?
1. Raised Flower Bed Arrangement
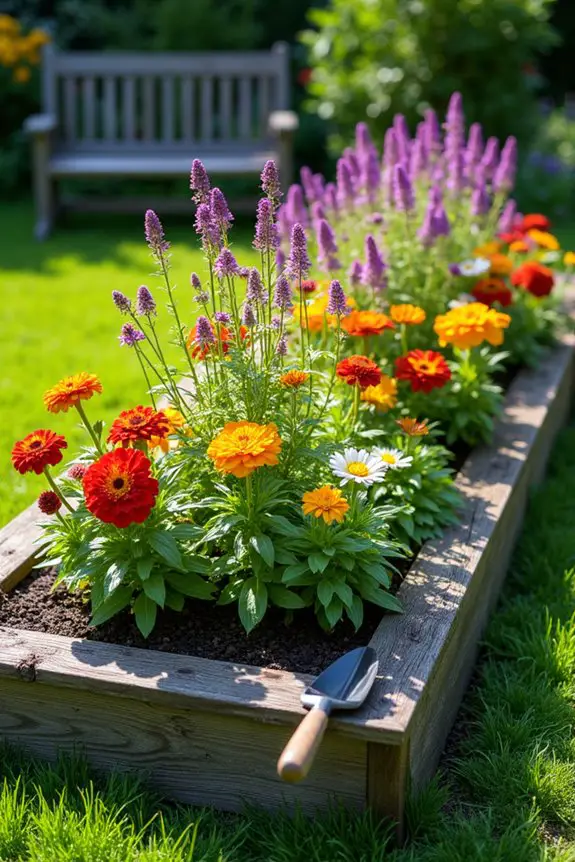
When it comes to garden layouts, raised flower beds are like the cupcakes of the gardening world—visually adorable and oh-so-functional. Imagine cultivating a colorful burst of blooms that invites butterflies, bees, and maybe even your neighbor’s curious cat. Seriously, raised flower beds not only elevate your plants for easier access and better drainage, but they also create a stylish focal point in your yard. It’s like giving your flowers a throne while they bask in the sun.
To kick things off, let’s get down to the nitty-gritty of layout. First, decide on the shape and size of your raised flower bed. Rectangles and squares are classic, while a curvy, free-form design can add a whimsical touch. Personally, I went with a simple rectangle for my first attempt—nothing fancy. I mean, I once tried to bake cookies and ended up with burnt edges, so let’s just say I played it safe!
Next up, think about the variety of flowers you want to plant. Mixing perennials with annuals gives you beautiful blooms year after year, plus it’s like decorating with fresh colors each season. Another tip? Use taller plants in the back and shorter, stepping stones of color in the front. It’s all about that juicy, layered look that draws the eye. Don’t worry if you feel overwhelmed; I accidentally planted my zinnias too far in the back once and learned that crowding will make your garden look like a chaotic family reunion—no one knows where to look.
Now, let’s talk about materials. You can use wood, stone, or even recycled materials like old bricks or cinder blocks. Just make sure it’s sturdy enough to withstand the elements. I used reclaimed wood, which made my garden feel rustic and cozy—until I realized I might need to sand it down more next time to avoid splinters. Ouch. Using lawn weed killer effectively can also help maintain the beauty of your raised flower beds without unwanted plants taking over.
As for planting, make sure to mix in some good-quality soil with compost for vitamins and nutrients. The ideal time for planting? Well, that depends on your zone, but spring is usually the star of the show. Just picture it: digging a little hole, placing a seedling, and feeling a tiny flutter of hope—that’s the gardening magic. Additionally, using organic lawn fertilizer can help enhance your plants’ growth and overall health.
Finally, don’t forget maintenance. Water them regularly; weeds are like uninvited guests at a party. They just show up and ruin your vibe. And hey, if things get too chaotic, remember it’s just a garden. Maybe even grab a cup of lemonade, sit back, and appreciate the growth—even if it means trimming back a few “overenthusiastic” plants now and then.
Creating a raised flower bed arrangement can be a rewarding and fun project. Plus, you’ll get to show off your gardening skills to everyone who wanders by. So go ahead, dig those hands into the dirt, and let your creativity bloom. Who knows, maybe you’ll end up with a garden that rivals a small botanical paradise—or at least, one that your neighbor is a little envious of.
2. Vertical Garden Wall Setup
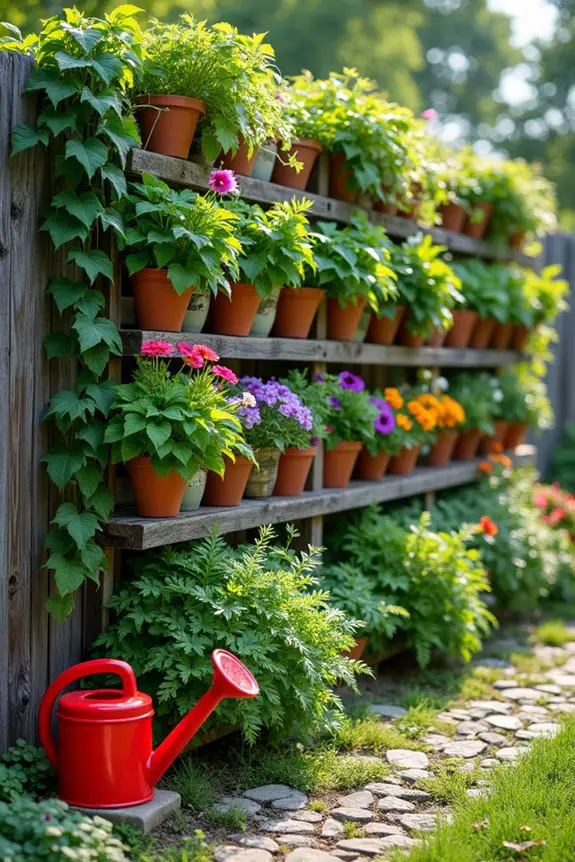
Imagine transforming an empty wall or fence into a vibrant tapestry of greenery—sweet, right?
Vertical gardens are the superheroes of garden spaces, maximizing your area while bringing life and color to even the dullest spots. They not only add a stunning visual element to your yard but can also help reduce noise, filter air, and maybe even conceal that rusty old shed that’s been haunting your backyard vibes. Incorporating worm castings bags can also boost the nutrient content of your plants, ensuring they flourish in your vertical oasis.
To kick things off, think about the space you want to utilize. Vertical gardens work beautifully on walls, fences, or even as portable structures if you want to get fancy. Last summer, I decided to take on my back fence, which had been feeling a bit drab after years of weathered wood and neglect. Seriously, it felt like the fence was judging my gardening skills.
Once I got started, though, I could already picture it covered in a cascade of colorful foliage. Talk about motivation!
Now, let’s explore plant selection. Opt for a mix of herbs, flowers, and even some leafy greens if you’re feeling adventurous. I went with trailing plants like ivy and petunias for the top and switched things up with aromatic herbs like basil and mint at the bottom. Not only do they smell divine, but it’s like having a salad bar right outside your kitchen—definitely beats the last-minute grocery runs when you need fresh ingredients. It’s also a great idea to boost your orchids’ growth with essential fertilizer spray to ensure they thrive in your vertical setup.
Just remember to pick plants that enjoy the same light conditions. Otherwise, you might end up with a sun-loving plant casting side-eye at its shade-seeking neighbor.
Constructing your garden wall can be as simple or complex as you want. For my setup, I used wooden pallets—yes, the kind you see at stores being tossed around like hot potatoes. I stripped them down, sanded them (a process that took three Netflix episodes), and mounted them on the fence with a few sturdy brackets.
If you prefer a more polished look, there are many commercial vertical garden kits that come complete with pockets or panels to hang your plants, making it a breeze for beginners.
Remember the watering game. Vertical gardens can dry out a bit faster than traditional beds, so consider a drip irrigation system for easy peasy watering. Or, if you’re like me and prefer the low-tech route, a good old watering can works just fine—just be prepared for those awkward moments when water spills everywhere.
You’ll never look at a watering can the same way again.
And finally, don’t stress about perfection; nature has its way of adding lovely surprises. Over time, I learned that some plants mightn’t thrive as expected, or they may try to take over the whole wall—hello, overachieving sweet potato vine.
But hey, it’s all part of the fun. Just grab your pruning shears and get a little snip happy when things get too wild. Trust me, a little trim goes a long way in keeping your vertical garden looking fresh and fab, even if it involves some embarrassing moments of wrestling with the plants.
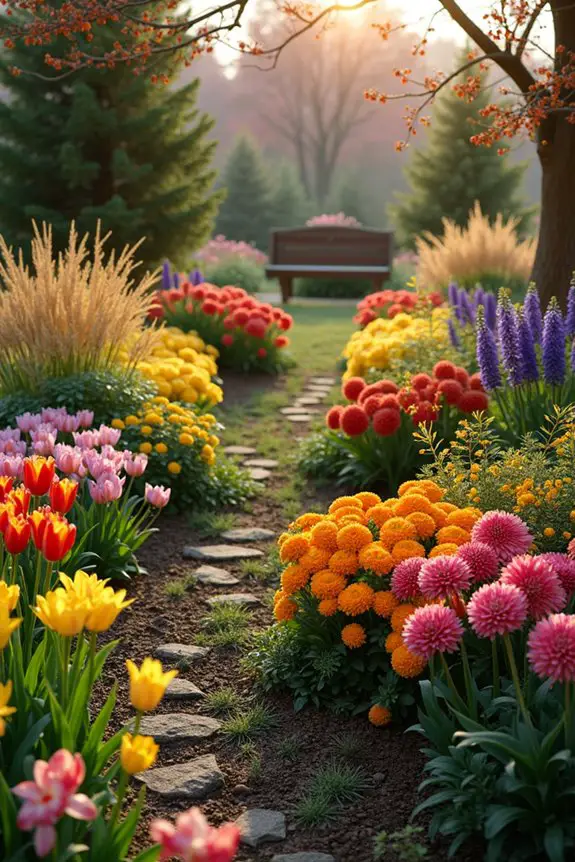
3. Curved Pathway Garden Design
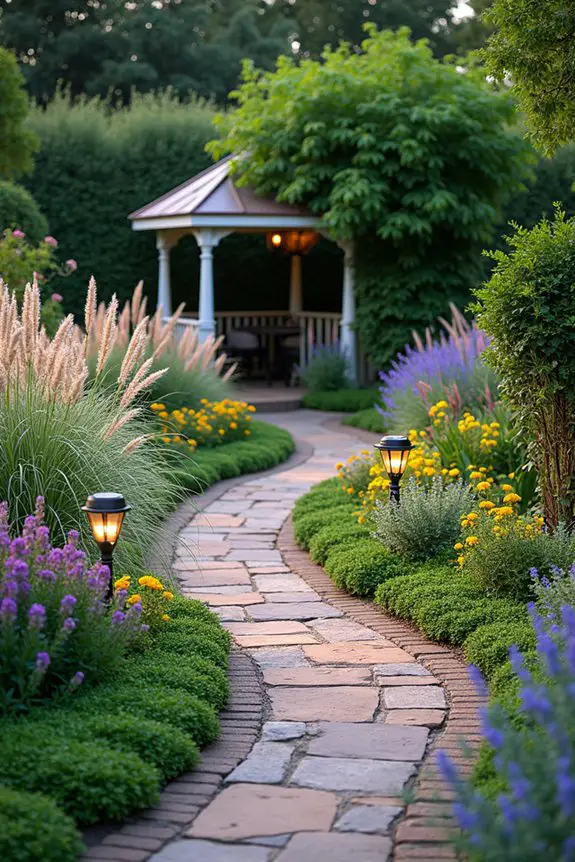
Now, let’s talk about curved pathways—these beauties can completely transform your garden into a whimsical retreat. Rather than the straight, mundane routes that have everyone wondering if they took a wrong turn, a curved pathway adds an element of surprise and brings a sense of flow. You know, like me, when I’ve had one too many cups of coffee and am bouncing around the kitchen.
It leads the eye and feet on a pleasant journey through your outdoor space, inviting exploration. Plus, it softens the overall vibe, making the garden feel more inviting.
To start, think about where you want your path to take you. Will it meander through flower beds, past a cozy seating area, or lead to your favorite zen spot? Picture yourself wandering along the gentle curves, perhaps sipping on your iced tea while the scents of your blooming flowers greet you. If you have a small garden, a curved path can create the illusion of more space, drawing visitors in with its charm. Just be sure that the path has a purpose; you don’t want folks to think they’re entering a maze.
Next up, let’s discuss materials. Gravel, pavers, or bricks all work beautifully for these types of paths. When I created mine, I used rustic flagstones, which made me feel like I was walking on a piece of art rather than a simple path.
It took me a hot minute to get my layout just right, but once I did, it felt like a personal victory—like finding that last donut in the box. To create the curves, lay out the stones without cement to see how they fit, experimenting with the shape until it feels just right. Honestly, it’ll take a little trial and error, but that’s half the fun, right?
Now, as you work on your pathway, consider incorporating some plants along the edges. Low-growing flowers like creeping thyme or even ornamental grasses can soften the edges and create a lovely connection between garden and path. Plus, adding an aluminum garden gazebo nearby can enhance the overall ambiance and provide a charming focal point in your outdoor design.
Just imagine how delightful it will be when you brush against the thyme—nothing like an unexpected whiff of herbs to elevate the stroll. And heck, if you’re up for it, why not add some solar lights along the way? They’ll add ambiance in the evening, and you won’t risk tripping over any of those pesky garden gnomes.
Finally, embrace the curves, my friend. Don’t stress if the path isn’t perfectly symmetrical; nature doesn’t do perfection, either. Every curve and turn adds character, just like every little bump I’ve got from my years of baking experiments (it’s all part of the charm!).
4. Natural Stone Patio Design
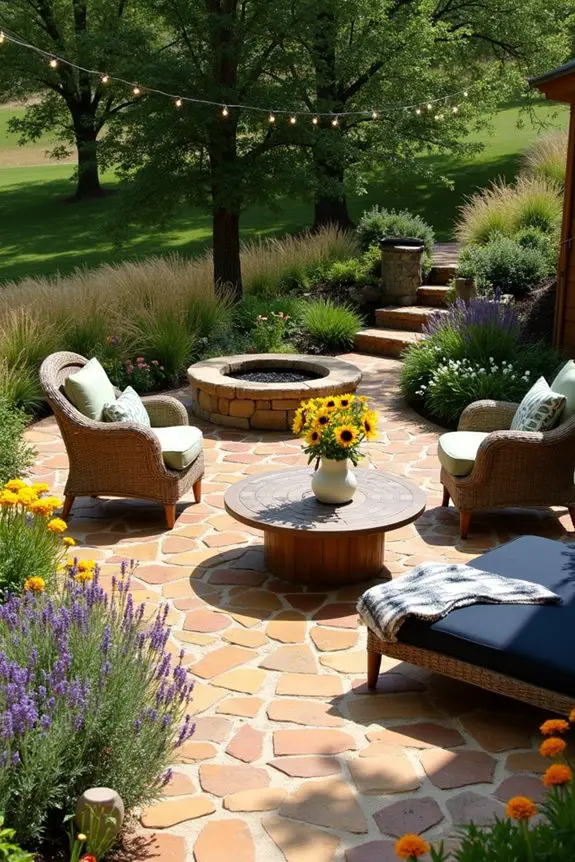
When it comes to outdoor spaces, a natural stone patio can create an inviting and beautiful atmosphere. Imagine this: you step outside onto your patio, and instead of the harsh, cold feel of concrete, you’re greeted by the warmth of natural stone underfoot. Not only does it lend a touch of rustic charm, but its durability means you won’t be replacing it anytime soon. Trust me, I can still recall my dad’s classic words about investing in quality. You want that patio to last for those summertime barbecues and late-night stargazing.
First things first, let’s chat about layout. Think about how you plan to use this space. Do you envision a cozy spot for sipping morning coffee or a larger area for entertaining friends? A well-designed patio can serve as an extension of your home, so consider creating different zones—like an eating area with a table and some comfy chairs, and a lounging section with a couple of loungers if you want to bask in the sun.
Just the other day, I found myself mapping out zones in my own yard on a whim, and let me tell you, it can feel a little like playing Tetris.
Now, to select the right stone, you’ve got options. Flagstone, slate, and even river rocks can work, each adding its unique character. I remember when I decided to go with flagstone for my patio because it felt like inviting a piece of nature right into my backyard—who wouldn’t want that?
You can choose different sizes and colors to give your patio a tailored look, too. Just imagine unraveling a colorful picnic blanket on a stunning stone base, basically turning your patio into a perfect gathering spot.
As for the installation, you’ll want to start with a level base. Make certain you’ve cleared the area of any rocks and debris and laid down some crushed gravel for stability. It sounds like a simple step, but let me warn you—it requires some elbow grease.
I once mistakenly thought a quick rake would suffice, and let’s just say I’d to channel my inner bodybuilder to correct that little oversight. After you have a leveled base, start arranging your stones, experimenting with the layout until it feels right. You want some space for joints to fill in with sand, which helps prevent those awkward little shifts.
Oh, and don’t forget to take a break and enjoy some fresh lemonade along the way. Hydration is key, you know.
Finally, think about what you’ll be surrounding your patio with. Plants, flowers, or even herbs can soften the edges of your stone hardscape. I’ve thrown in some lavender around mine, and every breeze carries that delicious smell, turning every gathering into a sensory experience.
It’s like aromatherapy, but for your garden. And for that added touch, why not weave in some outdoor lighting? You’ll create a cozy, magical vibe every time the sun sets, making family game nights or quiet evenings a dream.
In the end, a natural stone patio not only serves as a functional space but also as a stunning centerpiece in your garden. It’s all about making it a reflection of your style, so play around with ideas and let your personality shine through.
Happy patio designing—and remember, if everything doesn’t go according to plan, just own it like a champ. Because imperfections, my friends, add character.
5. Zen Garden Pathway Concept
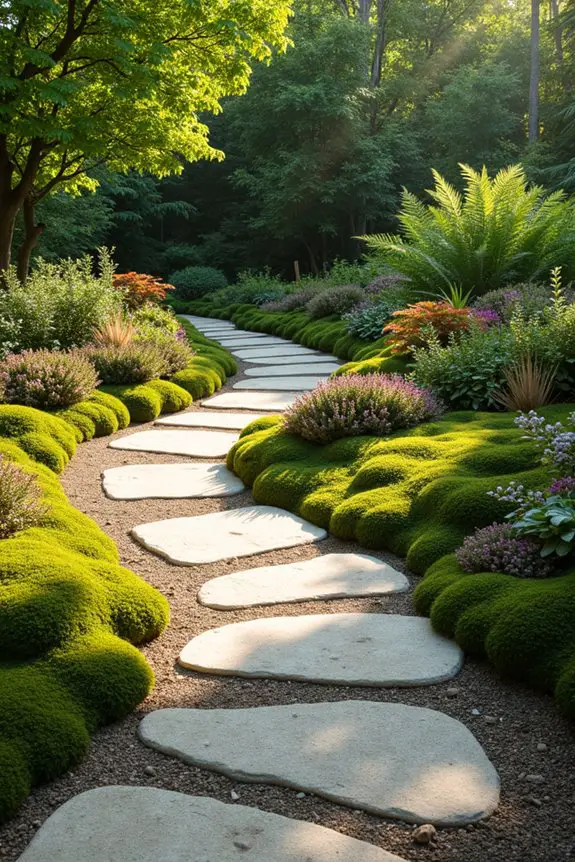
When you think about creating a Zen garden pathway, what often comes to mind? You might picture soft raked sand, smooth stones, and greenery that brings a sense of calm. That’s exactly what a Zen garden pathway does; it creates a peaceful vibe while offering practicality in garden navigation. Imagine walking down a serene path that encourages mindfulness and relaxation, making your outdoor space not just beautiful, but a haven for your soul.
Let’s immerse ourselves in the layout. Start by visualizing how you want to meander through your garden. A winding path tends to have that dreamy quality, inviting you to explore. You can lay out some stepping stones in a meandering pattern—think of it as telling your guests, “Hey, take your time; there’s beauty in every step.”
If you have distinct areas in your garden, let the path connect them smoothly. I once put together a winding path in my backyard, and honestly, it felt like creating my own personal journey through a mini-nature reserve. There’s an undeniable satisfaction in figuring out how best to lead the way.
Now, let’s talk about materials. You might think gravel is the only option, but oh no, my friend, the possibilities are endless. Sand, smooth river rocks, and even large flat stones can work beautifully. I personally love the look of rounded pebbles underfoot; they make a satisfying crunch when you step on them, almost like nature’s own version of a welcome mat.
They’re easy to find at garden centers, and you can even get creative with their arrangement. You might choose contrasting colors for added flair, which could turn an ordinary path into a work of art.
Once you’ve picked your materials, it’s time for the fun part—installation. Start with a plan, sketch it out if you like, but don’t stress if it doesn’t turn out perfect the first time. Trust me, the first layout I created looked more like a drunken snake than a thoughtful path.
Clear your chosen space of weeds and debris, and then lay down some landscape fabric to keep pesky plants at bay. After that, pour in your materials, arranging them in a way that feels right. Whether you’re aiming for symmetry or a more organic look, let your creativity flow.
Just remember, stepping stones should be close enough to feel connected but spaced apart just enough so you can dance a little from one to the next.
Finally, consider adding some greenery along your path. Low-maintenance plants like succulents or moss can soften the edges and create an inviting feel. On my own Zen journey, I found that a few well-placed ferns made my pathway feel even more tranquil.
It’s like inviting nature to join the party. The right plants can provide height and texture, drawing the eye toward your path and beckoning visitors to take a stroll.
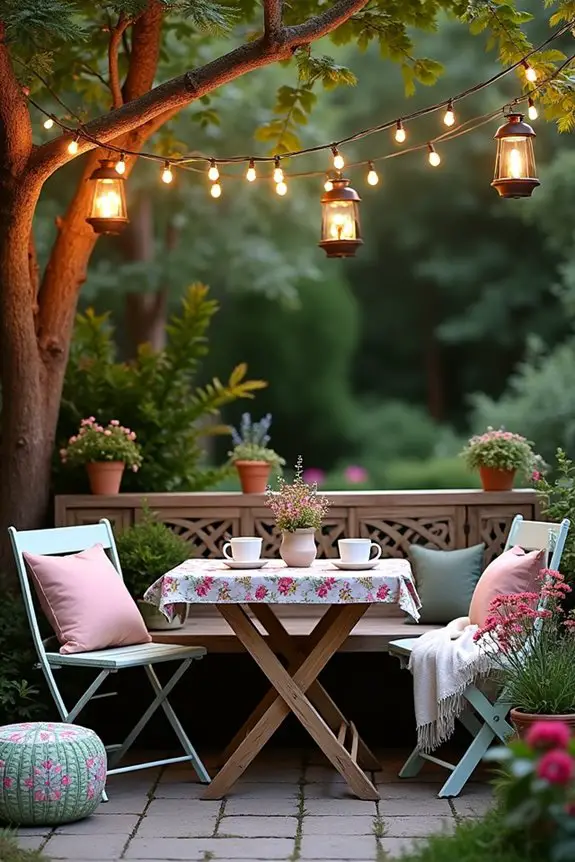
6. Sunken Seating Area Design
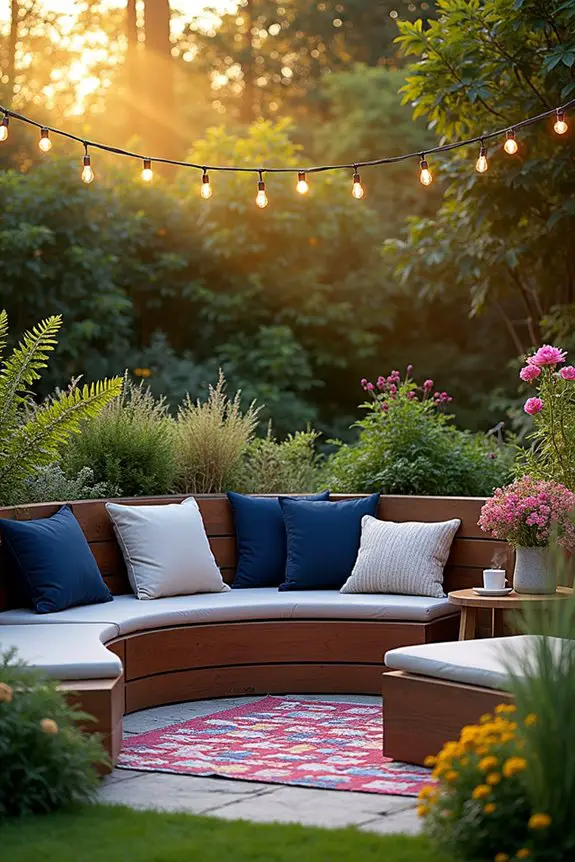
Creating a sunken seating area in your garden is like crafting a cozy nook right in the middle of nature. It’s not just about having a place to plunk down after a long day; it’s about creating an inviting vibe where friends can gather for good chats, or you can curl up with your favorite book surrounded by lush greenery. This design adds both functionality and aesthetic appeal—it’s a little haven that feels private yet approachable, blending seamlessly with your landscape.
So, let’s explore how to create this charming sunken seating area. First things first, assess your space. You’ll want to find a spot that’s a bit more level and has some natural viewing points, like a nice view of your garden or perhaps a nearby flower bed that could use some admiration. Clear the area of any twigs or those pesky weeds that seem to pop up out of nowhere; nature can be a bit overzealous, can’t it?
Next, you’ll need to dig out a small pit for the seating. Aim for about two feet deep—it’s deep enough to feel sunken without feeling like you’ve dug a massive hole. As your shovel hits the dirt, don’t forget to channel your inner gardener. Maybe hum a little tune to keep the energy up. Contrary to my experience, this should definitely NOT resemble an excavation site gone wrong; just take it nice and easy.
Then, once the pit is established, give yourself a pat on the back, because you’re already halfway there.
Now, for the seating itself. I highly recommend cozying up this area with some built-in benches, but if woodworking isn’t your jam, sturdy outdoor cushions or even a picnic blanket will work just as well. Consider lining the edges with beautiful stones or bricks for that polished finish. It’s like putting the icing on the cake but for your garden. You can even add an outdoor rug for a pop of color or texture that screams, “Come sit here, I promise it’s delightful.”
Don’t forget the ambiance! A sunken seating area isn’t just about sitting—it’s an experience, after all. So, think about surrounding your nook with greenery—perhaps some ferns or flowering shrubs that provide a lush backdrop. I once mixed in fairy lights—yes, I went the whole nine yards—and let me tell you, twinkling lights make it feel like your garden is whispering secrets just for you.
A few hanging lanterns can also add that warm, inviting glow for those evening chats under the stars.
Lastly, sprinkle in some decor items that make your seating area feel extra special. A side table for drinks, a few pots with beautiful blooms, or even a tiny water feature for that calming sound of trickling water can elevate the atmosphere. Trust me, it’s all the little things that’ll make you feel like you’ve just stepped into your own charming retreat, minus the plane ticket.
Creating a sunken seating area isn’t just about building—it’s about crafting a slice of paradise where you and your loved ones can gather, unwind, and soak in the beauty of your garden. So, roll up your sleeves, gather your tools, and let your creativity flow. You’ve got this!
7. Circular Flower Bed Arrangement
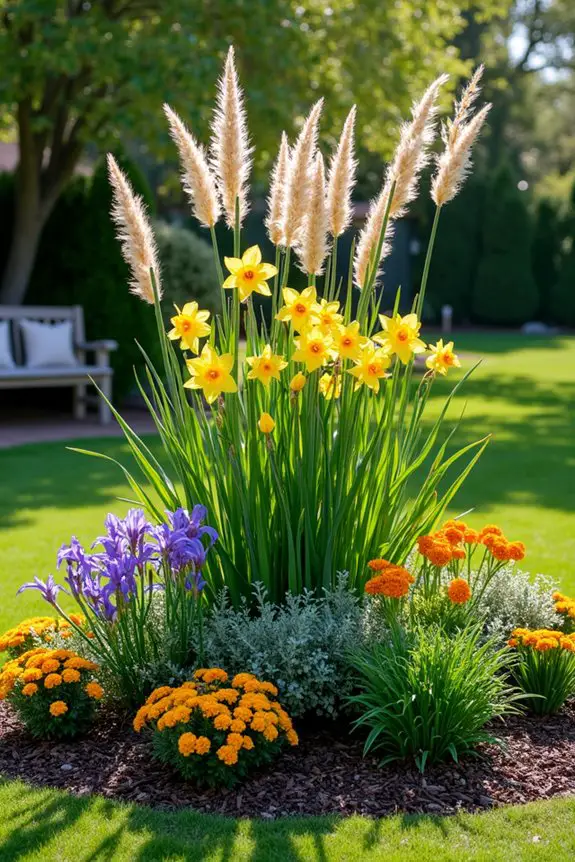
When it comes to garden layouts, a circular flower bed arrangement is like the cherry on top of your landscaping cake. It’s not just practical, offering a vivid focal point that draws the eye; it also creates a warm, inviting vibe that can transform any outdoor space into a little piece of paradise. Imagine this: a perfectly round bed brimming with a riot of colors and textures, beckoning you to stop and admire nature’s artwork. Isn’t that a lovely thought?
So, where do you start with this circular design? First, choose a spot in your garden that you want to highlight—perhaps near your entrance or at the center of your backyard. This can become the star of the show, so make sure it’s visible and sets the tone for the rest of your garden.
Once you have your location in mind, grab a couple of simple tools: a garden spade, a string, and a stake. Trust me, this is easier than it sounds.
Next, tie one end of the string to the stake and decide on the desired radius for your flower bed. If you want a nice, spacious circle, about three feet is a good starting point. Then, anchor the stake in the center of your chosen spot and stretch the string out to mark your circle—voilà! You’ve got a perfect guide right there.
Go ahead and use the spade to dig a shallow trench along your marked line. You’re not trying to excavate for a swimming pool, just a cozy little flower bed!
Now for the fun part—planting! Think about a mix of flowers that bloom at different times of the year so that your circular bed is always a feast for the eyes. Daffodils in spring, sunflowers in summer, and even some autumn asters for that fall feel.
When it comes to colors, let your creativity flow. How about some yellows and purples to flirt with each other? Or maybe a calming palette of whites and blues? Whichever you choose, just remember to group your plants in clusters for a gorgeous, natural look, like a painter creating a stunning masterpiece.
While you’re planting, consider incorporating some low-growing perennial flowers around the edges to create a soft border—think about plants like creeping thyme or marigolds. This not only adds depth but also makes the whole circle pop!
And, if you really want to give your flower bed that “wow” factor, sprinkle in some ornamental grasses or tall perennials in the middle for height contrast. It’s like adding the finishing touches to your favorite dish before serving it up!
Finally, mulch time. Covering the soil with a layer of mulch—about two to three inches deep—can enhance the overall look while keeping the soil moisture in check. Plus, it’s a great way to keep those pesky weeds at bay. Who needs that extra hassle, right?
Once everything is in place, step back and admire your handiwork. You’ve just created a stunning focal point that’s sure to stop everyone in their tracks.
8. Butterfly-shaped Flower Bed Design
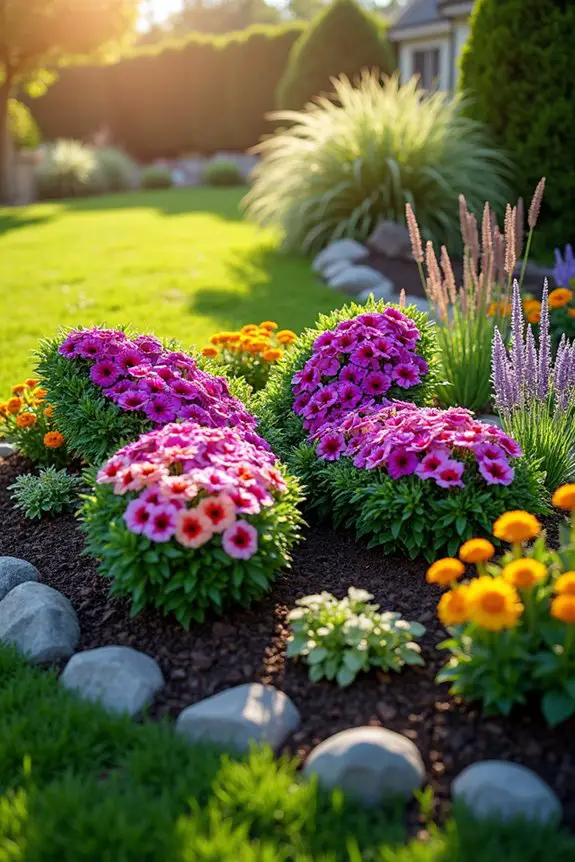
When you think about garden designs, what could be more delightful than a butterfly-shaped flower bed? This whimsical layout not only functions as a feast for the eyes, inviting colorful pollinators into your space, but it also adds a playful, artistic flair that can make any garden feel like a magical retreat.
Imagine stepping into a yard that resembles a fluttering butterfly, its vibrant wings spread wide, welcoming you with open petals—pretty enchanting, right?
Let’s get started on how to create this stunning butterfly flower bed. First things first, pick a sunny spot in your garden. Butterflies, like us, love the warmth of the sun, so a sunny area won’t only attract these beautiful creatures but also help your flowers thrive.
Once you’ve chosen your location, grab your tools: a shovel, a garden rake, and some stakes. You don’t need a PhD in landscaping for this; a little creativity goes a long way.
Now, it’s time to outline your butterfly shape. Picture a butterfly flapping its wings—this will guide your design! Use the stakes to sketch out where the body and wings will be. Think of a somewhat elongated oval for the body, then add on the wings which can flare out symmetrically on either side.
Don’t stress about it being perfect; nature is all about organic shapes. Plus, chances are you won’t find any butterflies scrutinizing your work with a critical eye.
Once you have your layout outlined, grab your shovel and start digging. Aim for about 12 inches deep. If it feels a bit intimidating—don’t worry—I once tried to dig a hole for a tree and ended up giving up and planting it in a pot. Talk about a gardening fail! But I digress.
As you dig, remember to remove any rocks or weeds. They definitely don’t belong in your butterfly oasis.
Now, let’s talk about planting. Choose a mix of flowers that are both colorful and fragrant—think petunias, zinnias, and lavender. Not only will these blooms add splashes of color, but they’ll also attract butterflies like a magnet.
Plant the taller flowers toward the back for height, and then gradually work your way down to shorter plants in the front; this layered effect mimics the beauty of real butterfly wings, creating a flow that’s easy on the eyes.
To take your design to the next level, consider adding some ornamental grasses or low-growing ground cover plants around the edges for texture. Don’t be afraid to mix different shapes and sizes; that’s what gives a butterfly the brilliant allure we all admire.
As you plant, give yourself this moment to connect with nature—perhaps close your eyes and envision those lovely butterflies twirling in their garden dance.
Last, but certainly not least, you’ll want to add mulch around your plantings. This helps retain moisture, keeps weeds at bay, and plants love it!
You’re basically throwing a cozy layer over your flower bed—think of it as putting a comfy blanket over your favorite chair.
And just like that, you’ve transformed your space into a butterfly-shaped haven.
9. Sculptural Plant Arrangement Design
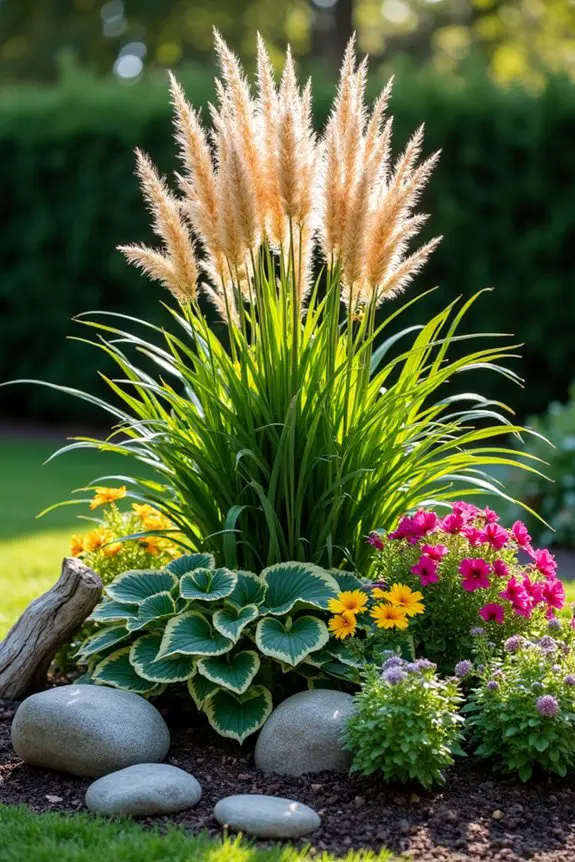
When it comes to garden designs, including a sculptural plant arrangement can bring a touch of artistry to your outdoor space. Imagine stepping into your garden and being greeted by eye-catching plant formations that aren’t just pretty to look at but purposeful too. This layout not only serves as a unique focal point, but it also maximizes space in a creative way. Who wouldn’t want their garden to be both functional and a feast for the eyes?
To create your stunning sculptural arrangement, first, gather your materials. You’ll need a variety of plants – think around three or four different types, ideally with contrasting colors and textures. A few suggestions include ornamental grasses for height, some leafy greens that make great fillers, and perhaps a flowering plant for that pop of color. Trust me, wandering around a garden center and obsessing over which plants to choose is an underrated form of therapy.
Once you’ve got your botanical cast ready, it’s time to think about layout. A sculptural arrangement works best with layers that draw the eye upward and outward. Position your taller plants in the center or back, then enthusiastically place medium-sized plants around them, leaving room for your little ones to shine at the front. Yes, you guessed it, I made the rookie mistake of placing my tallest plants in the front once. Let’s just say the view became… obstructed.
After your magnificent plants are positioned, it’s time to plant! Dig holes that are about twice the size of your plant’s root ball, then gently place each plant in its new home. Take a moment to pat yourself on the back after each one because, seriously, gardening is hard work. Make sure to water them well after planting; a daily splash of love goes a long way.
And if you forget one day? Well, don’t worry. Plants can be surprisingly forgiving, much like your neighbor’s dog that never seems to get mad when you accidentally step on its tail.
To make your arrangement even more personal, consider adding decorative elements like stones, sculptures, or even driftwood to amplify that art vibe you’re aiming for. I once added an old birdbath that magically transformed from a makeshift pond for pesky mosquitoes to a charming centerpiece.
Trust me; your garden will feel even more inviting when art and nature join forces.
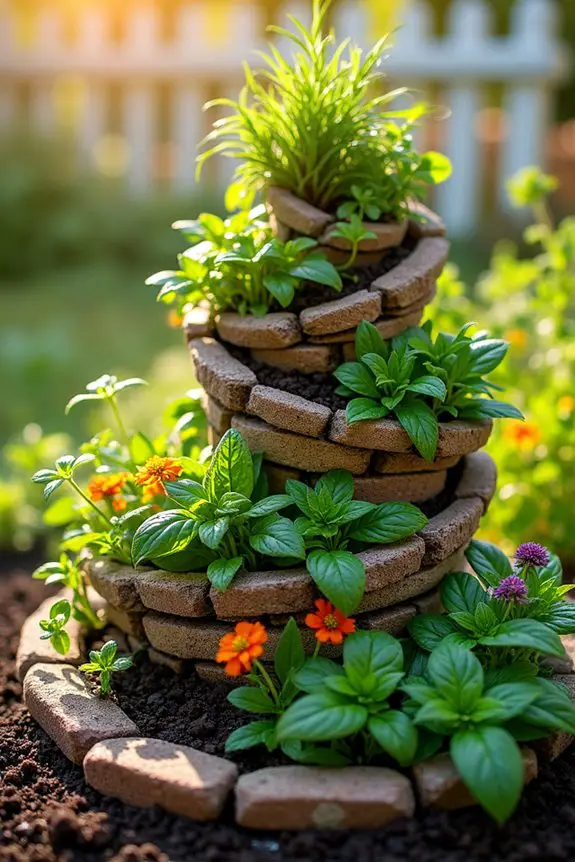
10. Lush Herb Spiral Design
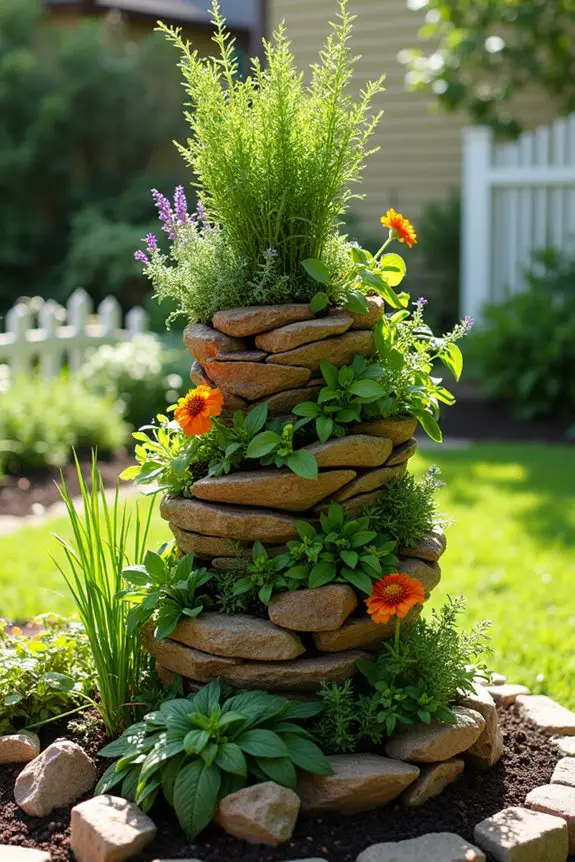
When it comes to creating a garden that’s practical and pleasing to the eye, a lush herb spiral design is a winner. It’s not just about growing your favorite herbs; it’s about maximizing space and adding an eye-catching focal point to your yard. The spiral design elevates your herbs, creating layers that look great, and they’re easily accessible. Who wouldn’t love a garden that combines beauty, functionality, and the promise of fresh flavors right at your fingertips?
To start your herb spiral, first, you’ll want to decide on the perfect spot in your garden. Look for a sunny area, as most herbs love basking in the sunlight. If you’ve seen your neighbor’s garden flourishing after a solid dose of sunshine, you know what I mean.
Once you’ve scoped out the location, gather your materials: some garden-friendly stones, bricks, or even wooden planks for structure, and of course, a selection of herbs. Think basil, mint, rosemary, and thyme—the staples that make any dish sing. Oh, and if you grab a rogue pot of cilantro, just don’t forget it quickly bolts into flowers if neglected; trust me, it’s not pleasing.
Now, here comes the fun part—creating the spiral! Begin by marking out a circular shape on the ground that’s about 3 feet across. Next, build up your walls with stones or bricks, creating a spiral shape that rises higher on one side. Don’t stress about being perfect here—its charm lies in the natural feel of the arrangement.
As you build it up, picture it as a cozy bed for your herbs to snuggle in. Make it as tall as you like, but remember, it shouldn’t be too high to reach. No one wants to pull a back muscle just to grab a sprig of mint, right?
Once your spiral is constructed, fill it in with good-quality soil, moving from the bottom to the top of the spiral. As you do this, place your herbs according to their water needs—those that thrive in dryer conditions, like rosemary, can go at the top, while thirstier herbs like basil should sit a bit lower.
This layering will create a mini-ecosystem, and I promise, your herbs will love the setup. Water them for the first week or so and watch as they perk up with their new home—just like how I felt the first time I found a couch that perfectly cradled my body.
To give your herb spiral that extra secret garden vibe, consider interspersing some edible flowers or companion plants, such as marigolds or nasturtiums, which not only look beautiful but also attract helpful bugs to keep pests at bay.
And don’t forget to keep an eye out for that crafty neighborhood cat eyeing your plants—those fluffy stealth ninjas tend to take a keen interest in garden affairs.
Creating a lush herb spiral isn’t just a fun weekend project; it’s like establishing your very own outdoor kitchen that brings joy both visually and gastronomically. With just a little bit of planning and care, you’ll be well on your way to whipping up culinary masterpieces right from your garden. What’s not to love?
Efficient Watering Schedule
As you dream of a lush, vibrant garden, it’s easy to overlook one essential element: an efficient watering schedule. Without it, your beautiful bloxburg garden ideas can quickly turn into wilted plants and sad pots.
Consider watering in the early morning when the sun’s gentle, and the ground’s thirsty but still cool. Aim for about 30 minutes a day, focusing on roots, not leaves.
If you’re busy (who isn’t?), group plants with similar water needs together—less running around equals more time for sipping lemonade on your patio.
And don’t forget to check your garden daily! Nothing says ‘I forgot’ like droopy leaves. Trust me, you’ll thank yourself later when your plants flourish with fewer hiccups along the way.