Imagine this: a tiny front garden transformed into a cozy retreat with a charming curved pathway that invites you right in. You might think you need a sprawling yard to create magic, but that’s not the case. If you’ve got a small space, don’t worry; there’s plenty you can do. From vertical gardens to playful plant arrangements, let’s explore how to maximize your little slice of outdoors while making it feel oh-so welcoming. Curious yet?
Unique Garden Theme Ideas
Let’s explore some unique garden theme ideas that can transform your small front garden into a cozy retreat.
Imagine a curved pathway that gently guides you to a charming seating area, or a vertical garden trellis packed with vibrant blooms.
You’ve got options like symmetrical flower beds that please the eye or playful asymmetrical plant groupings that add a little whimsy—how exciting is that?
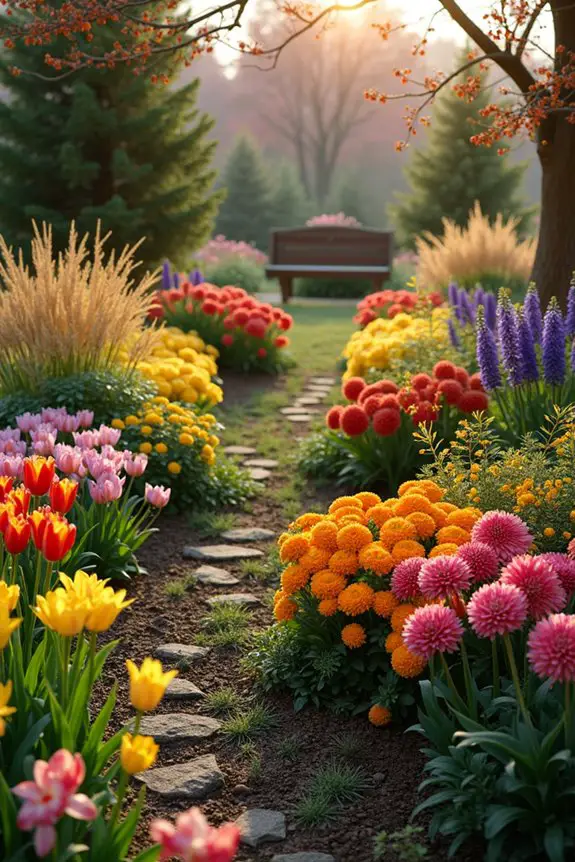
1. Curved Pathway With Seating Area
Creating a small front garden can be a real challenge, but one of my favorite ideas is to design a curved pathway with a cozy seating area. It’s not just about aesthetics, my friend. This design flows beautifully, inviting visitors in while also providing a delightful spot to relax. Imagine coming home after a long day, your little sanctuary waiting just a few steps away.
First, you’ll want to pick a nice location for that pathway. A gentle curve can create a sense of movement, like the garden is beckoning you to explore. You could use stepping stones, gravel, or even bricks to outline the path. If you’re feeling adventurous, mix and match. Just keep in mind that the path should be wide enough to walk comfortably.
Next comes the seating area. Think about a simple bench or a few stylish chairs that match the overall vibe of your home.
Want something rustic? A weathered wooden bench might just bring a smile to your face. Prefer sleek and modern? There are plenty of chic options out there. You could also sprinkle in some comfy cushions because, let’s be honest, who doesn’t love a bit of comfort?
Don’t forget about plants! Line the pathway with low-maintenance greenery, like lavender or small ornamental grasses, that’ll sway gently in the breeze. This adds texture and color, setting the whole scene. Additionally, incorporating garden lime can enhance the soil quality, promoting healthier plant growth.
And let’s be real—plants can work wonders, making the area feel alive and inviting. Consider using organic fertilizer pellets to ensure your plants are healthy and thriving.
And for those of us who aren’t exactly born with a green thumb (guilty over here), consider choosing plants that are native to your area. They’re usually hardier and require less upkeep. Honestly, if I can manage not to kill every plant in sight, so can you.
Just think: a curved path lined with lush greenery leading to your perfect seating area could be the envy of the neighborhood.
2. Vertical Garden Trellis Feature
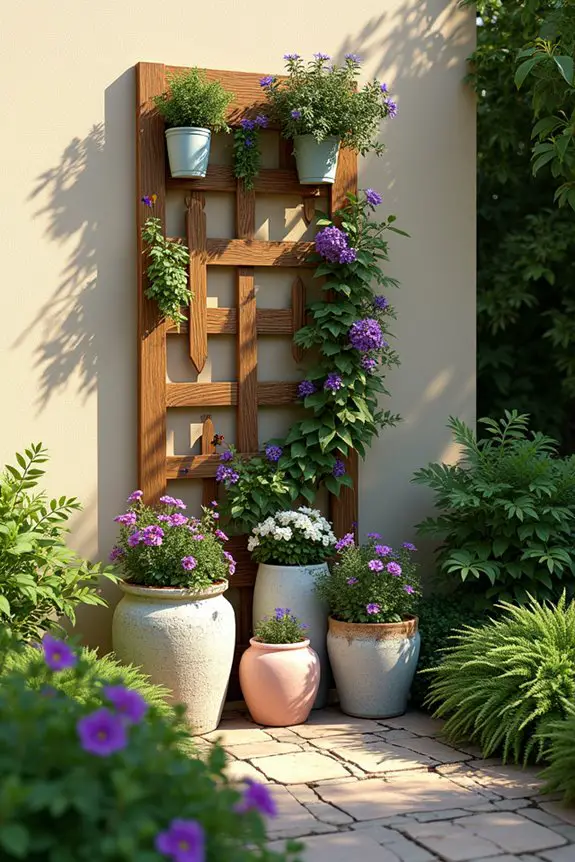
A vertical garden trellis feature isn’t just a striking centerpiece; it’s a smart way to maximize space in small front gardens. Imagine transforming a plain wall or fence into a lush vertical oasis, filled with climbing plants that add height, character, and life to your outdoor area. Plus, it’s perfect for those of us who may not have the greenest thumbs—it’s like creating a garden that takes care of itself, almost. Soil scoops are essential tools for digging holes and moving soil, making the planting process even smoother.
Starting off, you’ll need to choose a sturdy trellis that suits your garden style. Whether it’s rustic wood or sleek metal, make sure it complements your home. You want it to look like it was meant to be there, not something you slapped on last minute.
Once you have your trellis, get ready for the fun part: selecting your plants. Vining plants like clematis or jasmine are fantastic choices. They climb up beautifully, creating a stunning display that will make neighbors do double-takes.
On a personal note, I once had a challenging time with a trellis—let’s just say I didn’t measure it properly the first time and ended up with a little wobble that could have been featured on a “before” segment of a home makeover show. Lesson learned: a level is your best friend.
When choosing plants, think about colors and fragrances that resonate with you. If you love a sweet scent, jasmine is your go-to. Want something vibrant? Try morning glories or even sweet peas; they’re like having a party at your trellis.
And before you start planting, don’t forget to check sunlight requirements. Trust me, I’ve learned the hard way that sun-loving plants don’t do well in the shade. Consider incorporating vertical garden wall pockets to provide additional planting space while enhancing the visual interest of your trellis setup.
Consider adding some decorative pots at the base of the trellis to bring in even more color and texture. It’s like accessorizing an outfit—you want it to pop. A mix of blooming flowers and lush greenery can really pull the whole look together.
And if the whole concept feels overwhelming, just remember, it’s okay to start small. You can always add more plants or features later on, just like adding sprinkles to a cupcake—you can never have too much.
In the end, a vertical garden trellis creates both style and function. It draws the eye upward, making your small garden feel larger while fostering a sense of tranquility and beauty.
3. Symmetrical Flower Bed Arrangement
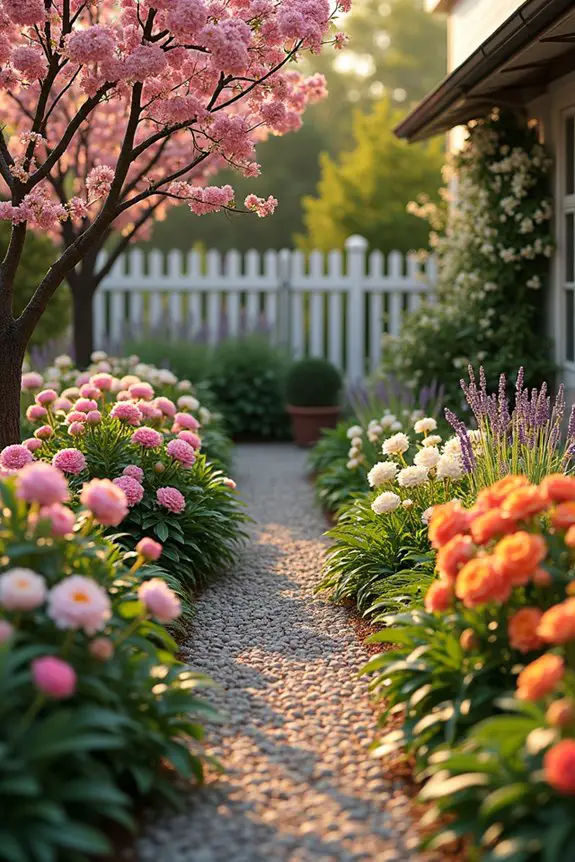
Creating a symmetrical flower bed arrangement is a fantastic way to add a tidy, cohesive look to your small front garden. This design style not only maximizes visual impact but also brings a sense of order and tranquility to your outdoor space. Imagine stepping out your front door to a garden that feels like a welcoming embrace—everything arranged pretty and perfect, giving off that vibe of serenity that we all crave at the end of a long day.
To start your symmetrical flower bed, think about dividing your garden area into two equal halves—like slicing a cake right down the middle. A great way to mark this division is by using a path, perhaps made of stepping stones or mulch, to create a charming focal point that invites guests in. From there, you can plant mirror-image flower beds on either side of the path. This adds not just symmetry but also a beautiful flow that feels natural and intentional.
Now, let’s talk about plant choices. Opt for flowers that bloom in the same season for that harmonious look we’re going for. Think classic pairs like vibrant peonies on one side and gorgeous roses on the other. Color coordination is key here; you might choose complementary colors, like yellows and purples, or stick with varying shades of the same hue for a more monochromatic feel.
Just imagine a flourishing arrangement where the pink blooms on one side are echoed by similar hues on the other—gentle and eye-catching, right?
One time, I attempted a symmetrical arrangement and got a little too carried away with the number of plants. I think I could’ve hosted a flower festival in my front yard. I ended up with too many flowers crowded together that could hardly breathe, let alone bloom. Lesson learned: less is more. Select a few key flower types, and allow them room to grow and shine.
Another creative tip: consider adding a central feature, like a small ornamental tree or a birdbath, right at the dividing path. It can serve as a stunning anchor for your arrangement, creating a vertical element that draws the eye upwards. Just make sure it fits your garden theme—no one wants a flamingo fountain in a serene Zen garden, let’s be honest.
Finally, don’t forget about textures. Incorporating plants with different leaf shapes and foliage colors can add depth to your design. You might choose leafy ferns to frame the flowers or even some low-growing ground cover to make the entire arrangement feel lush and full. The comfort of foam kneeling pads can ensure that your gardening tasks are performed with ease and relaxation. It’s like choosing the right side dish to enhance the main course—it all works together to create a beautiful dining experience, or in this case, a beautiful garden experience.
4. Asymmetrical Plant Grouping Design
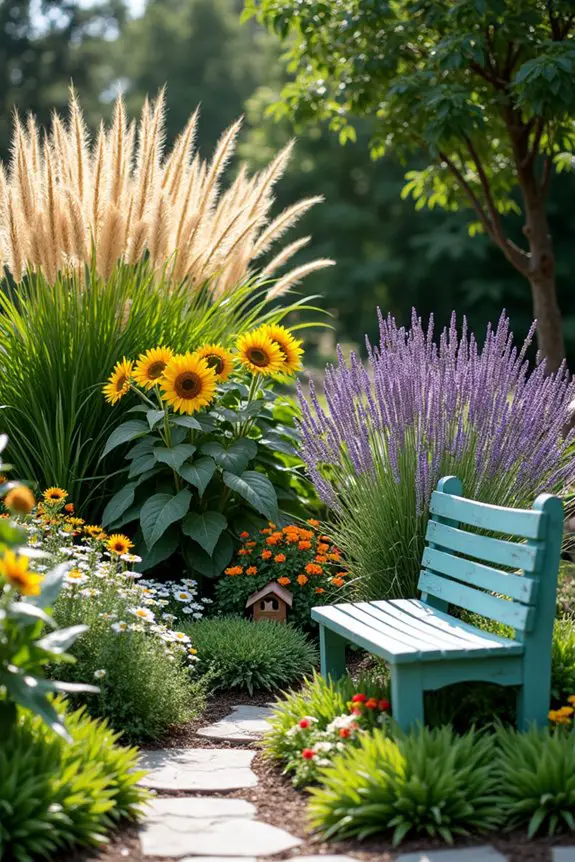
When it comes to small front gardens, asymmetrical plant grouping can be a game-changer. It gives your garden a dynamic, effortlessly chic vibe that feels a bit wild and free, almost like Mother Nature herself decided to drop some magical touches. It’s perfect for those who want their garden to have a somewhat natural feel, while still packing a punch of visual interest. Envision a space that feels alive and vibrant, inviting all sorts of little creatures to make it their home.
So how do you achieve this look? Start by selecting a mix of plants in different sizes, shapes, and colors. Rather than planting in perfect lines or mirroring one side to the other, let’s channel your inner artist. Grab that paintbrush, or well, a trowel, and get ready to create a living canvas. Imagine tall grasses or statuesque sunflowers on one side and shorter, bushy plants like lavender or cheerful daisies on the other. The key here is balance. You’re not trying to make it match, but instead, complement—like peanut butter and jelly, but in flower form.
Also, don’t shy away from layering. Envision a tiered wedding cake, with plants rising to meet the eye. You could use a mix of flowering plants in the front and trailing vines or larger shrubs at the back, adding height and interest. It’ll feel like a secret garden, with lush foliage that invites you to peek deeper. I made the mistake once of planting everything flat, thinking it would be a stately English garden, but instead, it looked like a pancake that had seen better days. Lesson learned, embrace those heights and depths.
When thinking about colors, craft a palette that makes your heart sing. You might pick a few dominant colors, then sprinkle in accent plants as if they were confetti. But be cautious—too much can be overwhelming. I learned this the hard way when I tried to recreate a tiny version of the rainbow. It looked more like a craft box exploded than a serene garden. Stick to three or four colors that complement each other and flow harmoniously; think soft blues against vibrant yellows or rich purples with touches of white.
And here’s a little tip: don’t forget about your garden’s personality! Choose plants that tell a story. Maybe you want a whimsical feel with colorful ornamental peppers and flowing ornamental grasses, or perhaps a more elegant vibe with delicate ferns and vintage roses. Each plant should evoke a mood, reflecting your personal style. That’s what makes a garden truly special, right? It should feel like an extension of you, a little slice of your soul right outside your door.
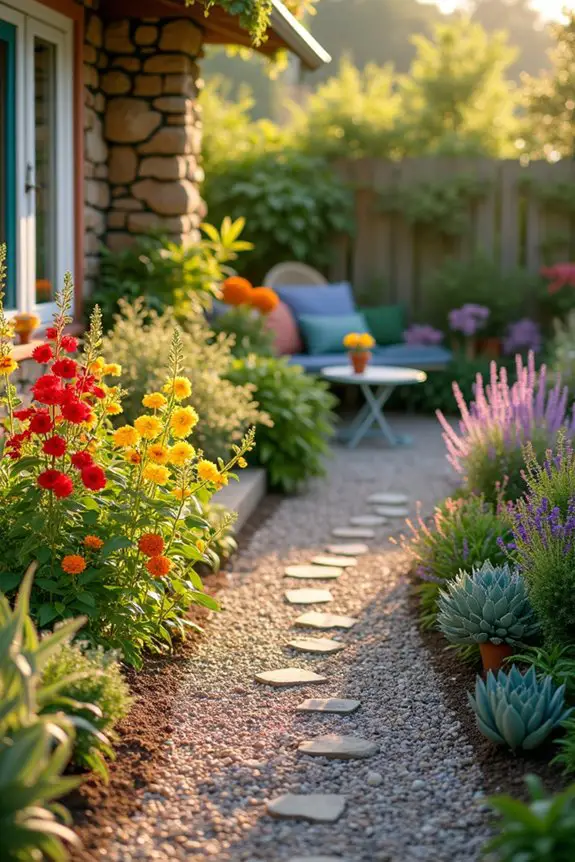
5. Stepping Stone Pathway Design
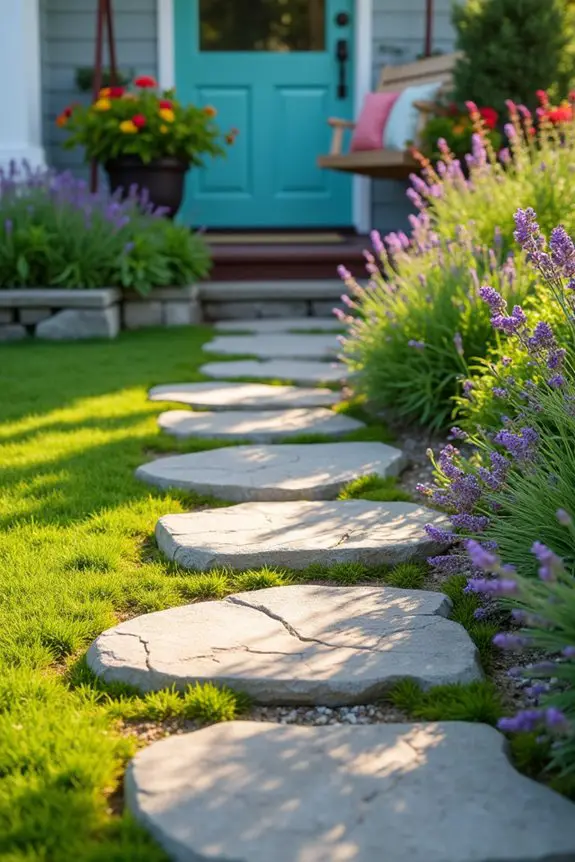
When it comes to small front gardens, a stepping stone pathway can be both practical and charming. Imagine a cozy little route leading visitors straight to your front door, all while adding a whimsical touch to your outdoor space. It sets the scene, guiding the eye and creating a welcoming vibe that says, “Come on in, we’ve got stories to share!”
Plus, it’s functional; it keeps the mud at bay and can even help you avoid a few unfortunate slips.
To create your own stepping stone pathway, start by deciding on a route. Will it be a straight shot to the door or a meandering path that feels a bit more playful? I once thought I was a garden architect and went for a zig-zag, only to realize my stone placement resembled an obstacle course.
Less is more in this case—aim for clarity, not chaos. Mark your intended path with some string or even a garden hose to get a solid visual of what you want.
Next, choose your stepping stones. You could go with classic, flat stones that fit comfortably underfoot, or if you’re fancy, mix in some irregular shapes for an organic feel. (Just maybe don’t use any stones that look like they belong in a horror movie; trust me, some of them can get a bit creepy.)
Once you’ve chosen your stones, measure the space between them. A good rule of thumb? Aim for about two feet apart, just enough for a relaxed stroll.
Now, clear the pathway area of grass, weeds, and any stubborn roots hanging around. A little sweat equity never hurt anyone; just think of it as your mini workout for the day.
Once you’ve got a clear path, you may want to lay down some landscape fabric to keep weeds at bay. Then fill the gaps between your stones with sand, gravel, or a mix of both to create stability.
And don’t worry about it looking perfect—nature isn’t about perfection.
Finally, add some charm around your pathway. Think about lining it with low-growing plants or colorful annuals that can cascade over the edges.
When I did this, I felt like I’d turned my ordinary garden into a magical corridor. It’s those little flourishes that bring everything together and make your stepping stone path a delightful experience to walk through.
Who says a practical pathway can’t be a theme of adventure? Now your guests might just wonder if there’s a treasure at the end—or a really good cup of coffee waiting for them.
6. Layered Plantings for Depth
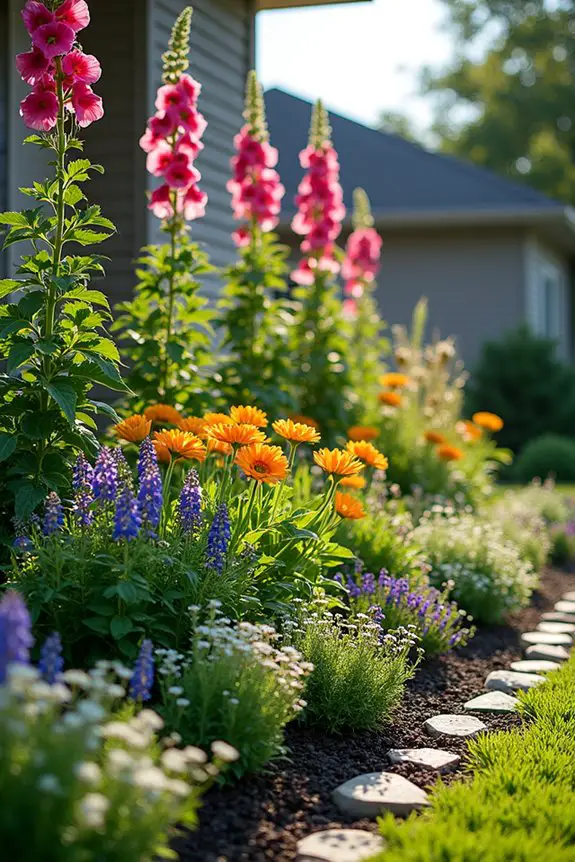
Layered plantings might just be the secret sauce for transforming your small front garden into a lush, inviting space. It’s all about giving your garden depth and dimension while also allowing you to play with different colors and textures.
Think of it as a three-dimensional painting where every layer tells a story. You can create various focal points that not only attract the eye but also spark joy as they bloom throughout the seasons!
To get started, grab a notepad and pencil (yes, old-school style works!). First, take a moment to stand in your garden and assess the sun and shade locations. What’s bathed in sunlight? What areas are cooler and shadier? This will guide your plant choices because, trust me, you don’t want to be planting sun-loves in the shade or vice versa—it’s a recipe for disappointment.
Next, think about the height of your plants. In a layered planting scheme, you’ll typically want taller plants at the back and shorter ones at the front. If you’re like me, you may have a tendency to throw caution to the wind, thinking, “I can mix this all together and it will be fine.”
Spoiler alert: it wasn’t fine. Avoid the chaos and plan your layers! Consider using shrubs or tall perennials like hollyhocks for the back row, mid-height delights like daylilies or delphiniums in the middle, and finally, colorful ground covers or shorter annuals at the front to tie it all together.
Once you have a rough idea of what plants to use, it’s time for a little shopping trip to your local garden center. This is the part where you may lose track of time, mesmerized by rows upon rows of greenery. Pick plants that bloom at different times of the year. It’s like throwing a year-round garden party where every guest arrives fashionably late but still makes a grand entrance.
Ever tried to talk to a friend who brought a plant that only blooms once in a blue moon? Let’s not give our gardens that burden.
Now, on to the fun part—planting. Dig holes that are spacious enough for the roots but not so big that your plants feel like they’ve landed in an underground cavern. It’s a balance.
(I learned the hard way that plants don’t thrive when they’ve room for an entire community of gophers to move in.) Make sure the soil is well-drained, and add some compost to give your plants the boost they need.
As you plant, step back every now and then to confirm your height and textures are looking lovely together. It’s a bit like posing for a family photo—you want everyone to be in the frame and looking good.
Water them well after planting and remember to mulch around them. Mulch helps keep moisture in and weeds out, plus it gives your garden that finished touch, kind of like adding a fancy bow to a present.
In a few weeks, you’ll start to see your front garden come to life in a way that reflects your personal style and the whirling wonders of nature.
And just like that, you’ve transformed a small space into a lush retreat. Celebrate the layered effect while enjoying the beauty as your garden tells its story, layer by layer.
Don’t be surprised if passerby’s start stopping to admire your handiwork—who knew your small front garden could be so big on charm?
7. Circular Flower Bed Centerpiece
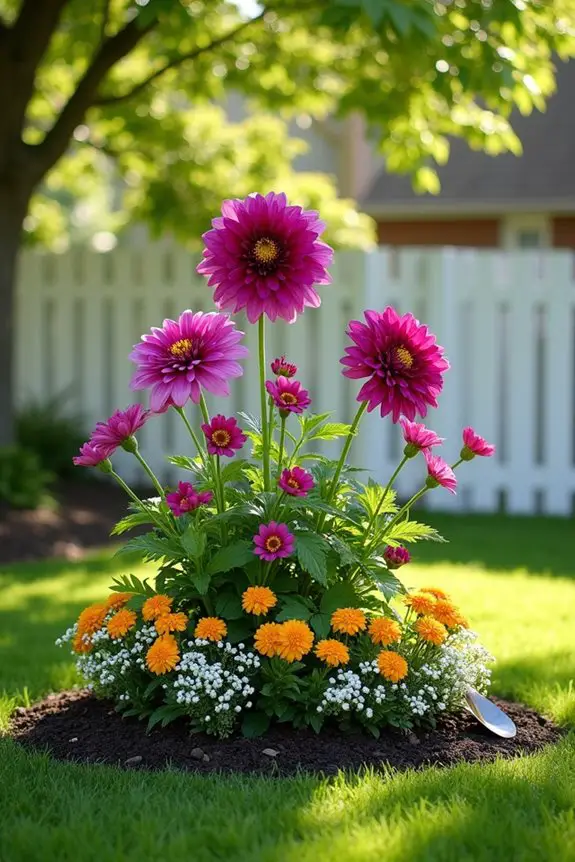
Creating a circular flower bed as a centerpiece for your small front garden is like giving your yard a fabulous accessory that draws everyone in. Picture it—a vibrant array of blooms forming a perfect circle, inviting and enthralling anyone who passes by. This design doesn’t just look stunning; it’s also functional, as it can help anchor your garden layout while breaking the monotony with its unique shape. Plus, a circular bed feels easier to maintain than a freeform design; you can weed and water from all angles without feeling like you’re on an expedition.
So, how do you initiate creating this floral masterpiece? First things first, take a stroll around your garden and decide where the circular bed will best fit. Are you opting for the sunny side or the shaded retreat? Visualize the circle in your mind, or use a garden hose to mark it out on the ground—believe me, your neighbors will think you’re a total pro.
Once you’ve got your desired spot, it’s time to jump into preparations. Start by clearing the area—you know the drill: no weeds, rocks, or rogue garden gnomes allowed. Then, consider the size of your circular flower bed. A diameter of three to five feet can feel just right for smaller gardens, enough space to create a lush display without overwhelming the area. Honestly, you don’t want it to turn into the Bermuda Triangle of plants where everything gets lost!
Now that you have the circle defined, it’s time to think about soil. Good soil is the foundation of a successful garden, much like good pasta is the key to a fabulous dish. Mix in some compost to guarantee your plants get the nutrients they crave, and break up any clumps—because no one likes a compacted mess, least of all your flowers.
When it comes to selecting plants, think color, height, and bloom timing. You want taller plants at the back or middle center, gradually tapering down to shorter blooms at the edges. A feathery fern or a striking dahlia can bring height and drama, while cheerful marigolds and sweet alyssums can spill over the edges for that soft finish.
Picture a kaleidoscope of colors bursting forth at different seasons—that’s the goal. Oh, and don’t forget to mix perennials with annuals, so your garden can dazzle all year long.
As you arrange your plants, hang back and take a gander at your handiwork. Are there any gaps that look sad and lonely? Perhaps a colorful snapdragon would fit perfectly there. You’re like an artist, painting with nature. And trust me, if you place those flowers just right, your garden may even earn a few compliments from your neighbors—bonus points for you!
Once you’re happy with the layout, plant those beauties, making sure to give enough space between them to breathe and thrive. Water them gently; they just moved into a new home, after all. Regular upkeep is essential, so keep an eye on weeds, deadheading any spent blooms, and rejuvenating mulch for that tidy look.
Before you know it, your circular flower bed will be the talk of the block. Just don’t let it go to your head; remember, next on the agenda is the raised planter boxes to add even more flair to your front garden.
8. Raised Planter Box Arrangement
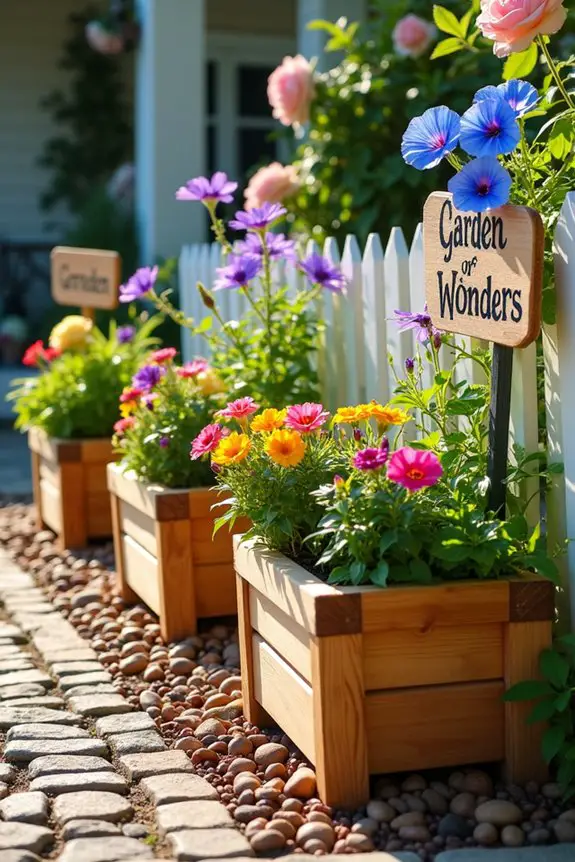
When it comes to small front gardens, a raised planter box arrangement can work wonders. Not only do these elevated beds add a modern touch to your outdoor space, but they also make gardening so much easier on your back—less bending down means more time to admire your floral creations. Plus, they can offer a stunning visual appeal, creating layers and depth that draw the eye. It’s a win-win!
So, how do you craft this delightful garden feature? Start by choosing your materials. If you’re feeling crafty, you can build your own planter boxes from untreated wood—think cedar or redwood, as they’re naturally resistant to rot. Of course, there’s always the option to buy pre-made boxes if you prefer to skip the sawdust and splinters. Just don’t forget to pick a color that complements your home—wood tones are classic, but a bold green or a fresh white might give your space a modern lift.
Now, let’s get to the fun part—arranging those planter boxes! The success of your design lies in how you place them. You might want to stagger the boxes at different heights, kind of like a mini-pyramid of greenery. This adds dimension and allows each plant to shine in its own spotlight. Consider using corner spaces or even along pathways where they can be viewed from multiple angles. Trust me, when your neighbors see that arrangement, they’ll be asking for your design tips (cue the humble shrug).
Next, think about what you want to grow. Do you crave color all around? Mix annuals like petunias and begonias with perennials such as echinacea and black-eyed Susans. You can pull off a dramatic look by choosing a bold color palette—think bright yellows, deep purples, and fiery reds. On the flip side, for a calming vibe, you might go for softer pastels and whites. And remember, some herbs can work wonderfully here too. A little basil or mint never hurt anyone, right? Not only do they smell divine, but you can also snip them for your culinary creations.
As you plant, take a moment to admire the chaos. Yes, the joyful chaos of colors and textures mingling together in harmony. You may find delightful surprises hiding in blank spaces—perhaps a trailing vine that can spill over the edges and soften the look. Give yourself permission to play and tweak your layout. This is your garden, after all!
Finally, don’t forget to add in some decorative touches. Consider colorful stone paths or whimsical garden décor that speaks to your style. As much as you want the plants to shine, a quirky sign or some stylish gardening gloves displayed outside can add that personal flair. Crafting a raised planter box arrangement isn’t just about the plants; it’s also about showcasing your personality. So, roll up those sleeves—your garden masterpiece is waiting.
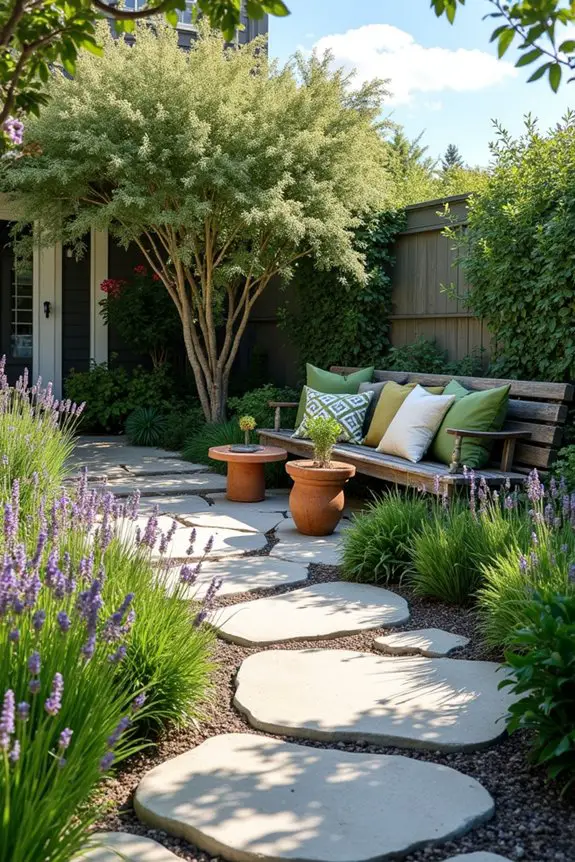
9. Zoned Planting Areas Design
An inviting front garden can set the tone for your home, but if space is limited, zoning is the name of the game. With zoned planting areas, you can create a visually appealing layout that cleverly separates different themes or styles, all while maximizing what little space you have.
Think of it as giving your garden its own personality, or even mood rings for plants. One corner might be all about colorful flowers, while another could be a green retreat filled with herbs and a cozy seating nook.
So how do you make this work? First, map out your small space. Grab a piece of paper and jot down where you’ll place each zone. You could designate a section for vibrant annuals bursting with color, another for scented herbs like lavender and rosemary, and maybe even a mini succulent corner for those low-maintenance vibes.
Mixing it up keeps things interesting and gives you plenty of options when you want to enjoy your little oasis. Is there a better way to impress your friends than with the ability to whip up a batch of pesto with freshly harvested basil from your own garden? I think not.
Next, consider using natural dividers to define these zones. These could be things like low stone walls, wooden trellises, or even rows of potted plants that create a sense of separation without feeling closed off.
Imagine this: as you stroll through your front yard, you pass through a herb zone, inhaling those lovely aromas, before moving on to a bloom-filled oasis—like stepping through a fragrant portal. That’s the magic of zoning. It gives layers to your garden while creating a flow that guides the eye and the spirit.
Then comes the fun part—plant selection! If you love color, let that flower section explode with vibrant reds, yellows, and purples. Think gladiolas, daisies, and marigolds blending together—seriously, it could rival a box of crayons.
For your herb zone, opt for a mix of culinary delights and fragrant flowers—basil for your pasta, mint for your iced tea, and even some bee balm to attract the good bugs. You could even throw in cute little garden markers to help you identify what’s what—I mean, for those of us who can forget what we planted as soon as the first sprout emerges.
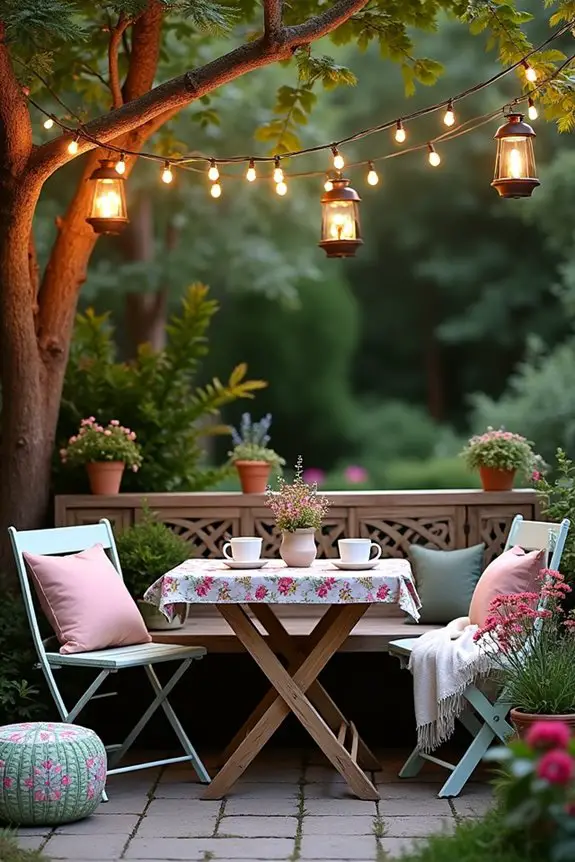
As you weave in these zones, take a moment to make them your own. Maybe add a quirky garden statue or a colorful bistro set for sipping morning coffee and admiring the beauty you’ve created.
This is your special nook, after all, and adding those personal touches helps it feel like home. By creating these unique planting areas, you won’t just have a garden—you’ll have an experience, a place that reflects your personality and style.
Who knew a small front garden could feel like a patch of paradise?
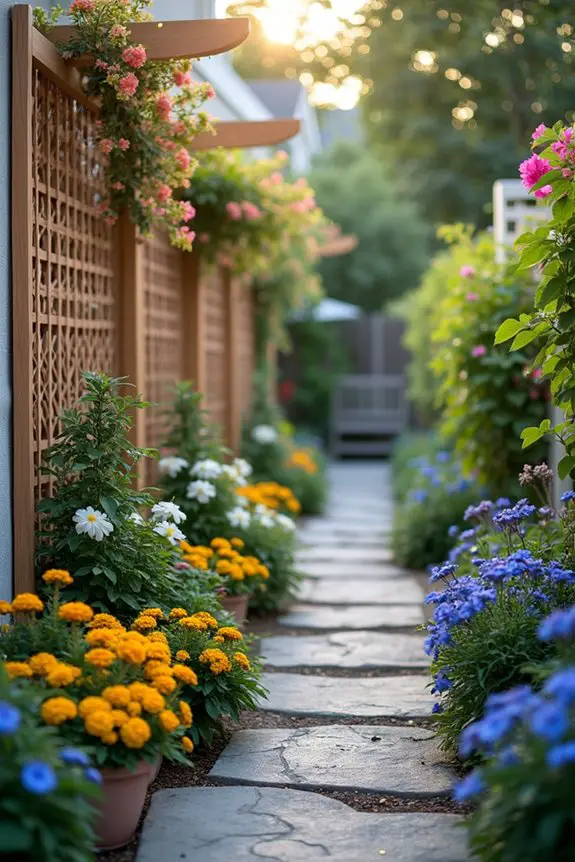
10. Lattice Privacy Screen Design
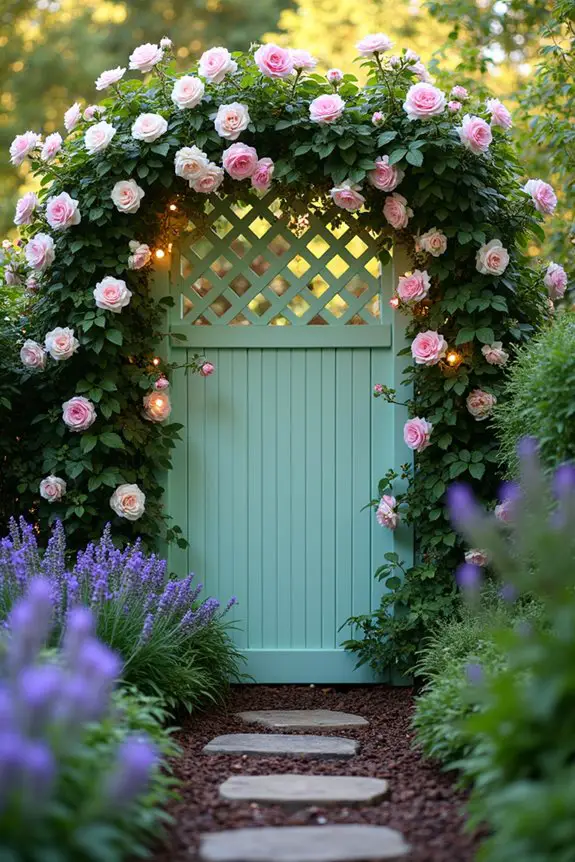
When it comes to small front gardens, privacy often takes a backseat to aesthetics. But fear not! A lattice privacy screen is a fantastic solution that serves both functional and stylistic purposes. Not only does it give you a cozy feeling of seclusion from the outside world, but it also adds a touch of charm and sophistication to your space. Think of it as your garden’s very own fashion statement—a beautiful barrier that’s still airy enough to let light shine through and keep things from feeling too cramped.
Now, envision this: a lovely lattice design that becomes the backdrop for climbing plants like sweet-smelling jasmine or vibrant clematis. The vertical space of the lattice draws the eye up, giving the illusion of more height in your garden. My own little plot has a lattice screen that I’ve trained some vibrant pink bougainvillea to climb up, and let me tell you, it’s like living in a postcard when they’re in full bloom. Not only does it provide that much-needed privacy, but it also creates a delightful visual spectacle.
So, how do you incorporate a lattice privacy screen into your front garden design? First, you want to pick a location that feels natural. This could be at the edge of your yard, where it meets the sidewalk, or maybe right in front of the less-than-scenic utility box that spoils the view.
Next, grab your materials. You can purchase pre-made lattice panels at your local garden center or lumber store, or try your hand at building one if you’re feeling crafty. If you’re like me, however, the only thing you’ve successfully built is a microwave meal, so sticking to pre-made is a solid choice.
Once you’ve got your lattice, it’s time for installation. Position it upright and secure it properly using wood stakes or concrete footings to guarantee it doesn’t topple over in a gust of wind. Next, give it a fresh coat of paint or stain if you want to customize the look—grays, whites, or soft pastels can really vibe well with your garden’s theme.
If you’re feeling adventurous (and a little patient), you can tackle the painting project before installing. Just a thought—one less mess to manage outdoors.
Now comes the fun part: introducing plant life! Choose climbing plants that suit your garden’s mood. For a fragrant getaway, opt for climbing roses or wisteria, while vibrant annuals can make it feel like a carnival.
And don’t forget, those twinkling fairy lights are the cherry on top. A few strands wrapped around your lattice can turn an ordinary evening into a magical one. Kind of like a fairy tale, but with fewer dragons and more petunias.
Efficient Space Utilization Techniques
Utilizing space efficiently in a small front garden can feel a bit like trying to fit a Thanksgiving turkey into a microwave—frustrating, yet surprisingly doable.
Start with vertical gardening; it’s like giving your plants a cozy apartment in the air. Think trellises or wall planters that turn bare walls into lush green displays.
Add multi-functional furniture, like a bench with hidden storage—talk about a great use of space. You could even use compact, tiered planters; they’re delightful small front garden ideas that maximize planting area without hogging the ground.
And don’t forget lighting; a few well-placed solar lights can make your tiny oasis feel spacious and inviting at night.