Are you tired of your back garden feeling more like a blank canvas than a cozy retreat? You’re not alone. Many of us dream of transforming our outdoor spaces but get stuck on where to start. Imagine vibrant flower beds, inviting seating areas, and winding pathways that spark curiosity. Sounds nice, right? Let’s explore some clever ideas that could turn your garden into a creative haven, where entertaining friends or curling up with a book feels effortless.
Unique Patio Arrangements
When designing your patio, think beyond the ordinary and consider unique arrangements that really set the vibe.
Imagine cozy sunken seating areas where you can sink into relaxation, or curved flower beds that add a touch of whimsy.
You might even explore diagonal pathways that guide your guests through the garden like it’s a secret adventure, bringing everything together in a delightful dance of shapes and colors.
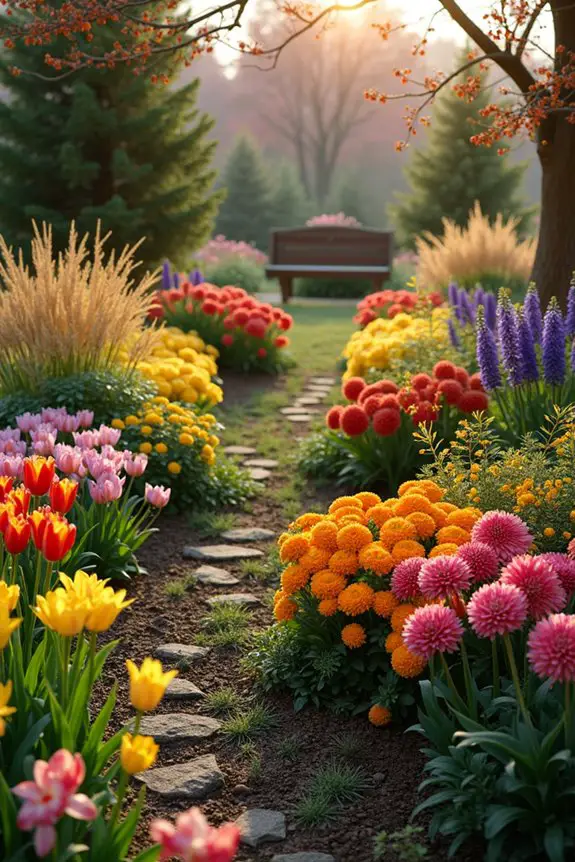
1. Curved Flower Bed Placement
Curved flower beds can transform your back garden from a simple outdoor space into a vibrant work of art. They not only enhance the beauty of your garden, but they also create an inviting atmosphere that encourages relaxation and exploration.
Imagine strolling through soft, flowing lines of color instead of straight, sterile edges—how much more welcoming does that sound?
To create a curved flower bed, start by finding a spot in your garden that feels right. Somewhere with a good amount of sunlight and, let’s be honest, close enough to the hose for easy watering is usually a win-win.
Grab a garden hose or some string to sketch out your desired curve. This is where the fun begins. Feel free to go wild—think smooth arcs that mimic nature, or even whimsical loops for that extra flair. Just remember, there’s no wrong way to do it. If you find yourself questioning your curve design, just ask yourself, “Would my garden gnome give this a thumbs up?”
Next, dig out the area along your line, about 12 inches deep. You’ll discover the joy of discovering random stones and maybe even a lost flip-flop while you dig. Don’t worry, we all have our “I swear I saw this here last summer” moments.
With your flower bed shaped out, you can now add a border if you like. Brick, wood, or even colorful stones can give it a finished look—and who doesn’t love a garden that has a bit of bling?
Now for the fun part: planting. Choose a mix of perennials and annuals to keep things lively throughout the seasons. Think about height and color. You wouldn’t serve a plate of just mashed potatoes, would you?
A few taller plants at the back, with mid-sized beauties and shorter stunners in the front, create a beautiful layered look. You want it to feel like a concert in your garden, with all the plants playing their part.
Lastly, water your newly planted gems like they’re your favorite pet. They mightn’t wag their tails, but they’ll sure show their appreciation by blooming beautifully.
And remember, tending to your garden should be as relaxing as sipping your lemonade. So sit back, enjoy your handiwork, and daydream about all the compliments you’ll get from neighbors on your stunning curved flower bed. Who knows? You might just start a trend in the neighborhood—curved flower beds could be the next big thing.
2. Sunken Seating Areas
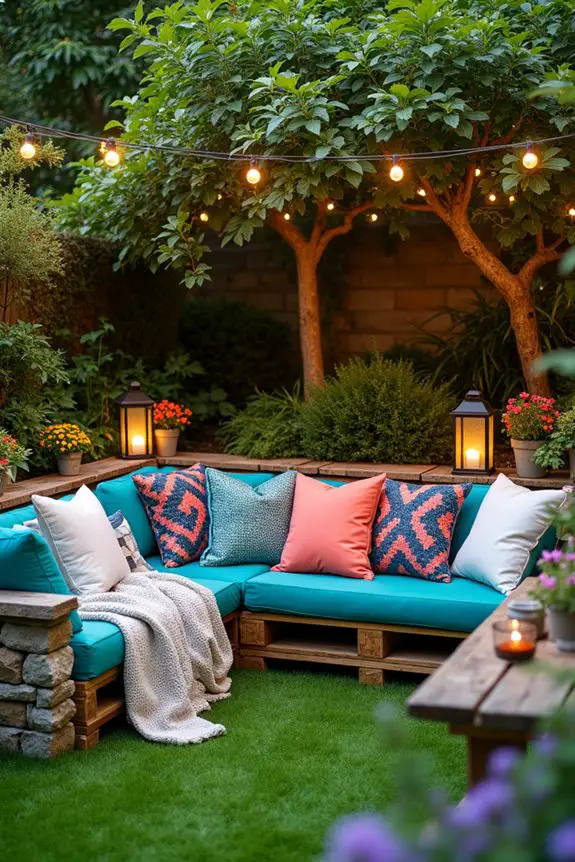
When designing a back garden, creating a sunken seating area can really elevate the vibe of the space. It’s not just functional, offering a cozy spot to relax, but it also adds a unique touch that makes your garden feel like a little oasis. Envision sinking into a nest of cushions, surrounded by lush greenery, while enjoying a cup of coffee or a glass of wine. Sounds inviting, right?
First things first, choose an area that feels natural for sinking. Look for a spot with a view or a place that feels a bit tucked away—like a secret garden nook. To get started, you’ll want to dig down about 18 inches, but don’t get overly obsessed with the precision. A little variation in depth can add character, just like your favorite pair of jeans that fit just a bit differently every time you wear them.
While you dig, you might uncover some old garden treasure—perhaps a rusty garden spade or that elusive garden gnome you thought escaped to another dimension.
Next, once you’ve got your pit dug, it’s time to line the edges with some stones or bricks. This not only gives it a clean finish, but it also helps hold the soil in place. If you’re feeling crafty, why not create a mosaic with those stones? You could even make shapes that tell a story; after all, every garden needs a little whimsy. Additionally, consider using solar light kits to illuminate the area and enhance its charm.
Now, for seating—don’t think you need to run out and buy fancy outdoor furniture. Instead, consider using large, comfy cushions or even pallets with some thick cushions on top. Just visualize: cushions in vibrant colors that make your garden pop, inviting friends and family for casual gatherings. You can stack the pallets or place them in a circle to create a cozy conversation pit.
But a word of caution—do avoid the cushions that look great but feel like you’re sitting on a rock; comfort should be at the top of your list.
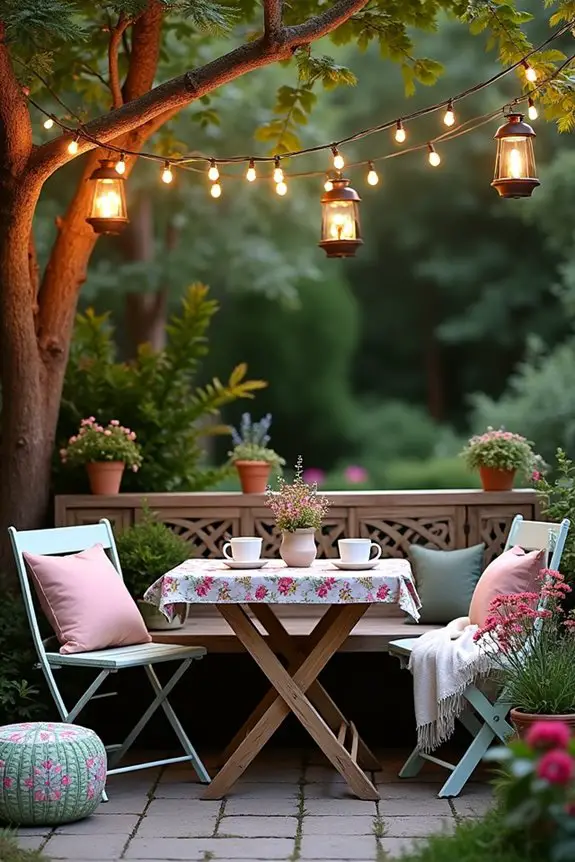
To enhance the atmosphere, throw in some mood lighting. You can hang fairy lights from nearby trees or place lanterns on the edges. When evening falls, the soft glow will invite you and your guests to stay a little longer, chatting away under the stars.
And hey, don’t underestimate the power of plants; adding low-maintenance, trailing plants around the edge of your seating area can create a lush, green atmosphere that feels like you’re in a little cocoon. Moreover, consider incorporating a stylish patio dining set for outdoor meals and gatherings that complement your cozy nook.
Finally, don’t forget about the finishing touches. Toss in some fun outdoor blankets and a couple of colorful throw pillows to make it extra inviting, almost like you’re setting the stage for an outdoor movie night.
Just remember, the idea is to create a cozy space that beckons you to sit back, relax, and perhaps even nap a little. So, grab your favorite drink, sink into your comfy seating area, and bask in the satisfaction of your stunning back garden transformation. You may just end up becoming the neighborhood hangout spot, which isn’t such a bad fate.
3. Diagonal Pathways for Flow
Creating diagonal pathways in your back garden can be a game changer—both visually and functionally. These pathways don’t just guide you from point A to point B; they also add movement and flow, making your garden feel like a journey waiting to be explored. Picture yourself strolling down a zigzag path, with different garden vistas unfolding before your eyes, like scenes in a movie. Isn’t that enticing?
To start designing your beautiful diagonal pathways, contemplate the layout of your garden. Find areas that might feel too square or too linear, and envision how you could create a sense of adventure by adding some unexpected angles. A good rule of thumb is to angle your pathways at about 30 to 45 degrees. If you were to lay it over a soccer field, it would look like a diagonal kick rather than just a straight run. No offense to straight paths, but who says we can’t spice things up?
Next up, you’ll need to choose your materials carefully. Stone, gravel, or even wooden planks can elevate the look of your pathways, working beautifully with the vibe of your garden. If you’re feeling a bit budget-conscious—like most of us do from time to time—basically any flat surface will do for a temporary solution while you figure out your dream path. Old pavers or leftover bricks from a project can be piled together haphazardly for that rustic charm that’s so in right now. Trust me, you don’t need to make it perfect; a little imperfection adds character!
Now, as you lay out those paths, think about the “destination” points. Maybe it’s a cozy corner with a bench, a bubbling fountain, or a stunning flower bed. You want each angle to lead to either a moment of pause or a visual delight. If you’re lucky enough to have your own gnome collection, strategically positioning them along the pathway can bring a smile to your face as you wander by. Just imagine: one day, it’ll be you enjoying the fruits (and veggies) of your labor and the next, you’ll be narrating gnome adventures in your garden like a seasoned storyteller.
Lighting is another fantastic element to ponder. Adding solar lights along your diagonal path can transform the atmosphere as dusk settles in. Just think about how lovely it would be to take an evening stroll, the soft glow illuminating your way while the chirping crickets serenade you. Solar path lights not only enhance the beauty of your garden but also increase safety and visibility during nighttime walks.
Finally, plant some flowers or low bushes along the edges of your path. This not only softens the hard edges of your walkway but also introduces color and fragrance that’ll delight your senses. Plus, it’s an easy way to show off your gardening prowess—or in my case, the great skill of keeping plants semi-alive. Remember, this is your garden, so let your personality shine through every angle! An efficient way to support your garden’s water needs is by using a rotary lawn sprinkler, which evenly distributes water across your lush pathways.
Creating diagonal pathways can turn a standard back garden into a unique experience, so why not take this creative plunge? Your garden deserves it. Plus, who knows what fascinating corners you might discover along the way. Happy gardening!
4. Geometric Plant Arrangement Patterns
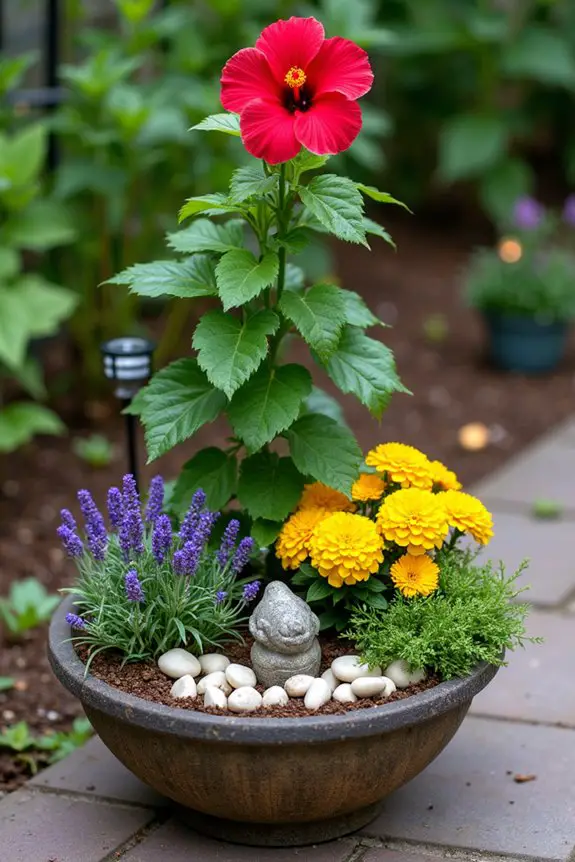
When it comes to creating a unique and vibrant patio, geometric plant arrangement patterns can truly transform your outdoor space. They not only bring a sense of order and aesthetic balance to your garden but also allow you to express your creativity and style. Think of it as composing a beautiful piece of art using vibrant plant life instead of paint and canvas. How cool is that?
To start, gather your geometric inspiration. Perhaps you’re drawn to the clean lines of rectangles, the elegance of circles, or the dynamic feel of triangles. Whatever captures your fancy, use it as the foundation of your layout. For example, if you love the idea of a circular arrangement, you might center a round pot with a stunning focal plant—like a vibrant hibiscus or a tall ornamental grass—and then place smaller plants around it, gradually decreasing in size. This creates an inviting look that lures you in.
Next, choose your plants carefully! The beauty of geometric arrangements is that you can mix different shapes, colors, and textures. Consider pairing tall, spiky plants with low, sprawling flowers. Envision this: a majestic lavender plant standing proudly next to a cheerful patch of creeping thyme. That’s a match made in garden heaven.
If you’re worried about plant compatibility, don’t be shy to check their sunlight and watering needs to make certain everyone gets along without any drama—trust me, you don’t want to deal with a turf war among your plants.
Once you’ve selected your plant pals, it’s time to play around with spacing and placement. An effective tip is to not overcrowd your designs—allow breathing room for each plant to flourish. As you arrange them, take a step back to see how they complement each other. This is where a little trial and error can go a long way. Honestly, I’ve spent far more time than I’d like to admit adjusting plant positions, feeling like a garden version of a DJ mixing sounds, until it finally feels just right.
And don’t forget about the practical aspect of water drainage. With a geometric pattern, it’s essential to confirm that the soil drains properly. You don’t want your leafy friends to end up drowning in a soggy pool of despair.
If you’re using pots, make sure they’ve drainage holes, or elevate your plants slightly through layers—fancy, right?
Finally, finish off your arrangement with decorative touches that speak to you. You can add stones, pebbles, or even sculptural elements to give your design that extra flair. Remember, it’s all about creating a vibe that feels personal and welcoming. Additionally, consider enhancing your garden’s ambiance with solar butterfly stake lights that not only provide illumination but add a whimsical charm to your outdoor design.
5. Layered Lattice Trellis Structures

When it comes to back garden design, layered lattice trellis structures offer a fantastic way to bring both functionality and style to your patio arrangements. Not only do these trellises provide a supportive backdrop for climbing plants, but they also create a visually striking element that adds depth and dimension to your outdoor space. They offer that perfect blend of rustic charm and modern flair, don’t you think?
To get started with layered lattice trellis structures, consider where you want to place your trellises. They work beautifully along walls, fences, or even as freestanding dividers. Having a little nook in your garden just begs for a focal point, doesn’t it? Imagine this: a beautifully crafted trellis with cascading vines, delicate flowers bordered with rustic wood, and a cozy seating area nestled nearby. You’ll not only create a welcoming vibe, but your outdoor garden will feel like a little secret hideaway—who wouldn’t want that?
Next, let’s explore plant selection. Climbing plants thrive in these spaces and can really jazz up your lattice design. Consider varieties like clematis, morning glory, or sweet peas. They don’t just look good; they also add color and life, transforming your plain lattice into a lively green canvas. Just remember, when selecting your plants, check how much sun they’ll need as well as their growth habits. We’ve all had those sad gardening moments when the plant you thought would be a perfect fit decided to turn into a jungle instead, right?
When it comes to installation, take your time. The last thing you want is a crooked trellis that looks like it’s had one too many glasses of lemonade. Level it out using a spirit level, and make sure it’s securely anchored into the ground—after all, you don’t want your beautiful arrangement to come tumbling down with a gust of wind.
Once you have your trellis up and your plants in place, it’s time to get creative with layers. You don’t have to stick to just one trellis; feel free to mix and match heights and designs. Layering with different heights creates visual interest, and trust me, your garden will begin to feel more dynamic as your climbing plants weave in and out. It’s like a performance art installation but with flowers, leaves, and vines instead of eccentric sculptures.
Finally, consider adding decorative elements around your trellis. Twinkling fairy lights, hanging planters, or vibrant decorative pots can elevate the whole aesthetic, making it feel like a magical corner of your garden. I remember adding string lights to my trellis, and suddenly my late-night gatherings transformed from “just sitting outside” to “welcome to my enchanting garden soirée.”
6. Circular Seating Fire Pit
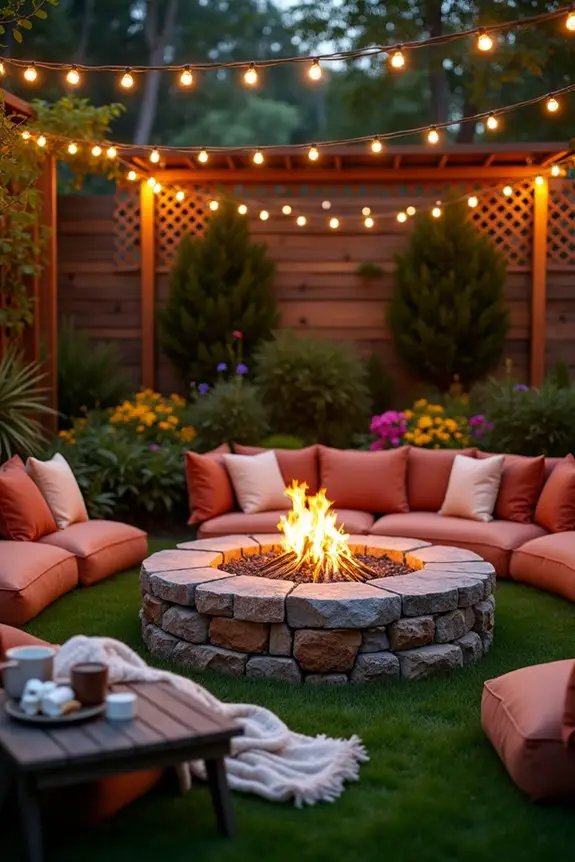
Imagine gathering around a warm fire with family and friends, laughter echoing as stories are shared under a canopy of stars. A circular seating fire pit design not only brings people closer together but also provides a cozy, inviting atmosphere. It’s the kind of setup that makes even the chill of autumn feel like a warm embrace, don’t you think?
Plus, a fire pit can serve as a stunning centerpiece that draws the eye and becomes the heartbeat of your garden.
Now, let’s talk about how to set this up. Start by choosing a good spot for your fire pit. Ideally, you want it somewhere that feels a little secluded but still easily accessible. Think about privacy—an area nestled among your gorgeous flowering plants or perhaps bordered by your beautiful layered lattice trellis. After all, you want to bask in the warmth of the fire without worrying about the neighbors peering in, right?
Once you’ve picked your spot, it’s time to measure out a circular seating area. You can use string to outline the perfect circle, or even grab a hula hoop if you have one lying around (yes, I might’ve been caught doing this once).
When it comes to seating, the options are almost endless. You can go for built-in benches, a circle of comfy chairs, or even oversized cushions tossed here and there for that relaxed bohemian charm. If you’re feeling super adventurous, why not mix and match? Imagine a patchwork of colors and textures that invites everyone to choose their perfect perch.
Just keep in mind the distance from the fire pit itself. You’ll want to be close enough to feel the warmth, but not so close that your marshmallow roasting turns into a high-stakes game of dodgeball.
Next, think about your fire pit itself. Options abound, from sleek modern designs that look like art pieces to rustic stone setups that fit in perfectly with nature. If you’re channeling your inner DIY expert, you could even build your own using fire-safe materials.
Just picture it—a custom fire pit that fits your unique style! But, as with all good things, safety is key. Make certain you have a plan for keeping the flames contained and a bucket of water or a fire extinguisher nearby—because nobody wants a surprise bonfire when they were just aiming for s’mores.
Now, to crank up the cozy vibe, don’t forget the finishing touches. String lights or lanterns hung nearby can create an enchanting glow as night falls. Soft, warm blankets add comfort and also look adorable draped over furniture.
And how about adding a small side table where you can set down drinks or snacks? There’s nothing quite like sipping hot cocoa while chatting around a fire.
Finally, let your space evolve seasonally. In summer, you could add colorful cushions or tropical decorations, while in winter, some lush throws and hot drinks create a snug retreat from the chill.
Who knew a simple circular seating fire pit could become the heart of your garden? Just think of the memories you’ll create, from summer nights to crisp autumn evenings, all around the cozy warmth of your fire. Sounds inviting, doesn’t it?
7. Raised Planter Box Arrangement
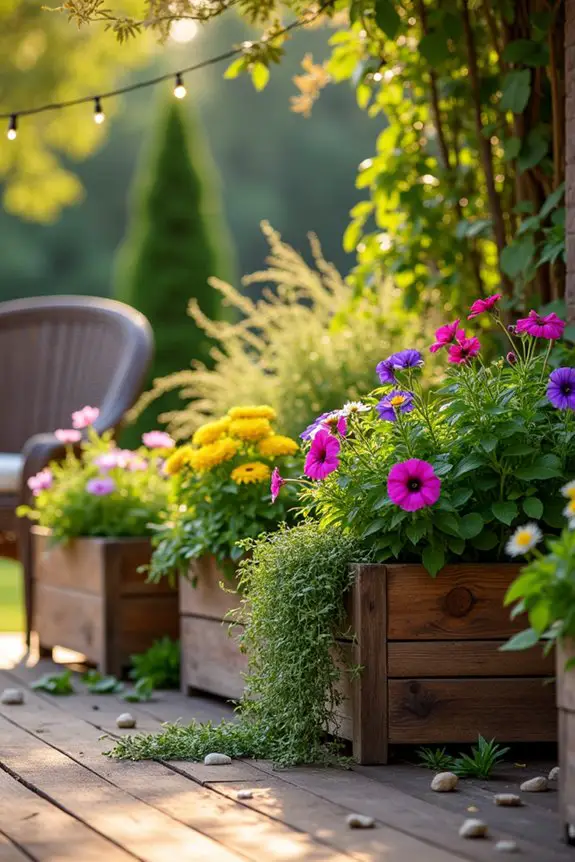
When it comes to sprucing up your backyard, raised planter box arrangements can truly elevate your outdoor space. Not only do they provide a stylish way to grow your favorite plants, but they also create an inviting vibe that screams, “Come sit with me.” Picture it: a collection of colorful flowers or fresh herbs, all neatly displayed in elevated boxes that draw the eye and add dimension to your patio. It’s like having a mini garden that makes even the smallest spaces feel lush and alive.
To get started, you’ll want to find the perfect spots for your raised planters. Do you have a sunny corner that could use some life? Or maybe along the edge of your patio for a beautiful border? Once you’ve scouted the best locations, it’s time to choose your boxes. If you’re into DIY projects, why not make your own? You could build them from untreated wood for that rustic charm, or even use reclaimed materials for a unique twist. Just make sure to drill some drainage holes—plants love a good drink, but they don’t want to drown.
Next up is the fun part: picking your plants! Think about a mix of colors and textures to keep things interesting. Herbs like basil or rosemary not only look lovely but are super handy for cooking too. You could even throw in some vibrant flowers to attract butterflies—who doesn’t love a bit of nature’s whimsy fluttering around?
And if you have kids, involving them in choosing the plants can turn it into a fun family project. Just be prepared for some amusingly chaotic decisions; “Can we plant ten of those giant sunflowers?!” might come into play.
Now, when it comes to arranging your planters, don’t be afraid to get creative. Vary the heights for a more dynamic look or mix and match sizes and shapes. It’s totally okay to have a slightly haphazard vibe; after all, gardens aren’t meant to be perfect. They’re about growth, life, and a little bit of that cottagecore magic, which brings me to spacing.
If there’s one thing I’ve learned (the hard way) it’s that you should pay attention to spacing plants properly. Too close, and they’ll be elbowing each other for sunlight, causing one of them to sulk (not that I’ve ever done that with my flowers before).
Finally, enhance your raised planter box arrangement with some personal touches. Light some fairy lights around them for a twinkling night-time atmosphere or add decorative stones to frame them nicely. Maybe even place a cozy chair nearby to enjoy the fruits of your labor.
Just imagine settling down with a cup of tea, surrounded by fragrant herbs and blooming flowers while soaking in the beauty of your creation. It’s moments like these that can transform everyday routines into something truly special, and isn’t that what we all want?
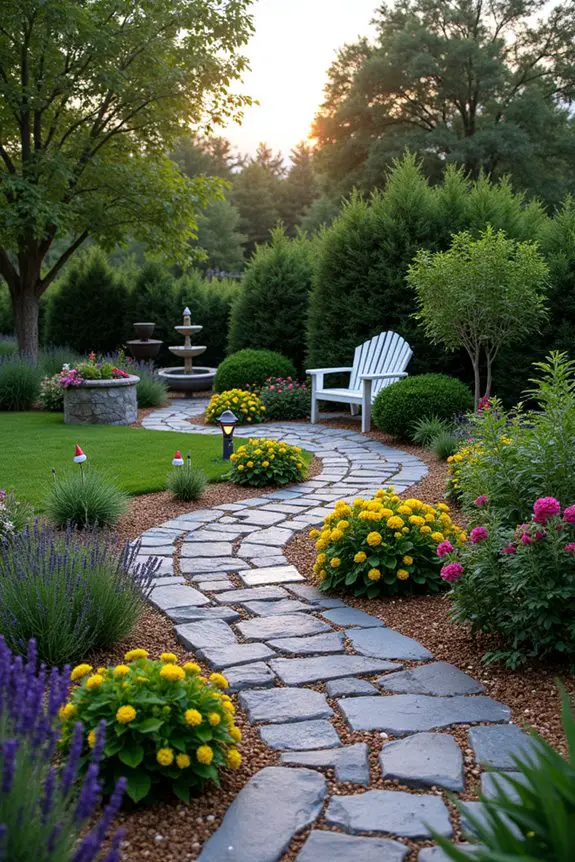
8. Meandering Stone Pathways
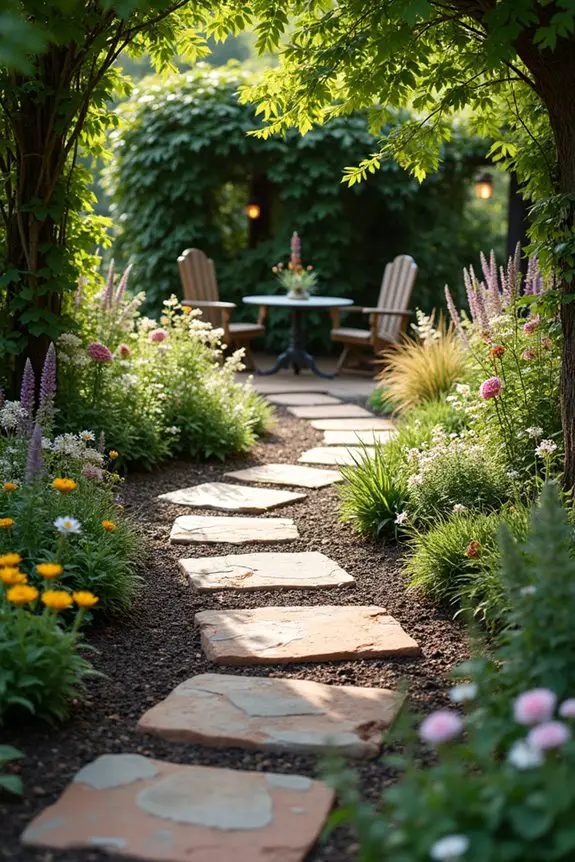
When it comes to creating a unique vibe in your backyard, meandering stone pathways are a fantastic idea. Not only do they offer a practical way to navigate your garden or patio, but they also add a whimsical touch that can make you feel like you’re walking through a charming fairytale. Just picture it: a winding path inviting you to explore every nook and cranny of your outdoor sanctuary, surrounded by blooming plants and softly rustling leaves. Sounds dreamy, right?
To get started with your stone pathway, the first thing you need to do is figure out where you want it to go. Think of your garden layout: do you want a pathway leading to a cozy seating area, or connecting different sections of your garden? Grab a garden hose and lay it out on the ground to get a feel for the curve and flow you want. You can always adjust it until it feels just right. The beauty of a meandering path is that there are no hard lines—let it dance around your plants as it pleases.
Next, you’ll want to gather your materials. You could go for sturdy flagstones, decorative pebbles, or even reclaimed bricks if you’re feeling eco-friendly. When you’re choosing your stones, think about color and texture. They should complement your garden and create a cohesive look. It’s all about picking stones that just feel right—sort of like finding the perfect pair of shoes. You don’t want to end up with something too clunky that ruins your walk (trust me; I’ve been there).
Now, it’s time to dig in—literally. Start by marking the outline of your path with stakes or string so you know exactly where to dig. Dig about three to four inches deep and make sure to remove any grass or weeds that might want to sneak back in. A little sweat never hurt anyone, and hey, consider it a workout under the sun—bonus points if you remember to drink water.
After you’ve created your base, sprinkle some sand or gravel in the bottom for extra drainage. Place the stones in your desired pattern, leaving small gaps in between to fill with mulch or ground cover plants, which can make the path feel more natural. And while you’re at it, why not make it a fun little project? Grab a friend, your music playlist, and maybe even some snacks to break up the hard work.
Nothing like a little teamwork to keep spirits high—and to guarantee someone is there to laugh at your inevitable stumbling over stones.
Finally, don’t forget to accessorize your path. Consider lining it with solar lights for a magical glow at night, or adding decorative stones to draw the eye. You can even place small garden statues or whimsical fairy houses along the way for an extra sprinkle of charm.
And as the plants grow in around your pathway, it’ll transform into a secret garden feel—so if you’ve got kids, they’ll think they’re on a real-life adventure search.
9. Asymmetrical Deck Features
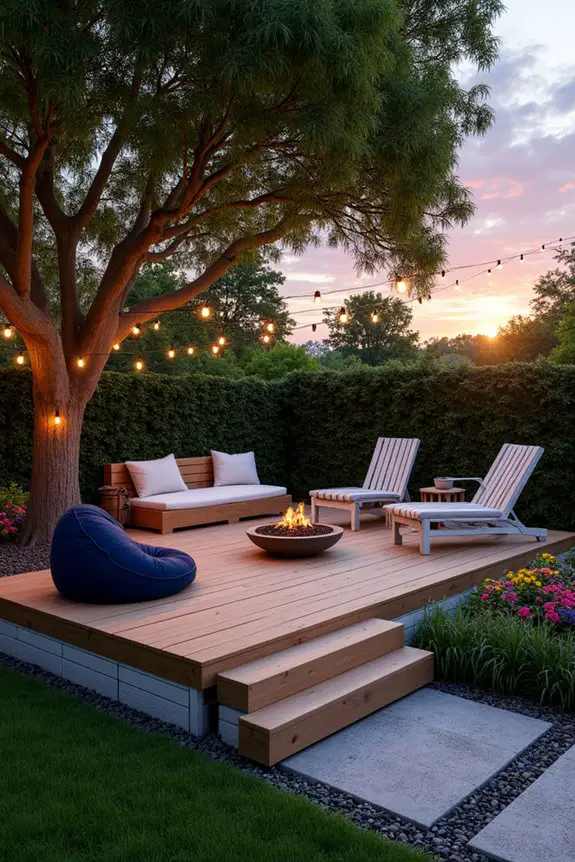
When it comes to backyard design, asymmetrical deck features can truly elevate your outdoor space, blending functionality with a creative flair. Instead of aiming for that typical square or rectangle layout, embracing irregular shapes can give your patio a more dynamic and inviting feel. Imagine sipping your morning coffee on a cozy, jutting nook that seems to hug a beautiful tree, or hosting friends at a semi-circular space wrapped around a fire pit. It’s all about making your patio work for you while also adding a dash of character.
To get started with your asymmetrical deck, first, sketch out your ideas. You don’t need to be an artist—just aim for rough shapes that represent the areas you envision. Think about the natural elements in your backyard: is there a lovely tree you’d like to incorporate? A stunning view you want to highlight? As you doodle, allow your imagination to roam—what about a small deck that extends out towards a flower bed? It could create an ideal spot for stargazing at night or soaking up the sun during lazy afternoons.
Next, consider the materials you want to use. You might want to mix and match decking types or even use pavers for a laid-back, garden feel. Wood is a charming choice, providing warmth and texture, while composite materials can save you time on maintenance—no one has time for endless sanding and sealing, right? However, keep in mind to think about color; a light deck can brighten your space, while darker shades might make your garden feel more intimate and cozy.
When you’re ready to go from paper to reality, mark your shape on the ground with spray paint or chalk. Take a moment to step back and see if your design feels balanced; remember, it doesn’t have to be perfect—imperfect shapes have a special charm. Afterward, clear the area of grass and debris, and try your best not to accidentally make a new flower bed while digging (yes, I may or may not have a beautiful patch of weeds in my yard to remind me of that mistake).
Now it’s time to get your base ready. You’ll need to dig down a good few inches to create a solid foundation, especially if you’re planning on adding weighty furniture. If it starts to feel like a workout, just remind yourself it counts as your daily steps.
Once the digging is done, level off the ground with sand and gravel for drainage. Picture it: cozy evenings on your deck, sans puddles. Place your boards or stones in your desired pattern, allowing for some quirky nooks and crannies to give it character.
The final touch is (you guessed it) accessorizing! Consider comfy outdoor furniture—bean bags, lounge chairs, or even a hammock swing if you’re feeling adventurous. Add in some twinkly lights or lanterns for a magical vibe, especially since we all know now that ‘setting the mood’ can turn your backyard into a dreamy escape.
10. Open Space for Activities
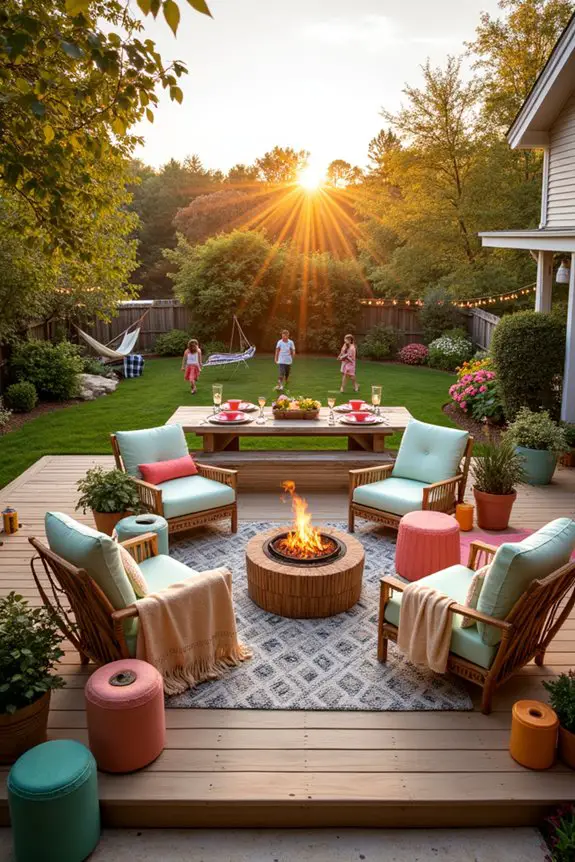
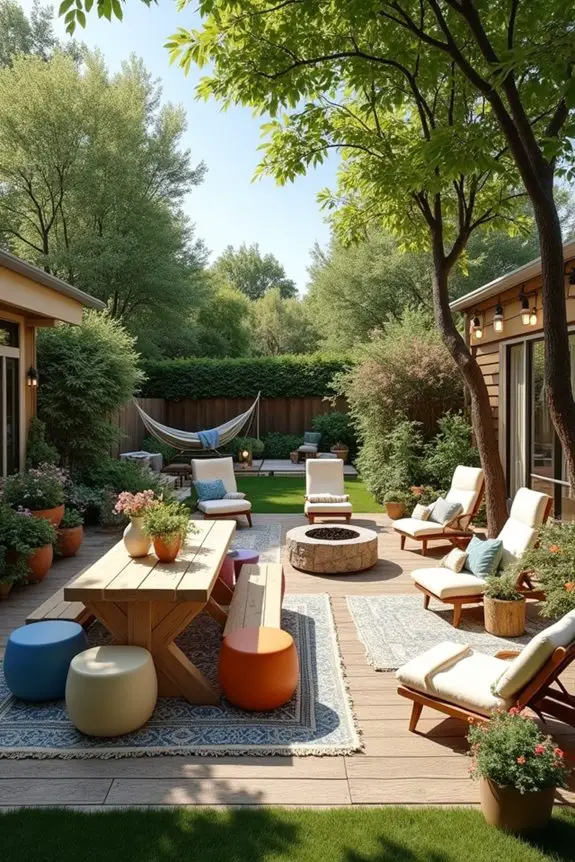
When designing your backyard, creating open spaces for activities can make it a versatile and inviting haven. It’s not just about having a place to set up a table and chairs; it’s about crafting an atmosphere where laughter can spill over and memories can be made.
Think barbecues, yoga sessions, or an impromptu dance party—an open layout encourages all these delights while keeping the vibe relaxed and fun.
Start by envisioning your open space. Imagine a large wooden deck edged with comfy seating, or a paved patio that makes room for games like cornhole or giant Jenga.
No matter the activity, a spacious layout allows for easy movement and adds a casual, festive feel. Picture friends mingling with drinks in hand, kids running around, or a cozy fire pit surrounded by blankets and laughter. You want your backyard to be a gathering spot where people feel free to unwind.
Next, think about the furniture you’ll need. Instead of heavy, bulky pieces that can weigh down the area, opt for light, movable furniture that can easily be rearranged to suit different occasions.
A mix of lounge chairs, a large picnic table, and some whimsical stools can do wonders. You’ll want your space to feel inviting and adaptable—think of it as a blank canvas waiting for creativity to unfold.
Now, let’s add some flair. Incorporate elements like a hammock slung between two trees for lazy afternoons, or a fire pit that doubles as a cooking station for making s’mores.
Think about adding a couple of outdoor rugs to define spaces or cozy up an area. Even potted plants can help frame your open space, creating a beautiful shift from the garden to the patio.
As you arrange your layout, take a step back occasionally. Imagine yourself in each spot: Will there be enough room for a spontaneous game of tag? Or for a picnic blanket to spread out on? You know, the kind of dappled shade that invites you to take a nap.
If it feels cramped or cluttered, don’t hesitate to shift things around. Your space should feel wide open and ready for whatever activity you toss its way.
Finally, consider the lighting. String lights can drape beautifully across your open space, casting a magical glow come evening.
Solar-powered path lights or lanterns can help define your area without needing a complicated electrical setup. Just imagine the cozy gatherings, all lit up under a starry night—seriously, it’s the stuff of dreams.
In the end, design your open space with flexibility in mind, letting it adapt to all your family’s adventures. No matter how you choose to jazz it up; the goal is a gathering place that feels open, inviting, and bursting with possibility. Happy designing!
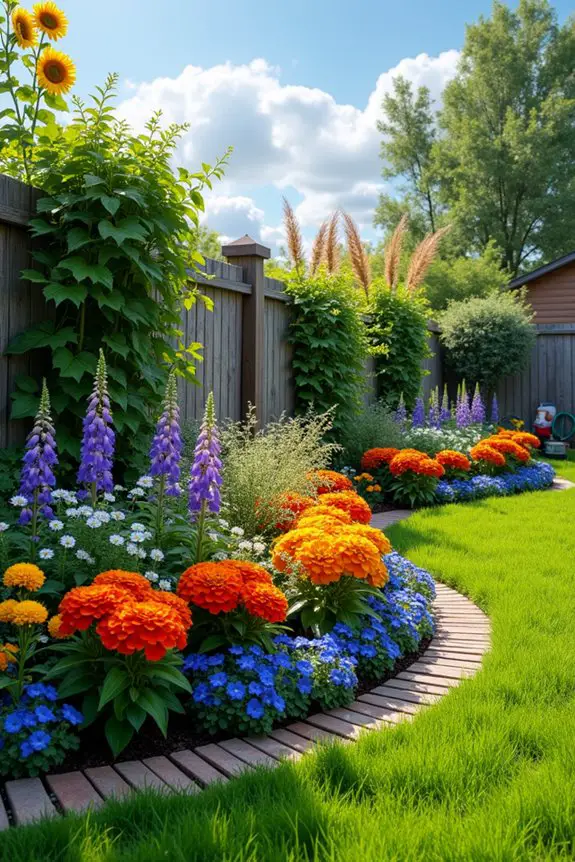
Color Coordination Strategies
Creating a vibrant back garden takes more than just a green thumb; it’s all about that perfect palette that can make your plants pop.
Think about color coordination strategies that elevate your space. Have you ever mixed bright yellows with deep blues? It’s like a party for the eyes. You can use a color wheel for inspiration—complementary colors create drama, while analogous ones offer harmony.
Try incorporating bold flowers alongside leafy greens for contrast. Consider layering different shades of the same color too.
These back garden ideas can transform your little oasis into a stunning retreat. Remember, it’s all about balancing those colors, so don’t hesitate to experiment. You might just surprise yourself with a masterpiece you didn’t expect.